This post may contain affiliate links.
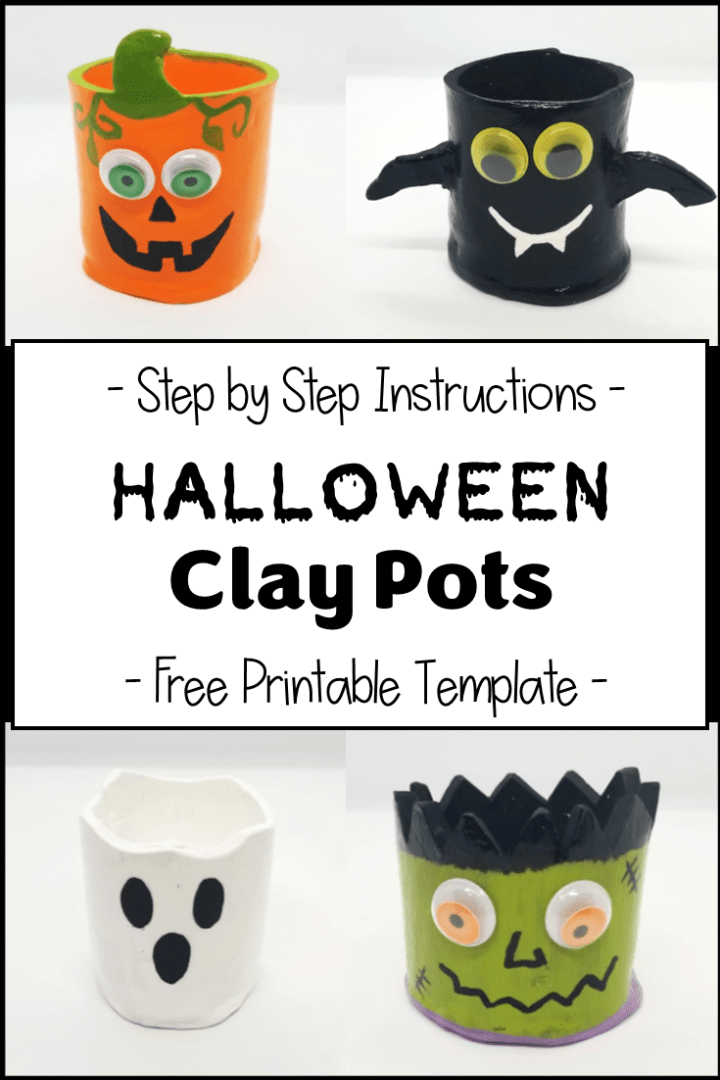
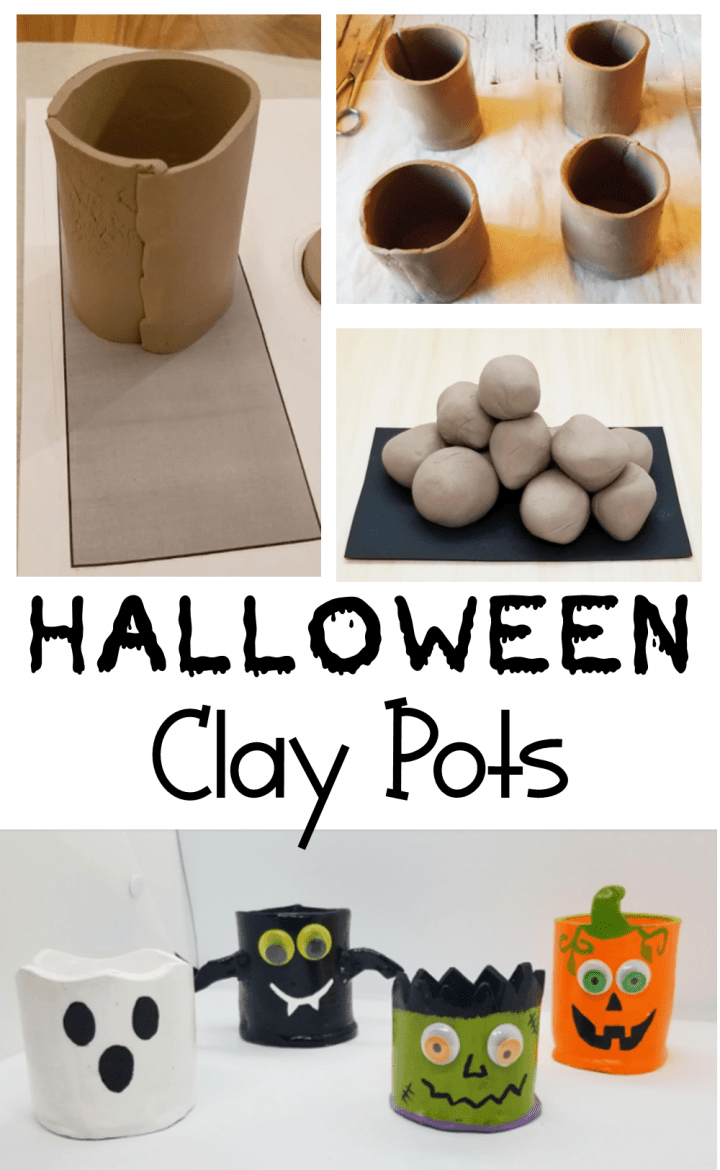
From pumpkins and bats to ghosts and monsters, Halloween is great time to celebrate and create. Clay is a wonderful art material to use and what you can create is limited only by your imagination. Clay animals and clay crafts are easy to create with step by step instructions. Read below for easy DIY Halloween clay pots for beginners and kids.
Whether you are an adult looking to create something beautiful with clay, or planning an activity for children and want them to explore a unique material, these DIY Halloween clay pots are simple and you can create adorable Halloween characters.
Clay pots are a unique thing to make with clay especially for beginners, however, with the free template printable and the step by step instructions below, you will be quickly and easily creating with your clay in no time!
So, this Halloween create these critters to decorate your home or even give as a gift. With minimal help, even children will be able to create and decorate the clay pots. Check below for Halloween clay ideas.
One of the reasons I like working with clay is because when it dries, and is painted, you are left with a craft that looks like something you could buy at a store. Clay creations are something worth hanging onto. For more clay creation ideas visit these easy clay animals and 33 clay creation ideas.
One thing to keep in mind when working with clay is that it it can easily dry out and it is fragile when dry. The clay can break fairly easily.
Once you create your pots you can use the clay, or even play dough for another activity with these Free printable Halloween playdough mats.
DIY Halloween Clay Pots Materials
You only need a few materials for these DIY Halloween Clay Pots. A link to some of the products are found below.
You will need:
- Air Dry Clay
- Free Clay Pot Template (Link at bottom of post)
- Acrylic Paint
- Googly Eyes (Optional)
- Gloss Finish (Optional)
- Parchment Paper (Optional)
For your convenience, this post contains affiliate links. As an Amazon Associate I earn from qualifying purchases and I may earn a small commission at no cost to you.

DIY Halloween Clay Pots – Exploring Clay
If you have not worked with clay before, give yourself some time to experiment and ‘play’ with the clay. Especially if you are doing this craft with children, give them time to explore.
It is good to feel that the clay can become stiff. The clay can also become dried out very quickly and you may need a bit of water to smooth cracks and hydrate the clay.
Talk to kids about how the clay feels. Does it move similarly to play dough or is it different? Can you make a ball? What about a pancake or a snake?
Once you have had some time to work with the clay, you are ready to start your DIY Halloween clay pot.
DIY Halloween Clay Ideas
Using the Template
Clay pots are easy to make with the template. Pinch pots are common when working with clay, but it is difficult to make two pinch pots that are the same size and shape. They can also be difficult to make smooth and even throughout. I recommend clay pots using the included template.
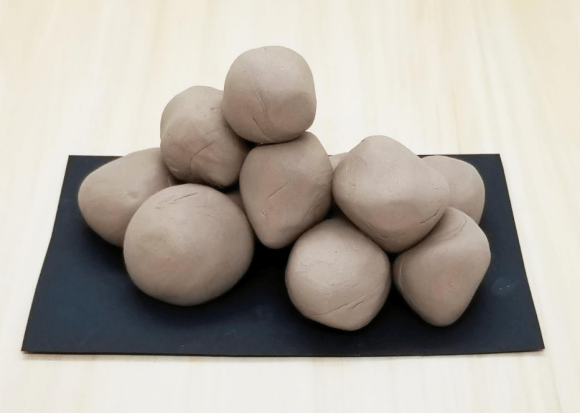
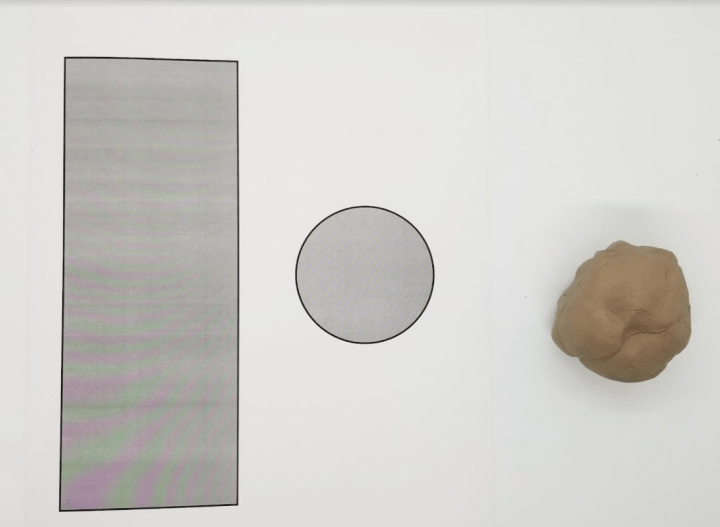
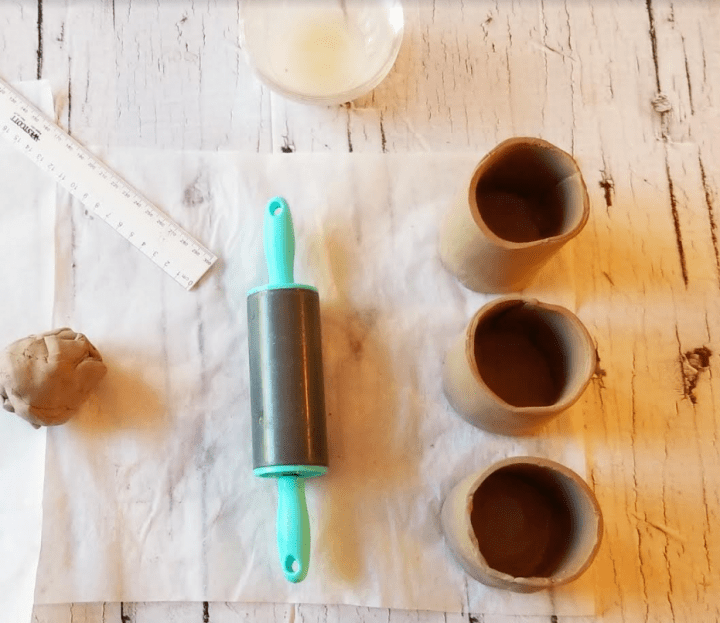
To start, use a ball of clay roughly the size of a tennis ball.
Have the printable template ready to go. The clay pot is basically made up up a rectangle and a circle. The template tells you the size of each you need.
Roll the clay out. I like to use parchment paper to roll the clay out on. The clay does not stick on the paper and you can lift it off easily. You can also set the parchment paper on top of the template to see the size of each rectangle you need.
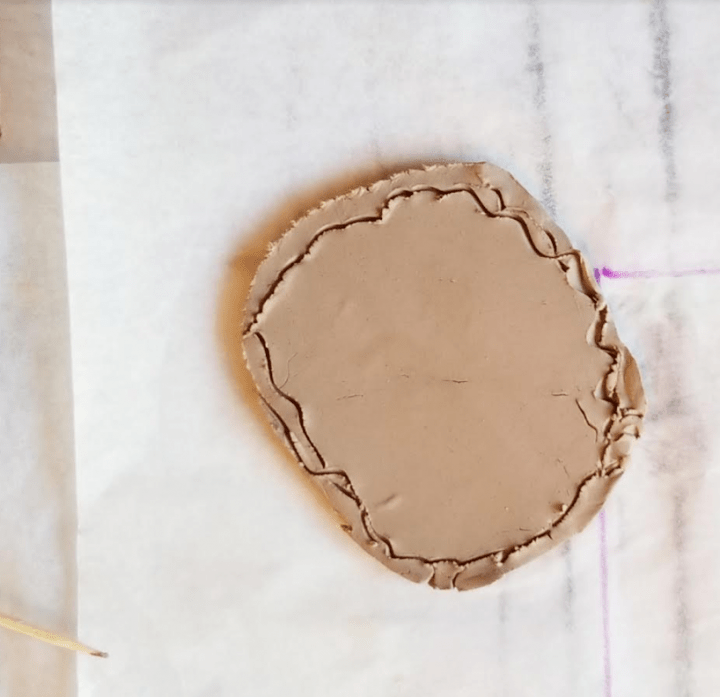
Once the clay is rolled out, set it on top of the printed template. Cut along the outside to remove the excess clay.
You can also set the printable on top of the clay and trace the rectangle and circle onto the rolled out clay to leave a mark where to then cut.
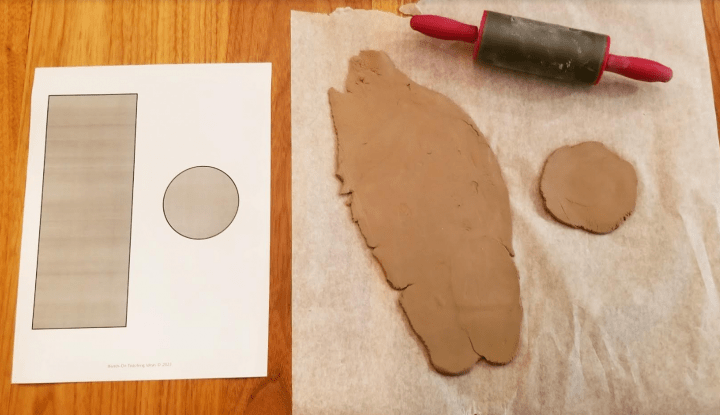
Once you have cut the clay to the template shape, you are ready for the next step.

Attaching the Clay
Clay, unlike some other art materials will not simply stick together. If you press two pieces of clay together they may dry stuck to each other, but they will easily break apart. Therefore, when working with clay you need to ‘score’ the clay.
To score the clay you are going to make hatch marks (pictured below) in any area that you want two pieces of clay to stay together.
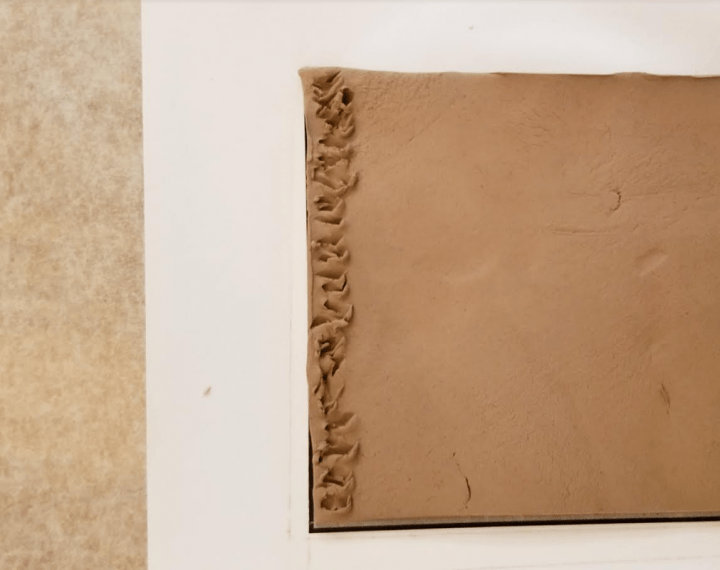
Once you score the clay attach it. You can then use water to smooth out where you connected the clay and smudge it together a bit as well. This will help secure the pieces together as they dry.
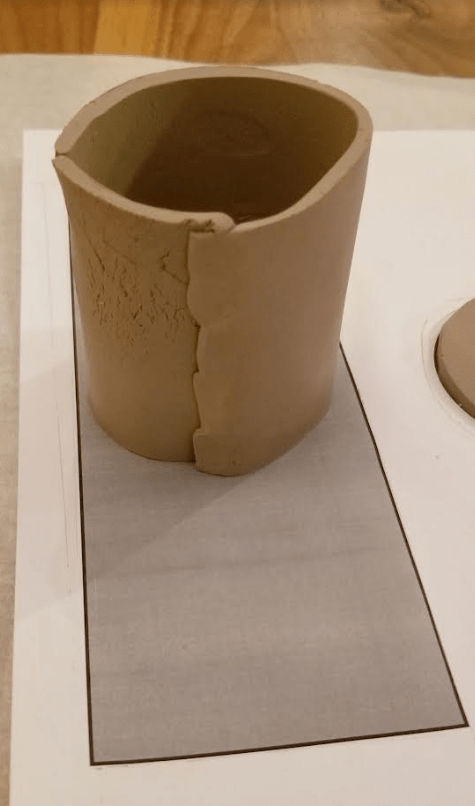
Please note that the rectangle on the template is intentionally longer then the circumference of the circle. This is to give you a bit of extra clay to overlap as you score it. If you feel it is too much excess, you can always cut a bit more off.
DIY Halloween Clay Pots
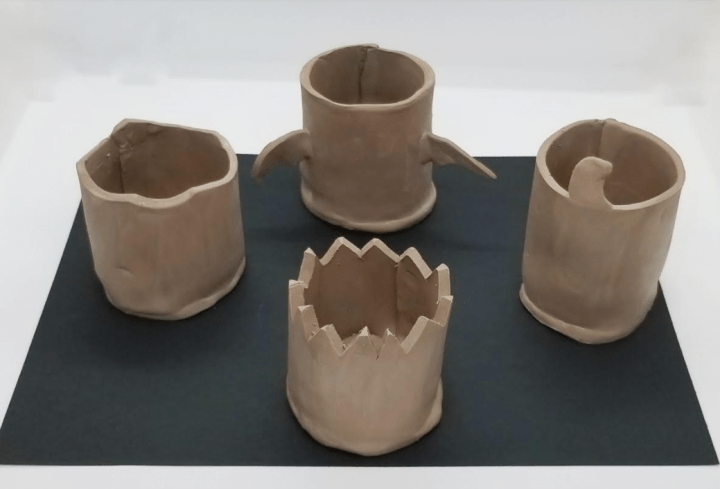
Adding Details
Once you have created as many DIY Halloween Clay pots you want, you can then add a few details to your pot. For anything extra you attach, you will need to use the scoring/hatching method shown above.
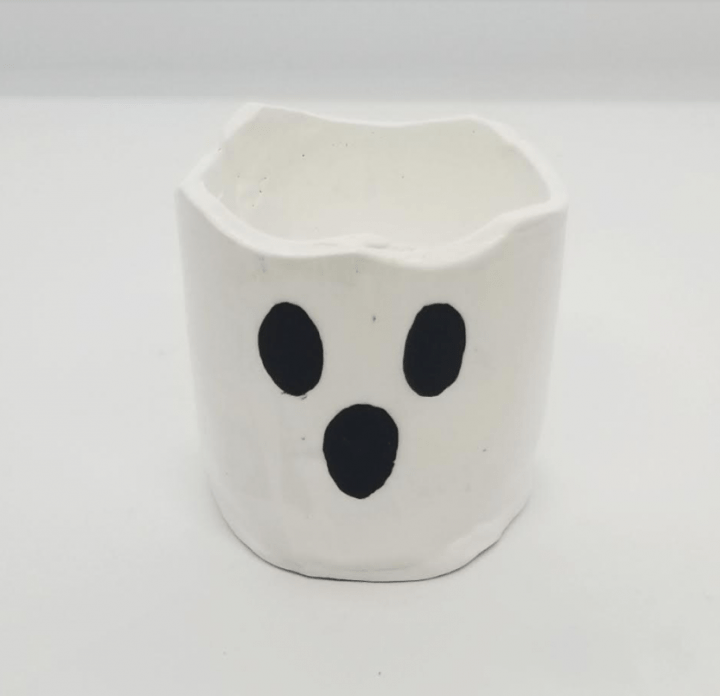
I added some extra details to a few of my clay pots. I cut a wavy design around the top of the ghost.
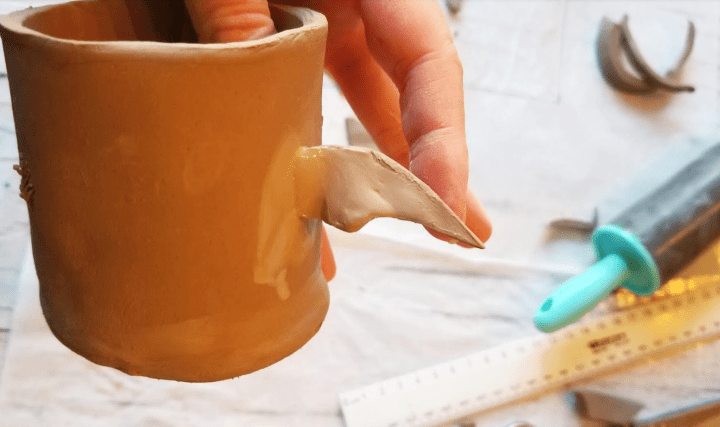
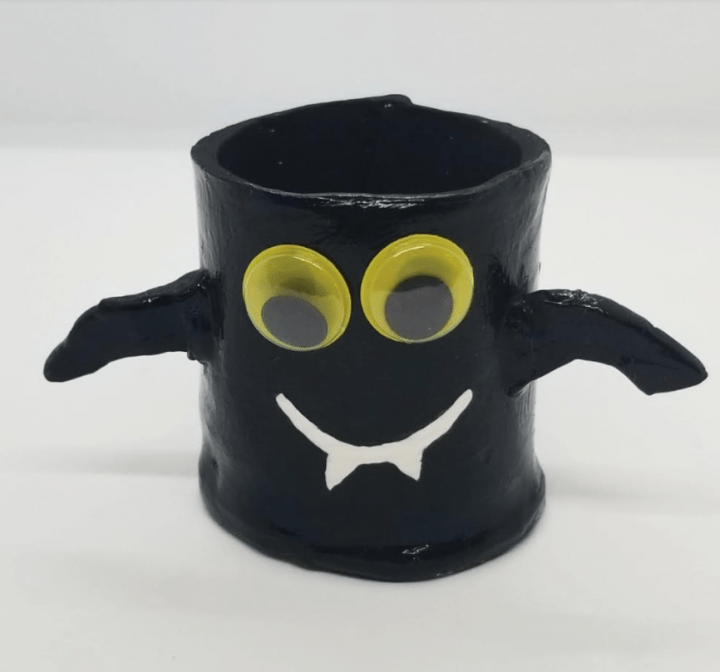
You could add some bat wings to your bat. Simply roll out clay and carve out bat wings. Do not let children carve out anything with the clay with a knife. Toothpicks work well, or even popsicle sticks for young children.
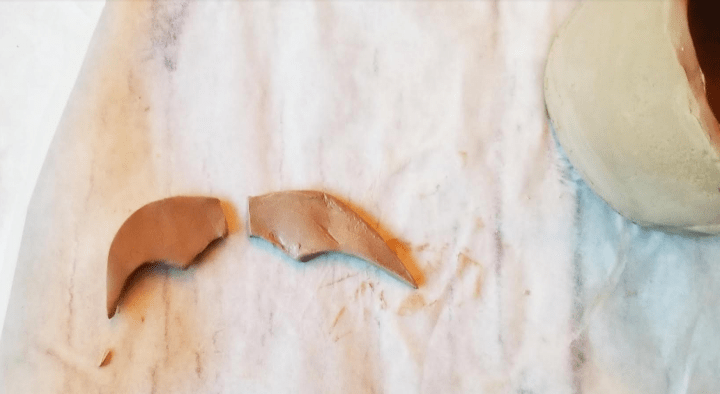
Next, score both the wings and the clay pot where you intended to connect them. Once scored, push the wings onto the pot and use water to smooth it out and help secure it.
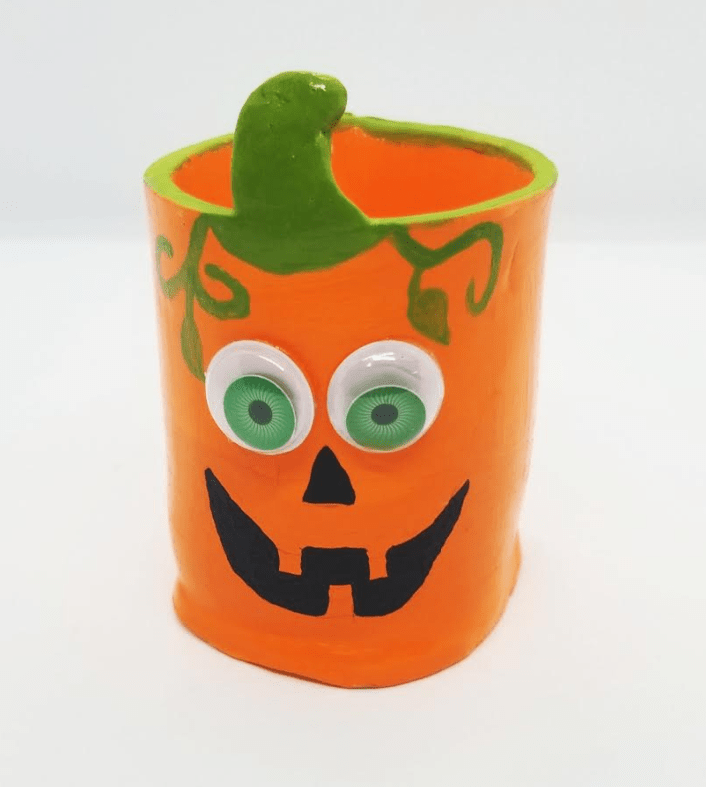
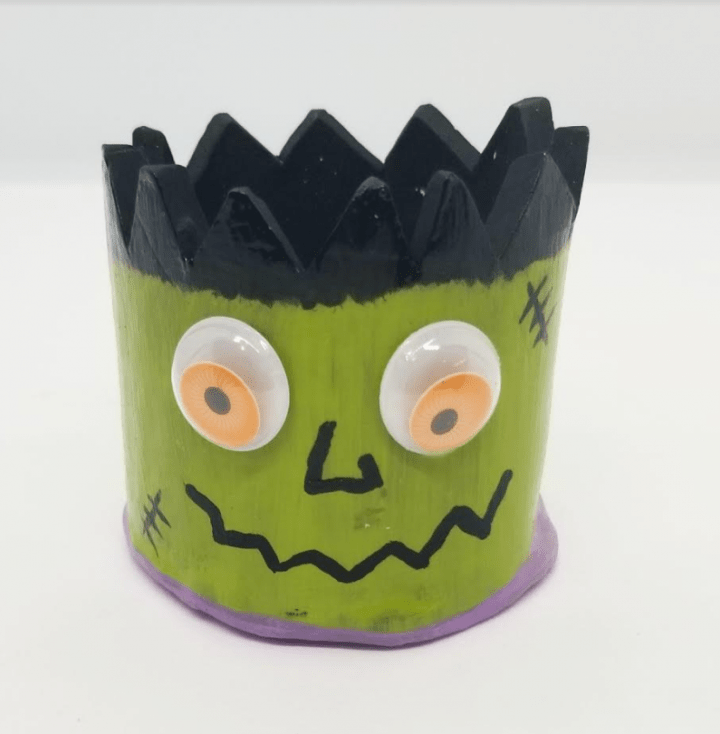
You can add a stem to your pumpkin, spiky hair to your Frankenstein, or even cut out eyes on your pumpkin through the pot. There are lots of options and choices to make your clay pots unique.
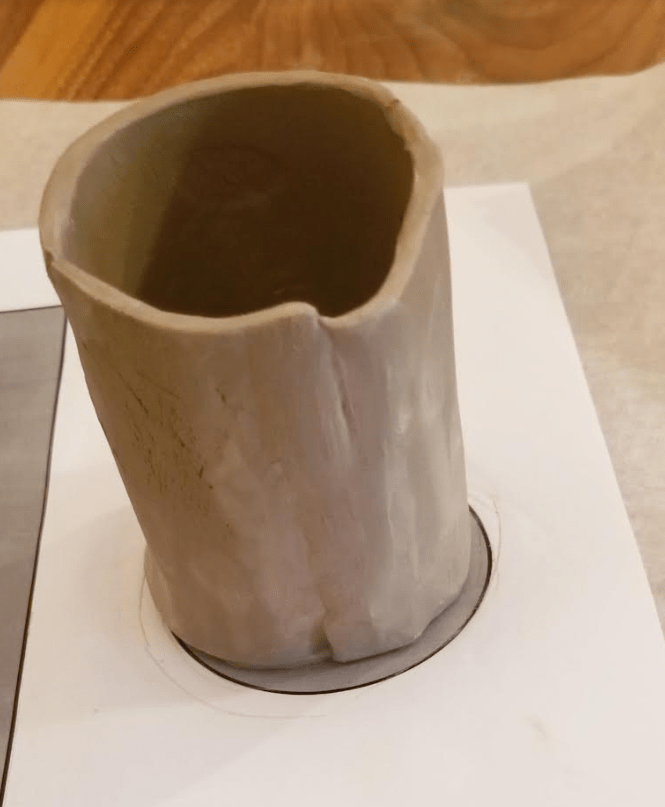
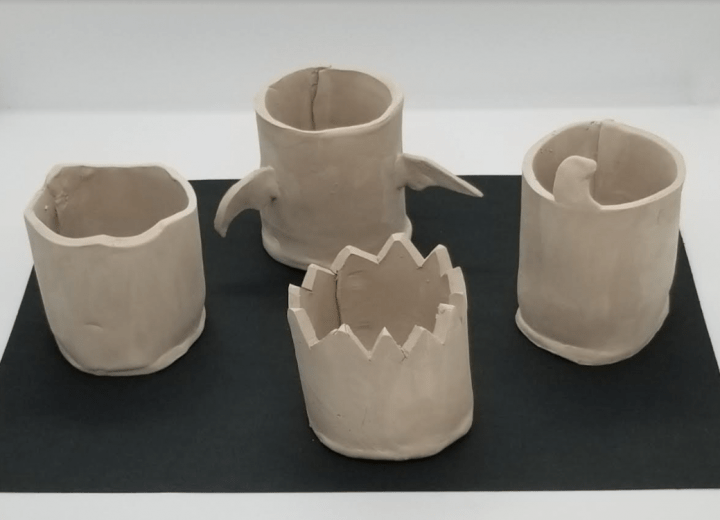
Once you are done, you can spend a few minutes with a little bit of water smoothing out your clay pot. Simply get a drop of water on your finger and then rub over any cracks or imperfections that you want to smooth out.
Add as many details as you want to each of your pots. Once you are done it is time to let your pots dry.
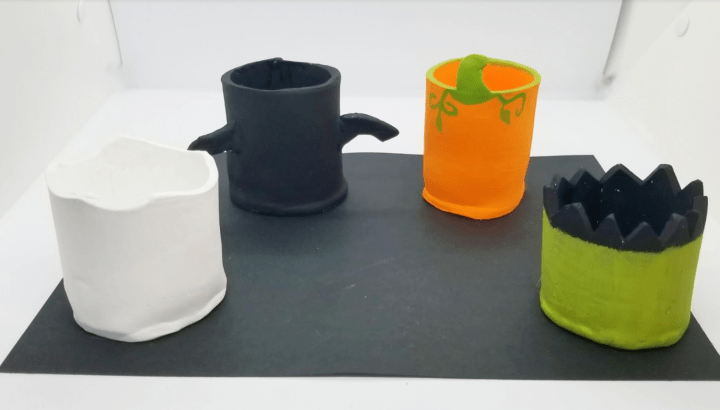
They clay will appear slightly whiter, or chalkier when dry.

Painting Your DIY Halloween Clay Pots
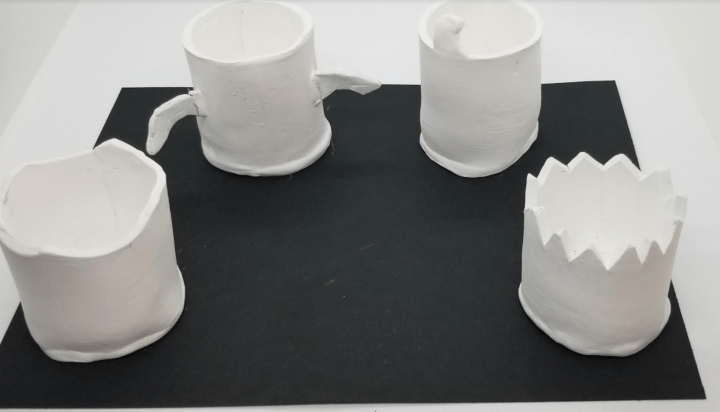
Once your pots are dry, it’s time to paint! I like to use acrylic paint on my clay because the colors stand out more then other types of paint.
To start, paint a layer of white on top of the dry clay. Paint quickly because the paint gets soaked into the pots and dries very quickly. By the time you start painting the second pot, the first will be dry.
Begin painting your clay pots whatever color you choose for your different Halloween characters.

Once you have a layer on each clay pot, you can add a few details, such as vines and leaves on your pumpkin.
Next, add eyes to your critters. I used googly eyes on some of my pots. I like the look of the googly eyes, but you can simply paint eyes onto your clay pots if you don’t have googly eyes.
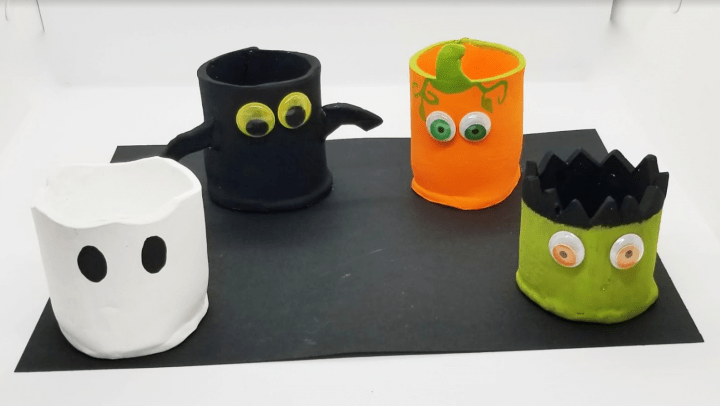
Once you have added the eyes, you can add the mouth, nose and any other details you’d like to add.
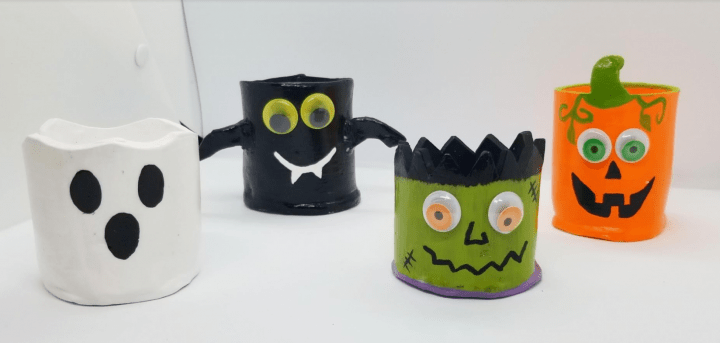
Once you have added any details, your DIY Halloween clay pots are done. You can add a finishing gloss (link below) to each of your pots if you like the look of them
The gloss provides some protection and it makes the pots look shiny and glossy. If you like the look of it on my clay pots, I suggest adding it to yours.
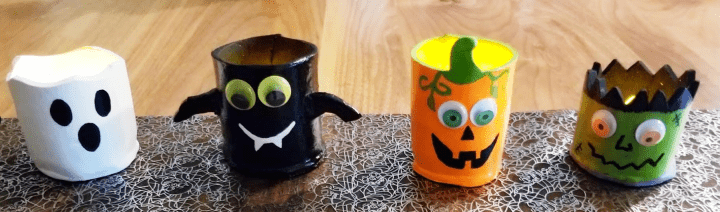
Halloween Clay Pots – Results
In the end, the pumpkin is my favorite, but seeing all four of the clay pots together is great! They look like a full set that you can use for decoration or as a holder.
Homemade arts and crafts like these are some of my favorite activities to do with my kids because they create something that we can easily display around the house and they will last for years to come.
I also added a flameless tealight to each of the pots to use as decoration around the house on Halloween.
Give kids the opportunity to create their favorite Halloween character. You may be surprised by some of the create, original ideas they come up with.
Although I created these clay pots for Halloween, you can use the same ideas, and the free template, to create clay pots for any occasion.
For more Halloween ideas, check out a Free Printable Halloween Scavenger Hunt and a DIY Halloween Escape Room.
Join Hands-On Teaching Ideas
Subscribe to Hands-On Teaching Ideas today to gain access to the Free Resource Library, filled with printable resources from a free escape room to educational worksheets. The library is always growing with new great materials.
By subscribing you will also be the first to learn about my latest blog posts and activity ideas. Join today!
This is a super simple template for the clay pots, but using it can help make sure that the circular bottom and sides for your clay pots will line up properly. Print it to save you time!

More Hands-On Teaching Ideas
If you are looking for more hands-on learning activities, below is a collection of my most popular and favorite teaching ideas.
From more Halloween ideas such as STEM challenges, to other Halloween activities and arts and crafts, there is lots to keep children busy and creating.