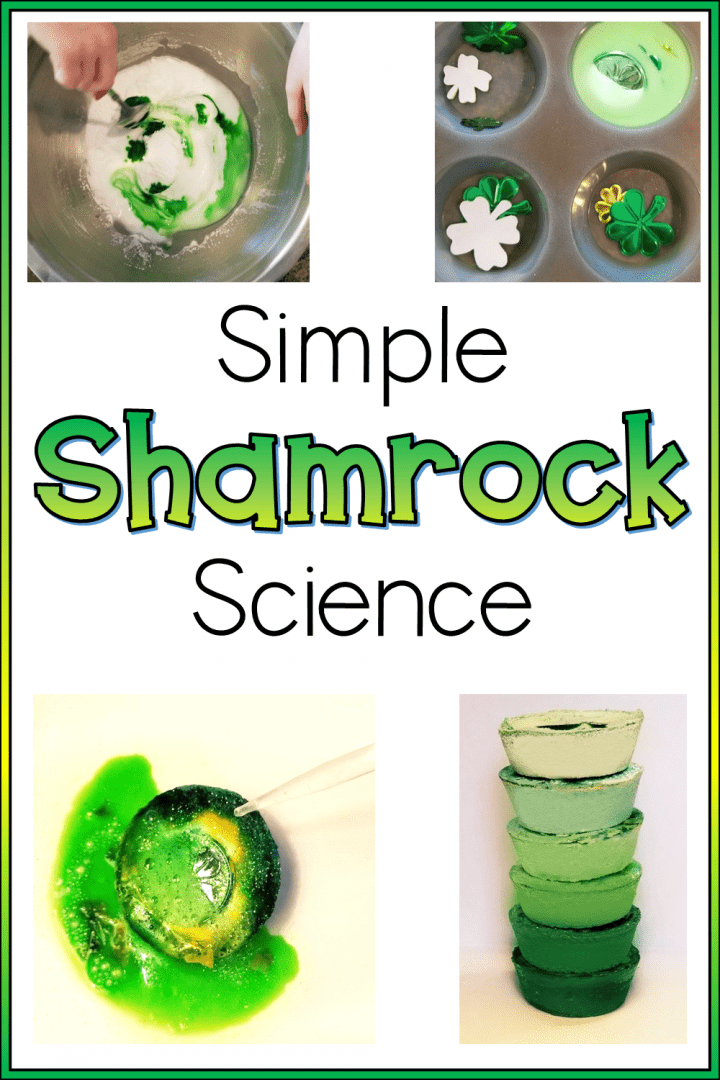
Kids love to celebrate! It doesn’t matter what the occasion is, they are happy to have something to look forward to and celebrate. This easy shamrock science experiment for kids is sure to get them excited about St. Patrick’s Day.
These shamrock pucks are really easy to make and kids of all ages will love watching their puck “explode” and reveling a special St. Patrick’s Day treasure.
This science experiment is also a great way for kids to learn, and get excited about chemistry.
I created these as a science experiment for my kids to do on St. Patrick’s Day. They loved it so much that I repeated it again with my own class at school.
All science experiments should always be done with an adult supervising and involved in the activity. Make sure to choose treasures for inside your pucks that are safe for the children you are creating for.
Science Experiment Materials
The supplies are really simple – just baking soda, water, and vinegar. You can also add some food colouring and fun little treasures. They are so easy to make and kids love them!
- Baking Soda (approximately 4 cups (1kg box) to make 12 pucks)
- White Vinegar
- Green Food Colouring
- Green Sparkles
- Hidden Treasure (Plastic Shamrock, “Gold” Coin, Gem)
- Silicone Muffin Mold (No Baking is Required!)
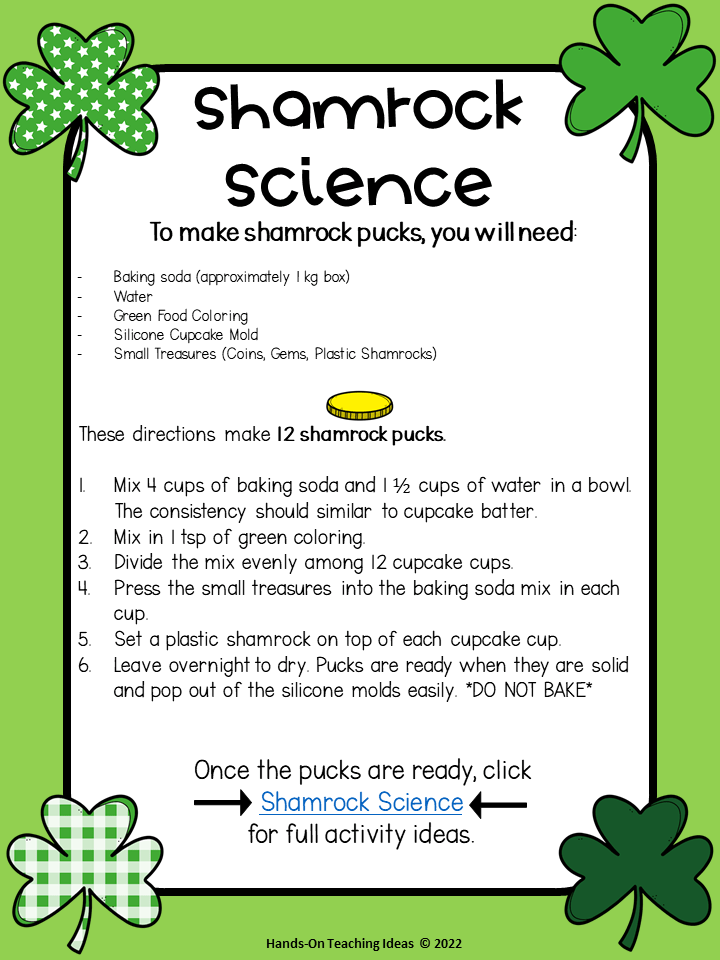
A printable list of directions on how to make the baking soda pucks, with exact measurements, is available at the bottom of this post.
Since I teach kindergarten, I have to be careful what materials I use when I do science experiments. I love doing this experiment because it uses materials found in the kitchen and it is really exciting and a great learning opportunity.
Preparing Your Science Experiment
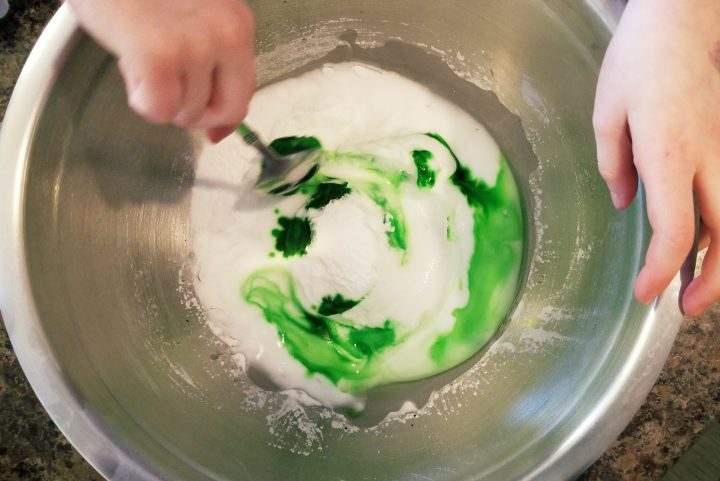
Start by adding baking soda to a bowl and then adding water. You want the mixture to be roughly the consistency of cupcake batter.
If it is wetter, it will still work, it just takes longer to dry.
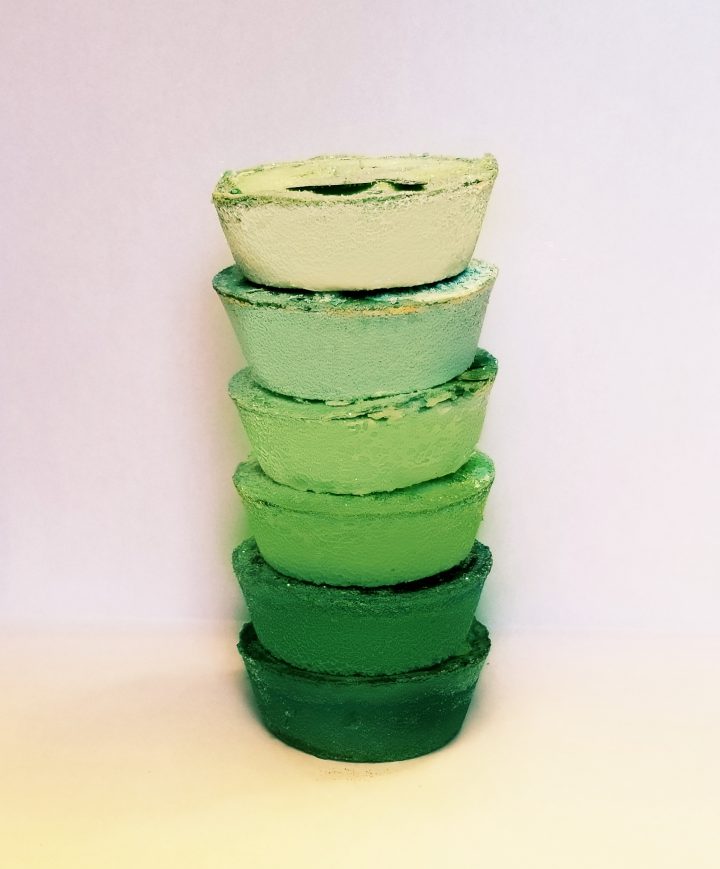
Next, add a few drops of green food colouring. I wanted some different shades of green so I only added a drop of green for my first pucks and put my mixture in a few of the molds.
I then added a few more drops, and added it to the mold and so on so that I had multiple shades of green.
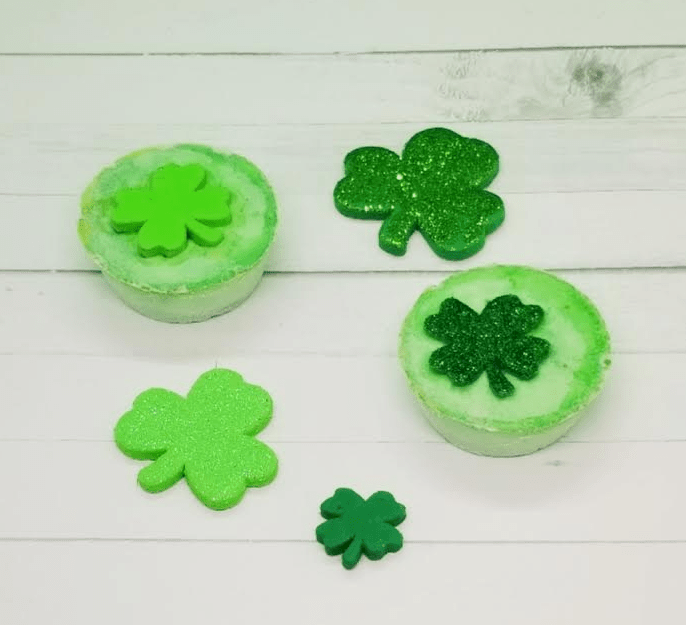
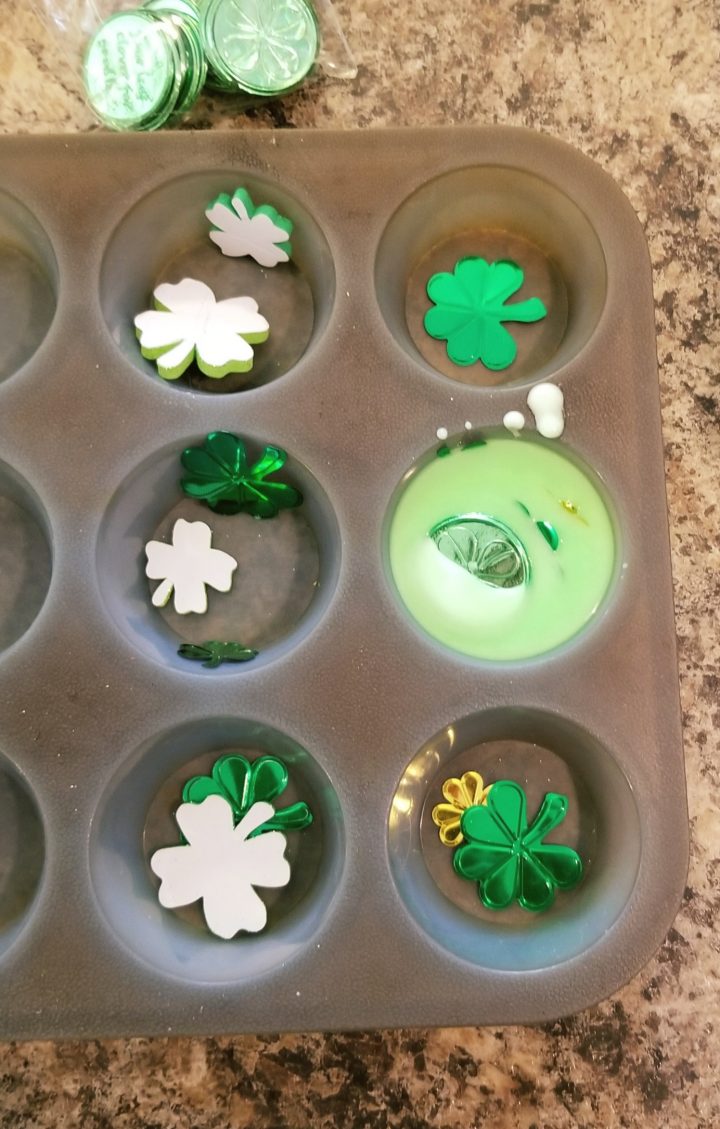
Before adding the mixture to the molds, drop whatever treasure you are including into the bottom of the mold. You can put plastic shapes, coins, and even gems.
Just make sure that whatever treasure you choose will remain intact with the water and vinegar later on.
Once you have mixed your baking soda and water and added the food colouring, pour or spoon the mixture into the mold.
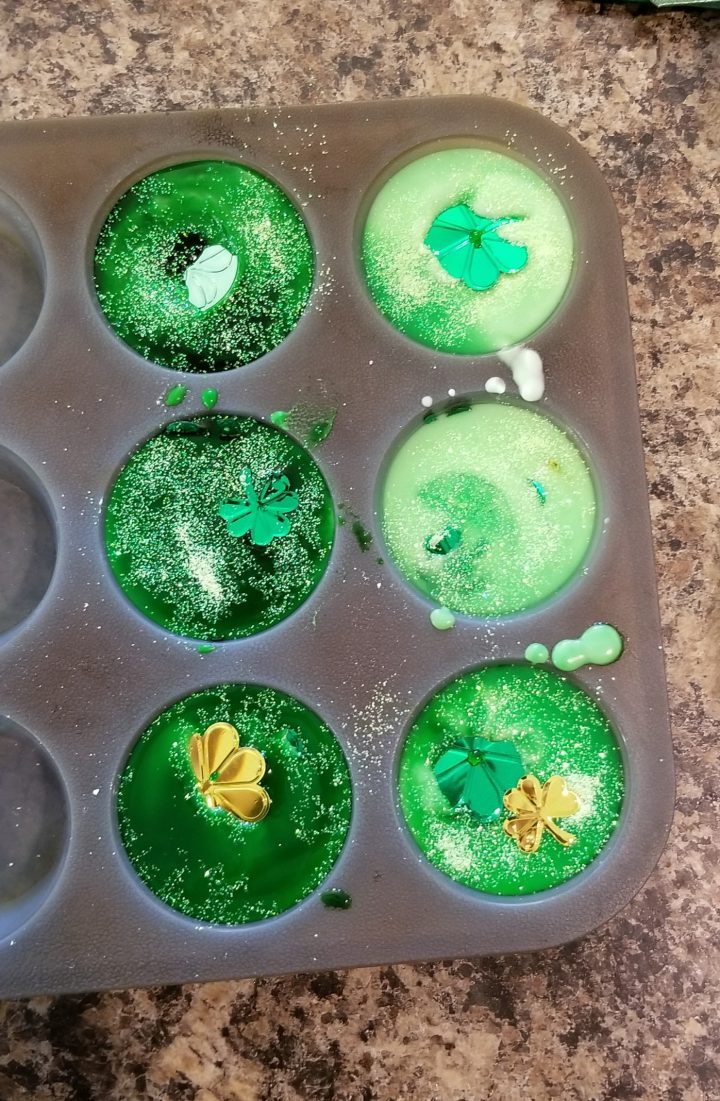
One the molds are full, I added a few more little treasures on top. You don’t need to but it adds to the look of the pucks and lets kids know there is something inside.
I then sprinkled some sparkles on top of the pucks.
Depending how much water you used to make your pucks, they will take at least overnight to dry.
*Do not bake your pucks. There is no baking required. Simply set them out overnight or 24 hours.*
When there is no water on the top and the pucks don’t feel cool to the touch, they should pop out easily from the mold and you are ready for your science experiment.
Science Experiment Steps
Once your pucks are dry, you are ready to let kids have some fun with this science experiment.
Pop the pucks out of the mold, and give one to each child. When I did this activity in the classroom, with over 100 children, I had children share their puck with a friend or two. I added a few extra treasures inside to make sure that each child found at least one.
To start, I had each child inspect their puck and make observations about what they saw.. They then guessed what they thought was going to happen when they added the vinegar.
Next, I gave each child a science eye dropper (link at bottom). Every time I bring out the eye droppers children get very excited. It makes they feel like a real scientist and the droppers work well to get the most out of the activity.
We talked about how the eye droppers work and how real scientists just add a drop at a time. Children practiced, and then added a drop to their puck.
Another great tool to use during this science experiment are magnifying glasses. The glasses encourage children to look closely and inspect their pucks before and after they add vinegar.
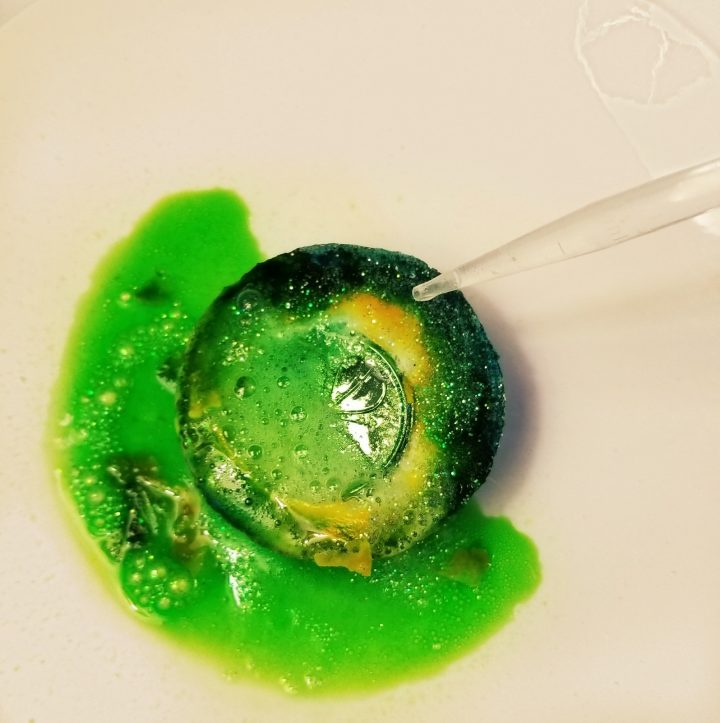
Add a few drops of vinegar to a puck and watch, watch and listen to what happens. Does the puck change? Does it make a sound? What does it look like?
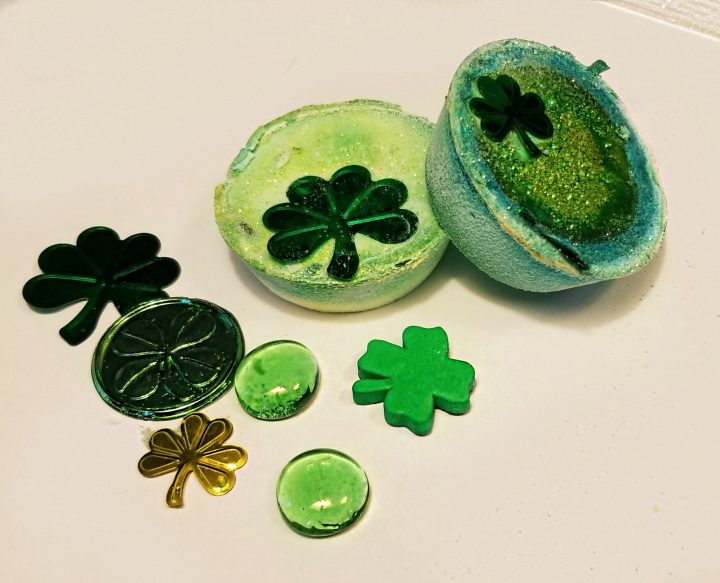
Children may notice that one of the treasures in their puck become more visible as the vinegar eats away at the baking soda around the treasure.
The fizzing is a chemical reaction that occurs when the vinegar touches the baking soda. The two materials react to each other and cause fizzing – or ‘explosion’ as my children and students called it.
You can then add several more drops as the vinegar breaks apart the baking soda. It is very exciting when the fizzy bubbles clear and kids begin to see all of the treasures inside.
It is fun to watch children work like scientists to discover all of the hidden St. Patrick’s day treats!
They will love learning a little bit about science and chemical reactions as they see and experiment hands-on with the materials.
I always love how children will hold onto their little treasures after they have found them all in their puck. The treasures also give children a way to remember their science experiment.
If you do the experiment with children at school, the treasures gives kids the opportunity to show, and tell all about how they were able to get the treasure and hopefully use some science words and understanding in their explanation.
For your convenience, this post contains affiliate links. As an Amazon Associate I earn from qualifying purchases and I may earn a small commission at no cost to you.
Join Hands-On Teaching Ideas
For a hands-on directions page to follow while making the baking soda pucks, print it from the Free Resource Library. Subscribe to Hands-On Teaching Ideas below.
Join Hands-On Teaching Ideas to gain access to my Free Resource Library filled with lots of printable learning resources, from a choice board full of STEM activities and science experiments for kids to escape room games, you can download anything that interests you for your classroom or home.
Click the “Subscribe Today” image to subscribe and download.
More STEM Activities and Science Experiments
If you are looking for more exciting activities to do on St. Patrick’s Day with kids, below is a collection of St. Patrick’s Day STEM activities that kids will love!
More Hands-On Teaching Ideas
If you like the idea of the above science experiment, you will like these other teaching ideas and activities below. Below is a collection of my favourite and most popular posts.



Leave a Reply