This post may contain affiliate links.
I enjoy Thanksgiving and being with family. We also like to use the holiday as a time to reflect on everything we have to be thankful for. My kids love creating and Thanksgiving is a great opportunity to create some beautiful Thanksgiving crafts.
My favorite thing about the Thanksgiving crafts is that kids of all ages can make it. It’s a great sensory activity and it uses recycled materials!
You don’t need very many materials to make this craft and your kids will be proud that their art work is being used on Thanksgiving.
For another adorable Thanksgiving craft, check out a Turkey Craft with Free Template from Red Ted Art.
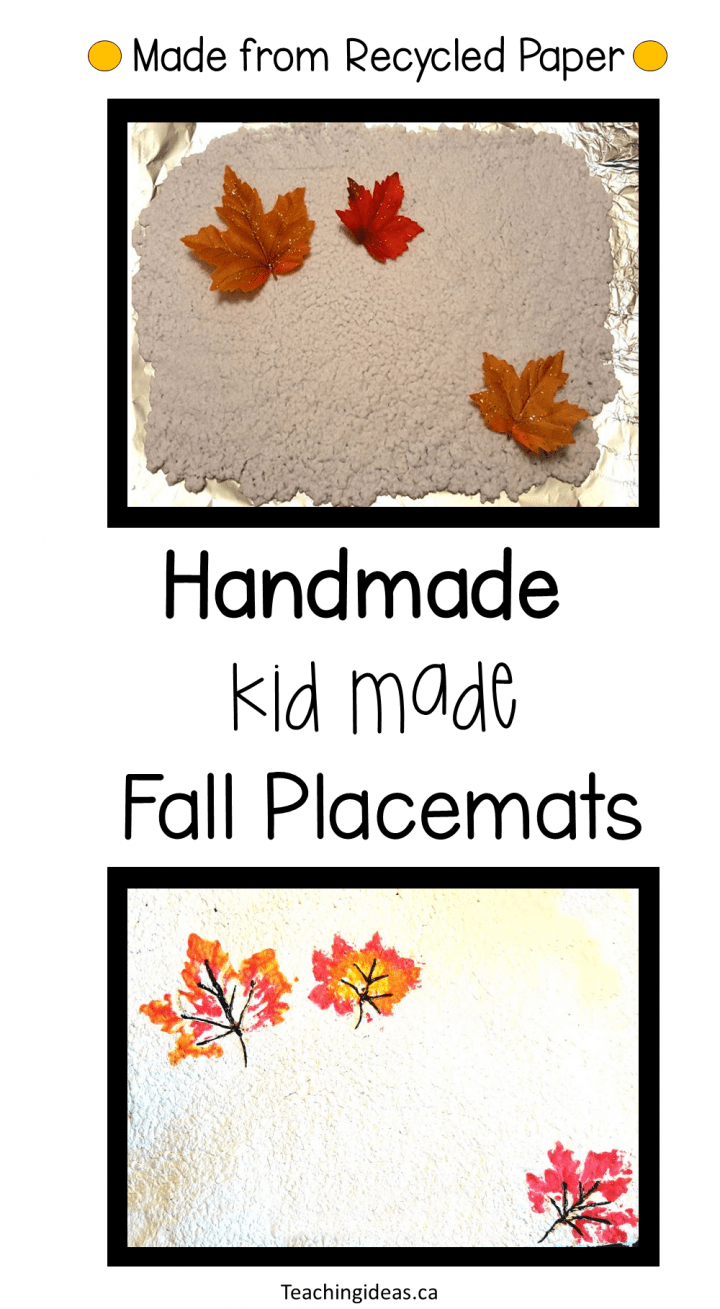
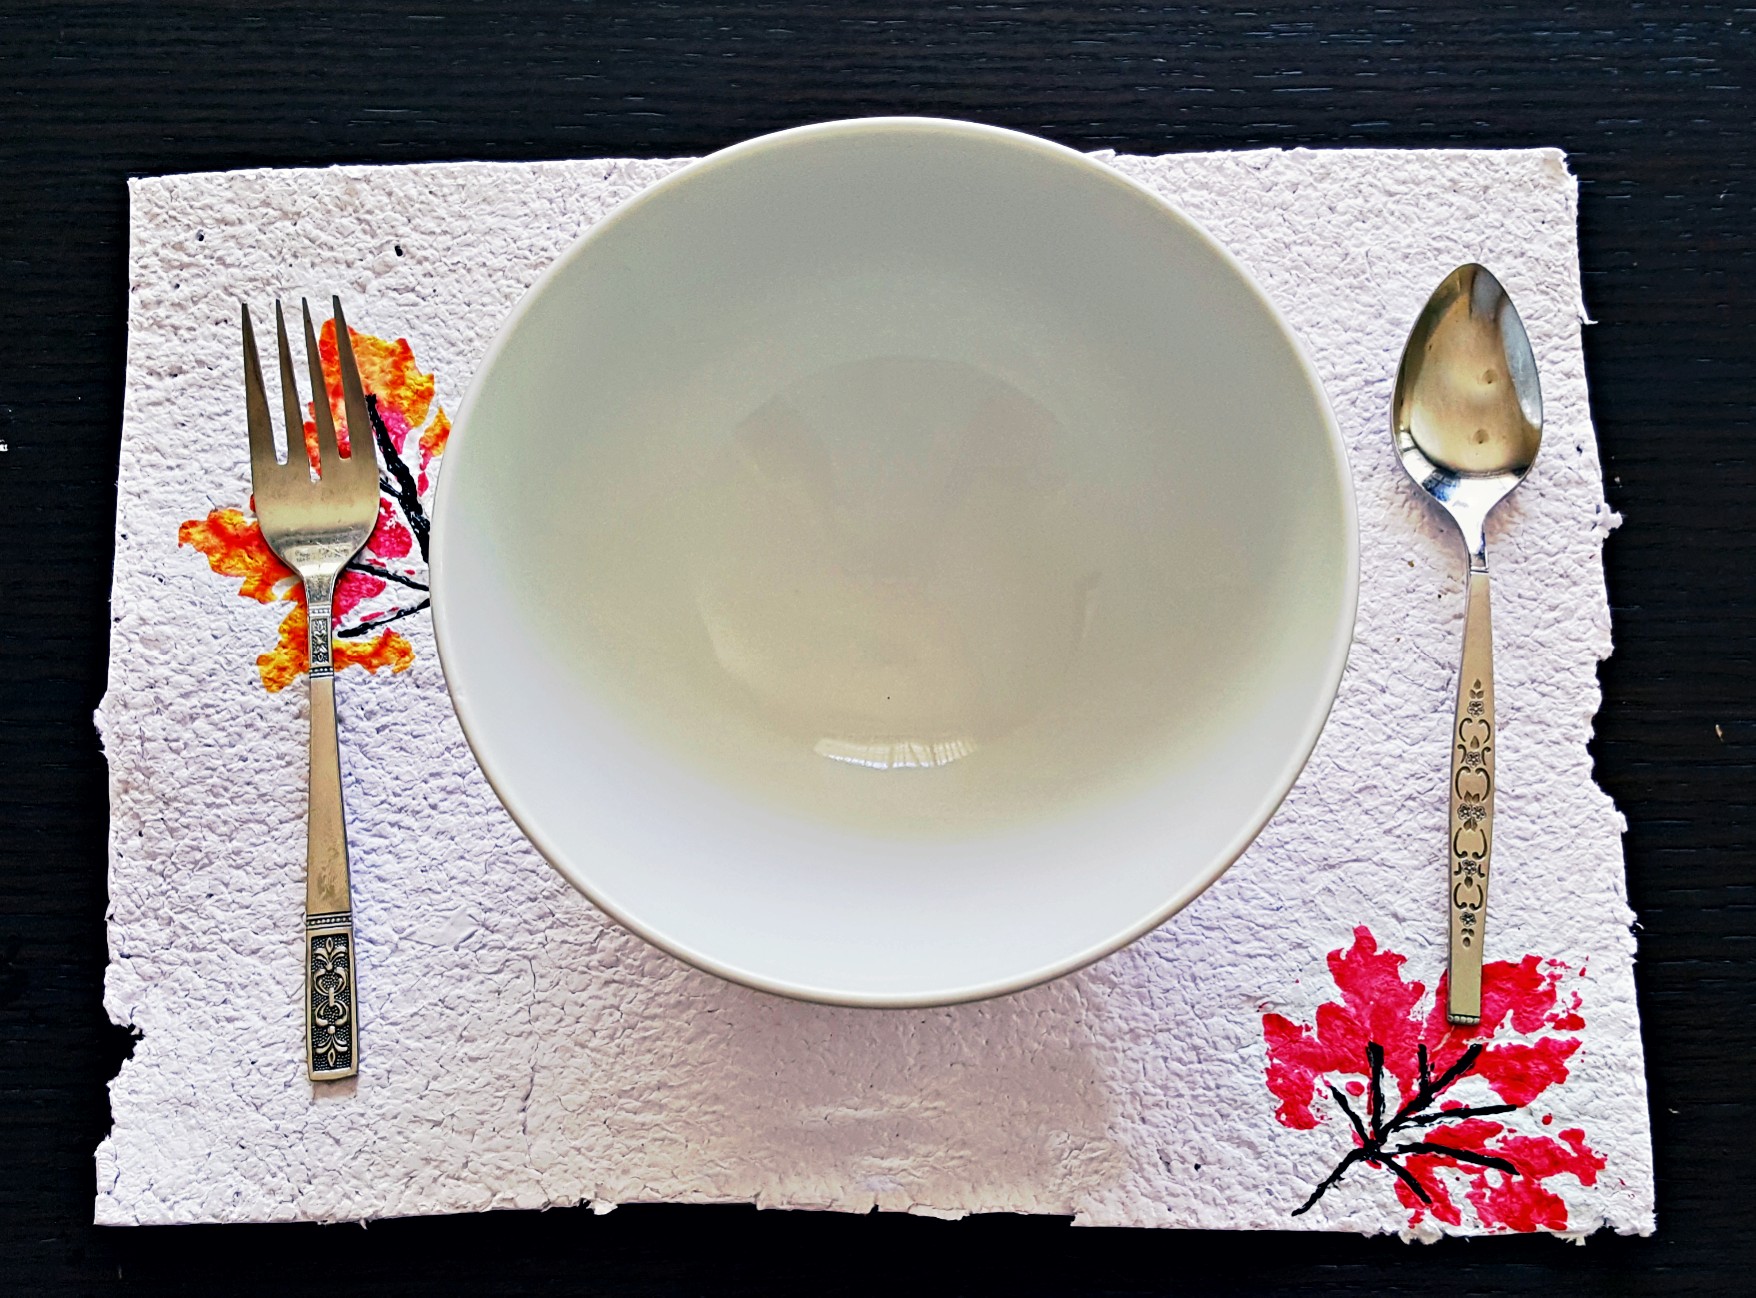
Thanksgiving Crafts – Placemat
We have been making a lot of things from recycled paper recently. My kids actually like the idea that some of their old drawings and art work are reused into new art work. I love that they are reusing and recycling and having fun while doing it.
With Thanksgiving coming up in a few weeks, we decided to make placemats for our guests.
Although we used this as a Thanksgiving craft, it is perfect for any fall theme. You can also easily change it to fit any theme by changing the details on it.
For another adorable, and simple, Thanksgiving craft, check out this Cornucopia Craft with Free Template and Fork-Painted Turkey craft from Little Ladoo.
The Steps
First, we ripped up old paper that was headed to our recycling bin. This is a great activity for little hands. It is good for fine motor practice, and what kid doesn’t love ripping up paper?
Once it is all ripped up, put it in an old blender with a lot of water. You need quite a bit of water to get it to mix properly. Don’t worry about adding too much, any extra water will squeeze out.
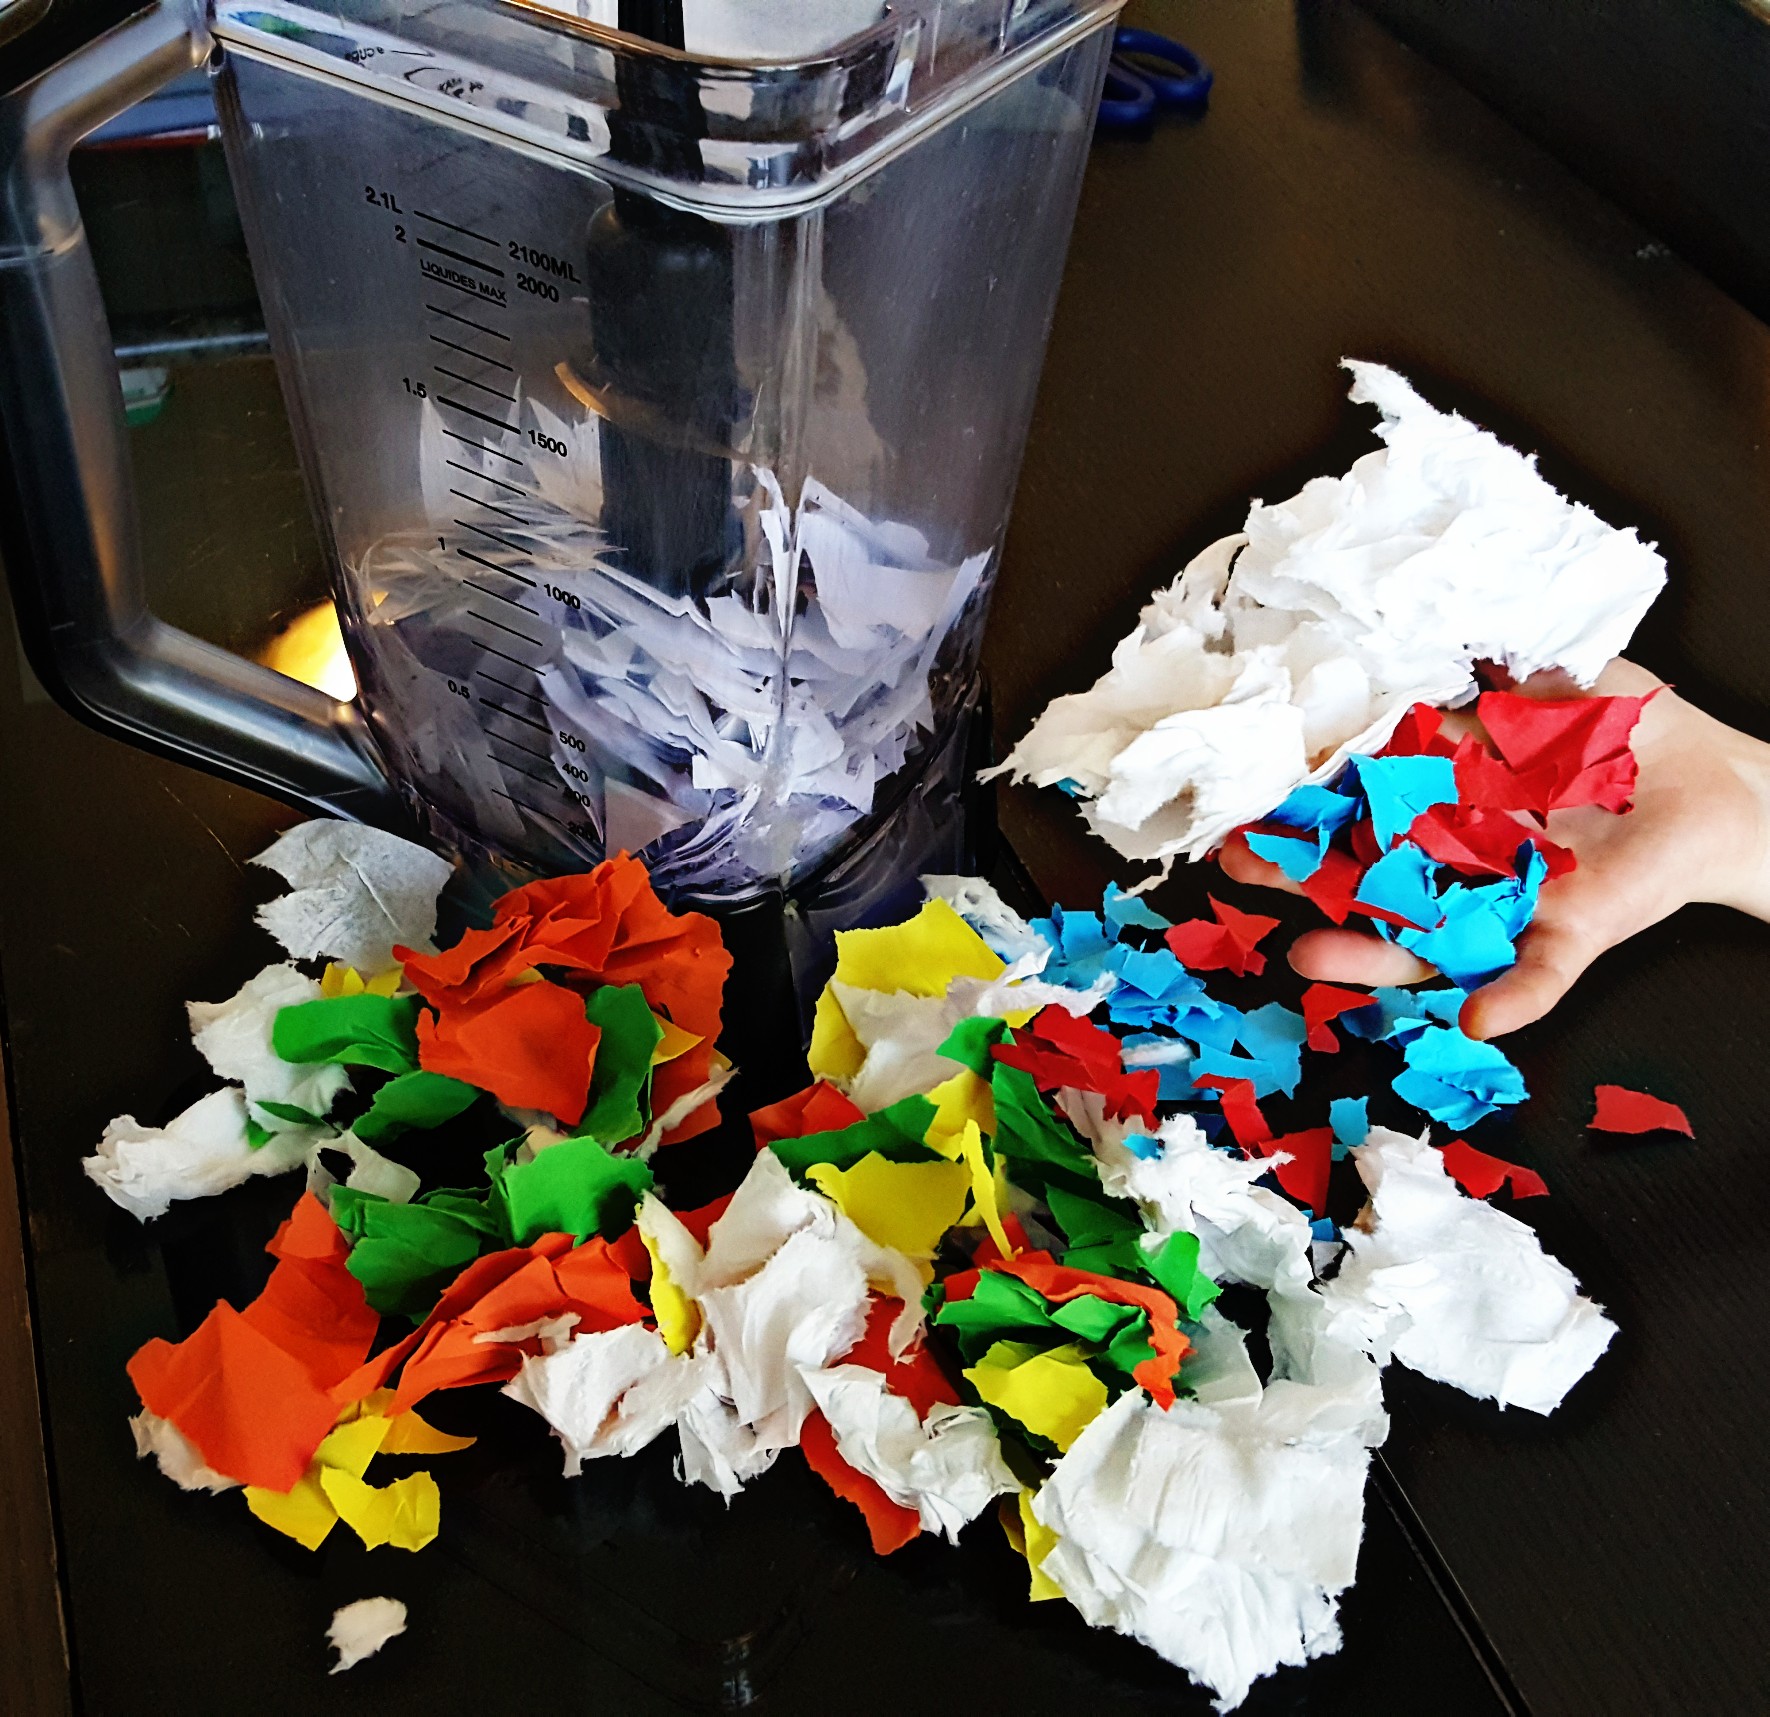
It’s okay if you use some sheets of colored paper. A lot of the color will come out with the water. Otherwise, you may just have some flecks of color throughout your placemat.
If you do use a lot of paper with coloring on it, you may need to soak and rinse it a few times to get the colour out. If you don’t have enough paper, you can add in some sheets of paper towel.
Once it is blended, remove the pulp from the blender. If you don’t mind your kids getting their hands a bit messy, give them a chance to feel the pulp they have made.
It is a really interesting feeling and good for them to feel the paper at this first stage.
Next, if you have a strainer, put the pulp into the strainer and push the pulp to drain some of the water. You can pick up the pulp and squeeze some of the water out as well.
Don’t strain all of the water out though. If it is too dry it will simply crumble when you lay it out.
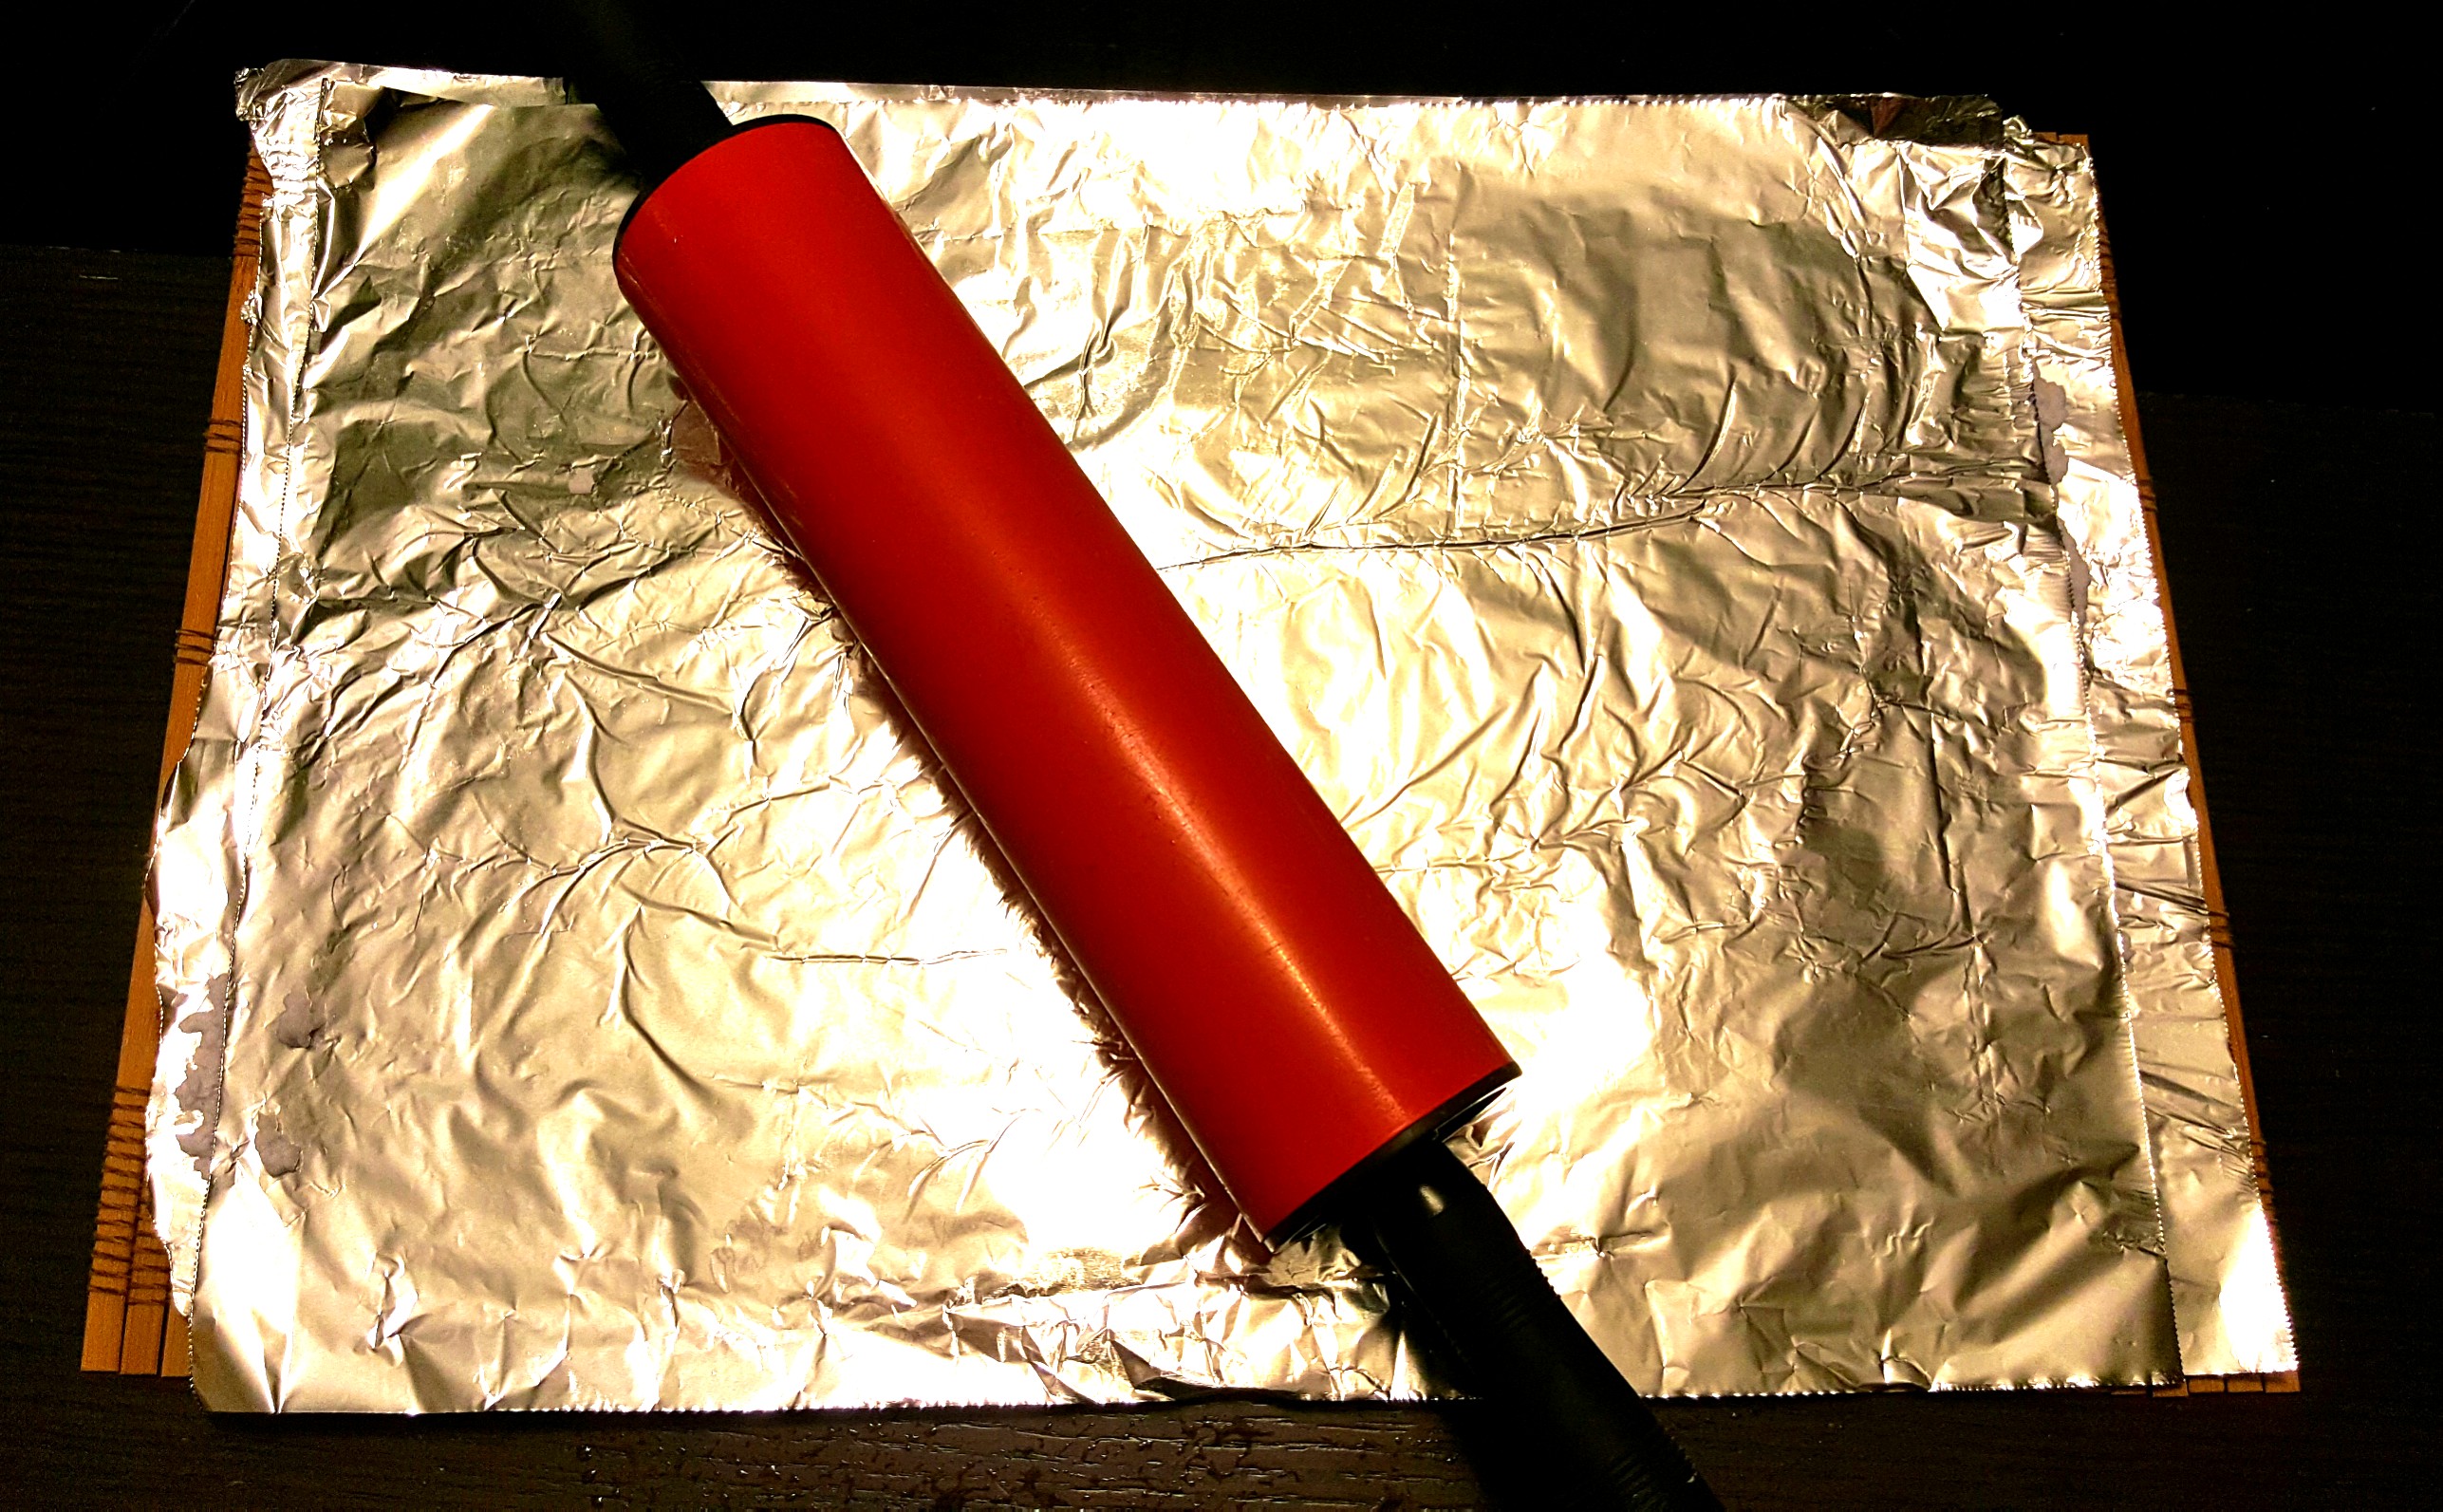
Next, we put the paper pulp out onto a sheet of tinfoil. Kids can push and flatten it so that it is the size and shape they want for their placemat.
To help flattened and spread it out you can place a second sheet of tinfoil and then roll it flat.
Make sure not to make it too thin. Thicker is better so that the placemat doesn’t rip. The only thing to consider is the thicker the placemat, the longer it will take to dry.
Next, we then placed a few leaves on top of the pulp so that it would leave the imprint on the paper.
You could go on a nature hunt and find real leaves, or simply use fake leaves. Place them onto the pulp where you want the print.

We then used the rolling pin again to flatten the pulp and push down the leaves. Don’t worry if the edges are not straight or even. It leaves a nice homemade look or you can cut it when it is dry.
Once the paper is dry, which can take a few days. We then pealed the paper off of the tinfoil and cut around the edges so that it was straight.
Unfortunately, the leaves did not leave as deep of a mark as I had hoped. If your pulp is thicker it will leave a more defined print.
However, I could still see where the print was, so we roughly painted where the leaf was. We then added black puffy paint to make the stem stand out. You could add more details and even words on your placemat, but my kids like the more simple look.
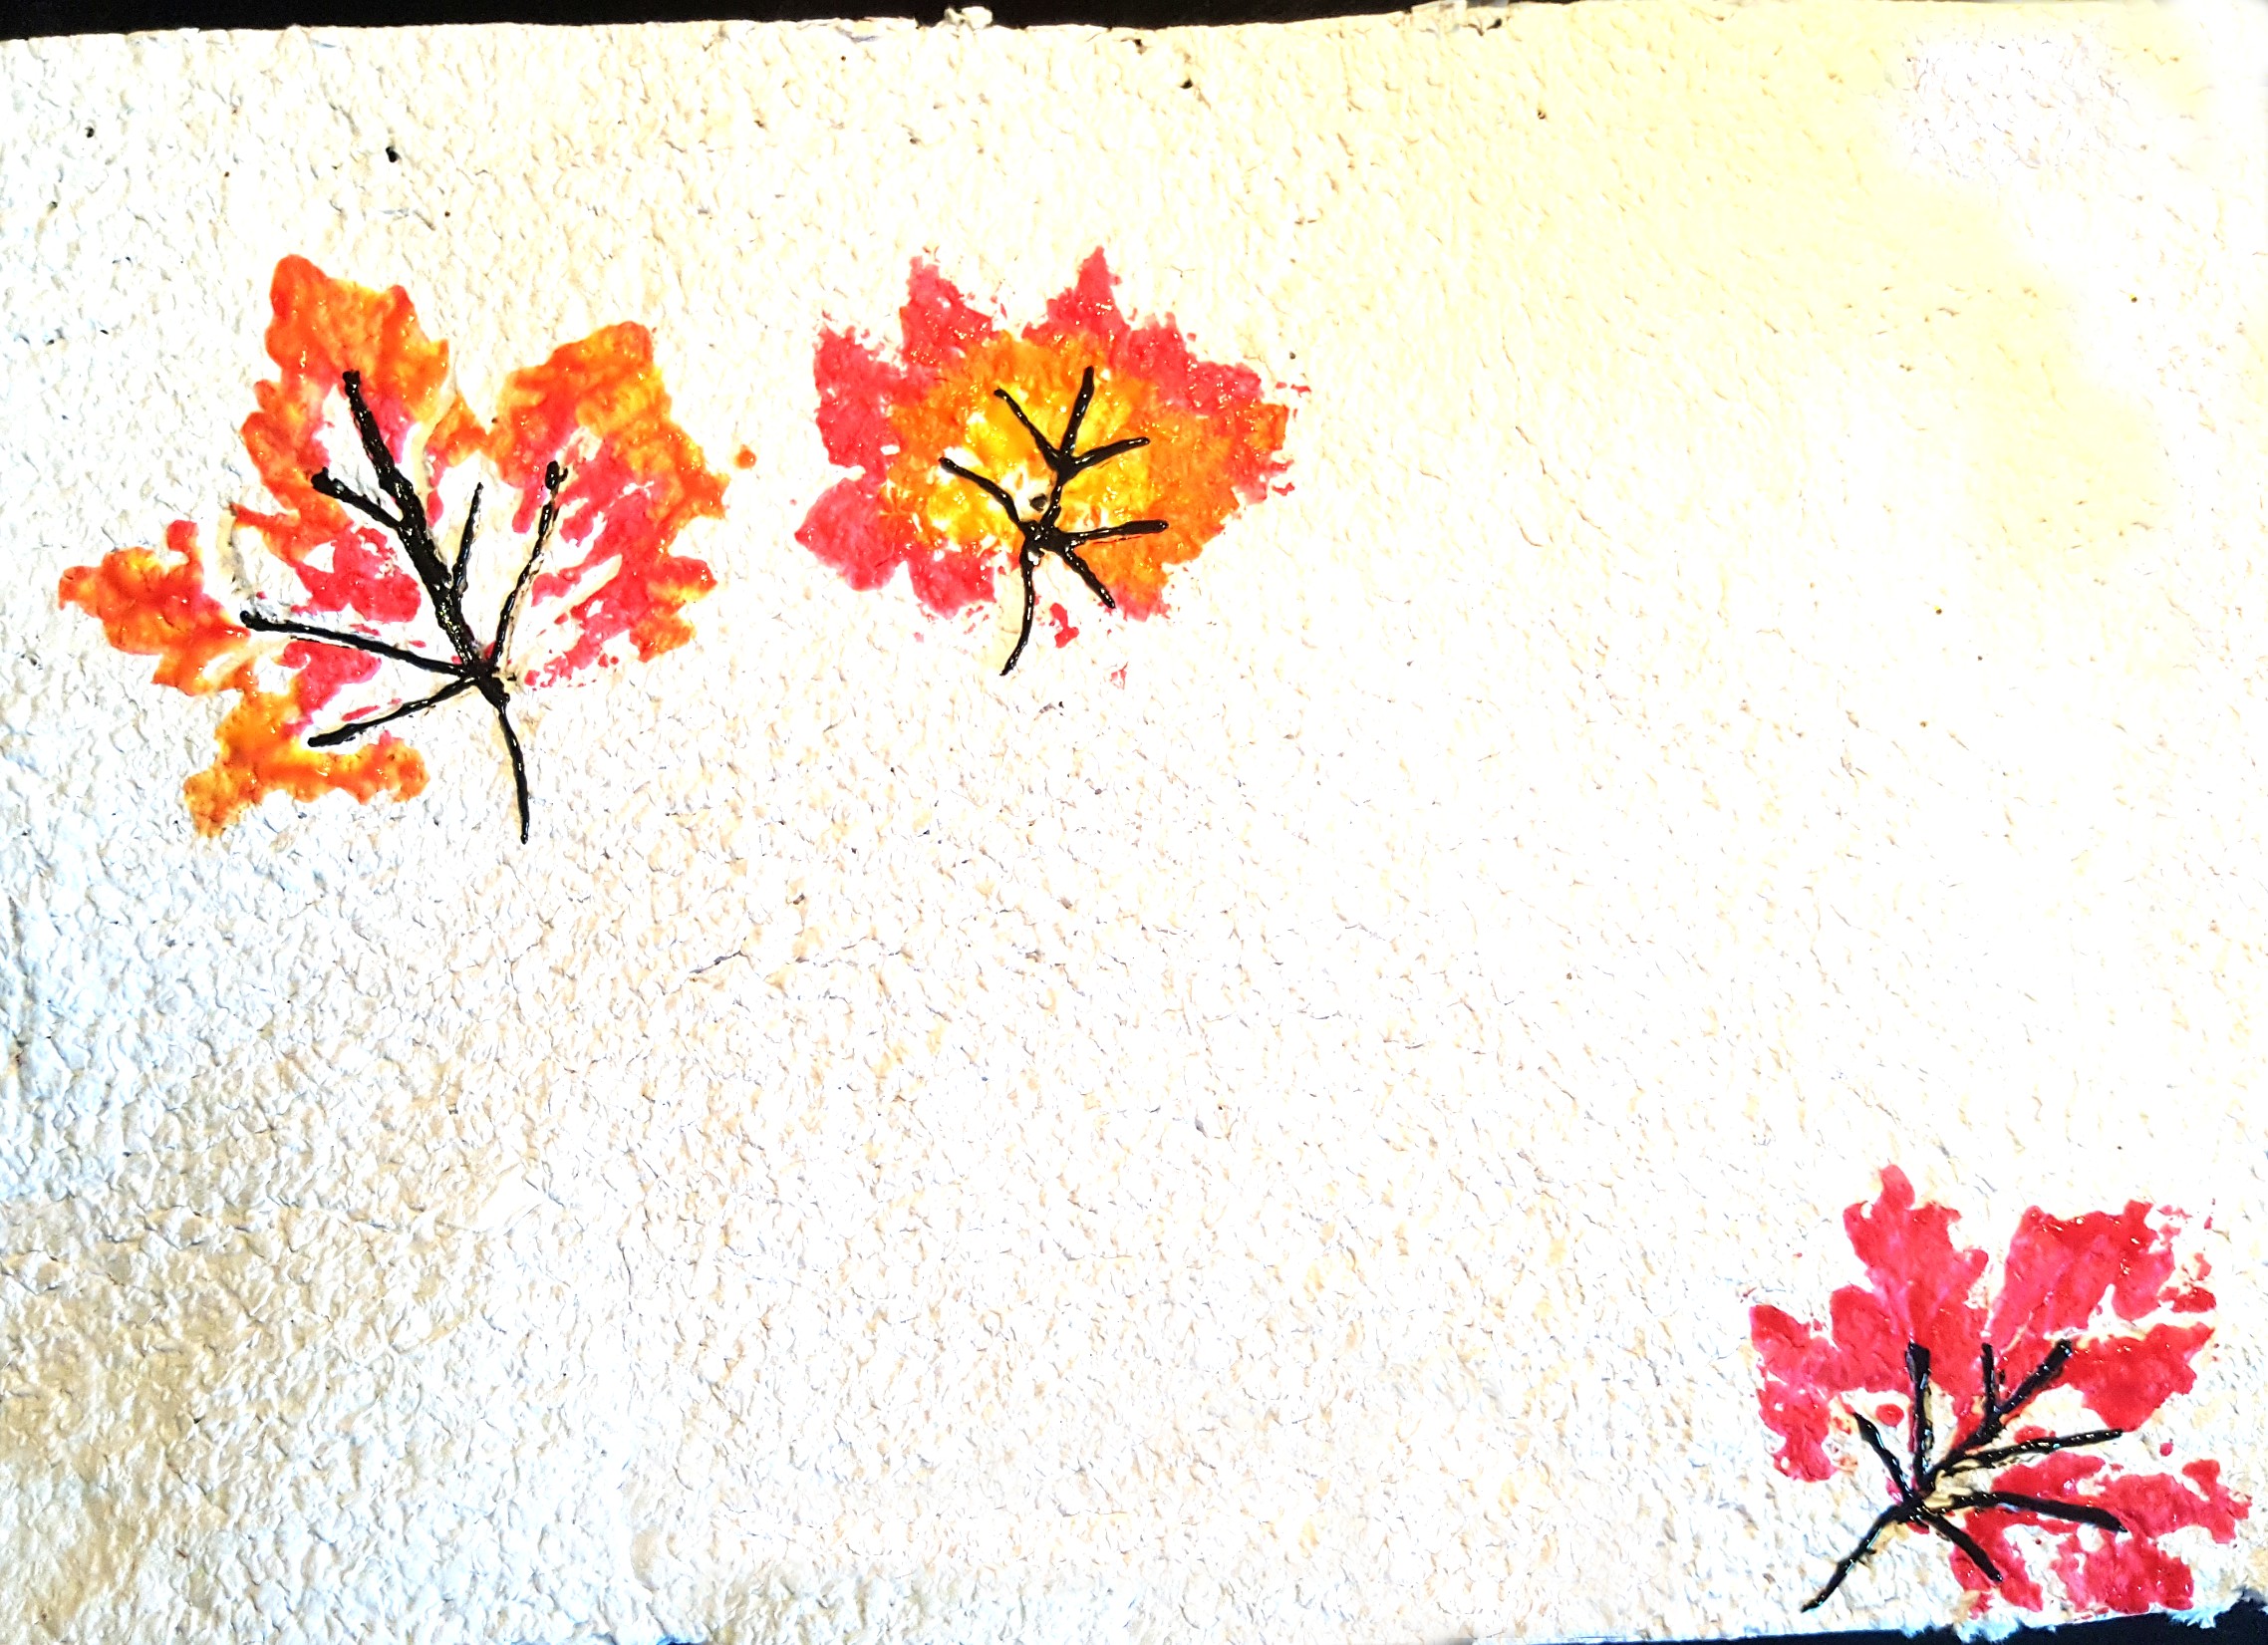
I think they turned out very beautifully. My favourite is the fact that they are kid made. I think everything looks better when made by kids.
My kids also loved telling everyone about how they made the placemats we were using and they were so proud to have them displayed and being used.
Since the placemats did not cost us anything to make, it is something that we could repeat year after year. I love the idea of making homemade recycled placemats as part of our tradition.
For now, we have set our placemats aside in a safe place until Thanksgiving.
Thanksgiving Crafts Extension Ideas
With some of the other crafts that we have made out of recycled paper we used colored paper to make our pulp. It creates a different look, but the colors can also add to the final product.
Although this Thanksgiving craft is intended for Thanksgiving, you could easily use some red, orange, brown, yellow or even green paper to use for the pulp for a fall theme.
The mix of colors adds a totally different look, but you can change your craft up by using these different colors. The great thing is that these recycled paper crafts are inexpensive so you can try out lots of different ideas.
If your placemat does not last until next Thanksgiving, you can always rip it up when Thanksgiving is over and add some water to make it into a pulp again. With the pulp, you can create a whole new craft!
More Crafts and Hands-On Activities for Kids…
For more craft and activity ideas that you can do at home with kids, click on an image below for details.