This post may contain affiliate links.
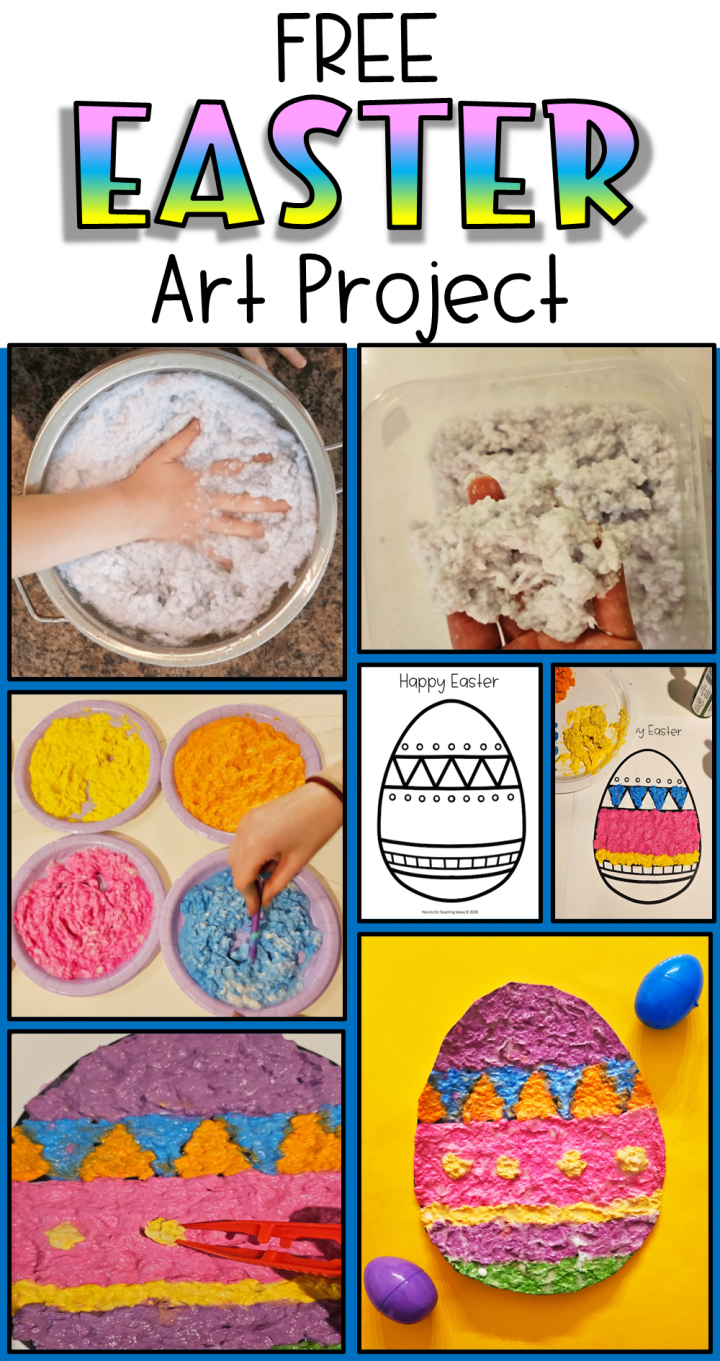
If you’re looking for an easy and inexpensive Easter craft to do with children of all ages, you’re going to love this Free Easter Paper Mache Project. It’s fun to create the mache and easy to make the Easter egg using the free template. You only need a few simple materials for this Easter craft that you’re going to want to do every year!
I started doing paper mache projects in my kindergarten classroom last year. The materials are supplies that you probably already have at home and kids will love being involved in the whole process.
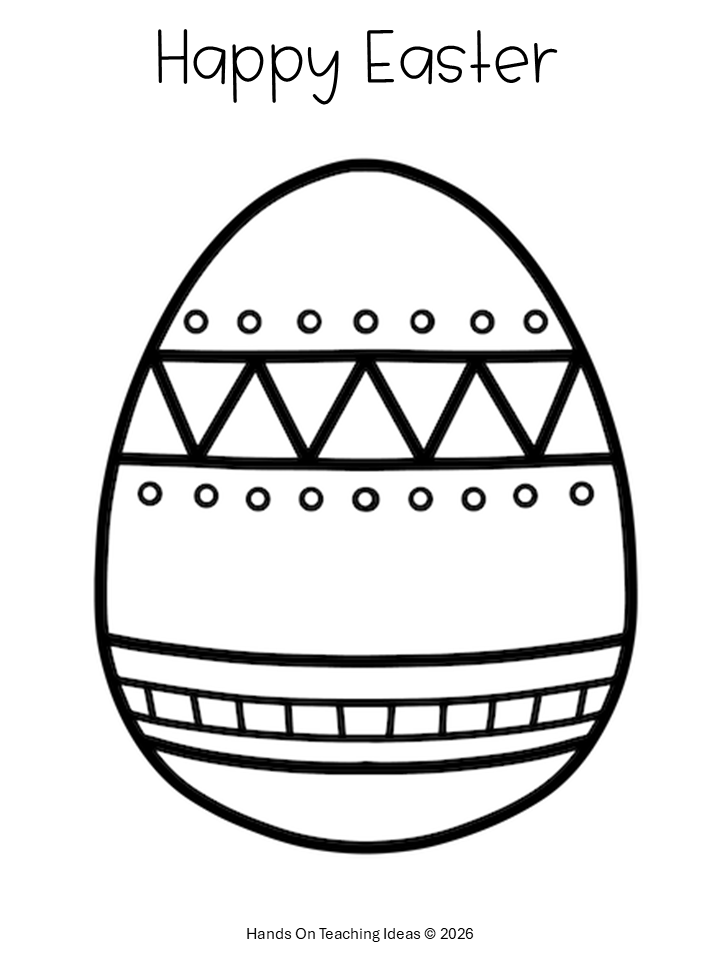
There is an egg template included for free at the bottom of this post. You don’t have to use the template, but I have found, especially with younger children, that the egg helps them be successful in creating an egg. I’ve given some tips below for how to make the experience the best for everyone doing the project. When you’re done, you’ll be left with a piece of art that parents will love displaying.
If you’re looking for more hands-on activities for kids of all ages, make sure to check out Hands-On Teaching Ideas, 22 Best Easter STEM Activities and an Easter / Spring Escape Room Game that can be played indoors or outside.
Free Easter Paper Mache Project Materials
One of the great things about this art project is that most of the materials you need are really simple and inexpensive. To do this project you will need:
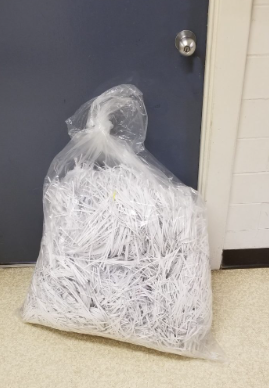
- Paper (Recycled paper, paper towel)
- Water
- Blender
- Strainer (Optional)
- Paint
- Glue
- Easter Egg Template (Available at the bottom of this post)
- Tweezers (Optional)
- Gloss (Optional)
Once you’ve collected all of the materials, you’re ready to start!
How to Make Paper Mache
Follow a few simple steps to make your paper mache. If you can involve kids in the process of making the mache, it’s a great sensory experience for them. The paper pulp feels really interesting to run your hands through.
For a more detailed description of how to make the paper mache, check out: How to Make Paper Mache + Free Recipe.
Read through the instructions below to make your paper mache mixture.
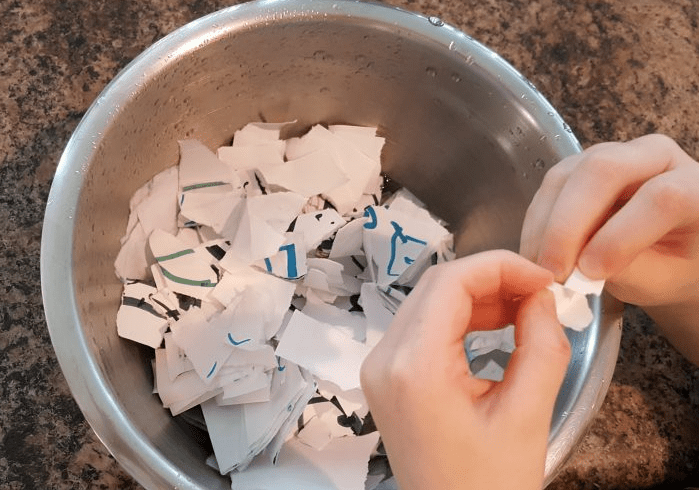
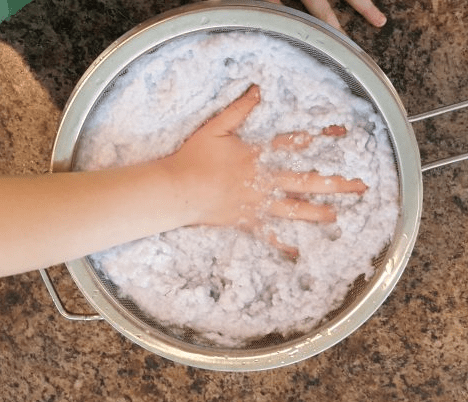
Tear paper into small pieces. Use about 5 sheets of paper to make 1 cup of paper pulp. Place the pieces in a bowl and cover with warm water. Let the paper soak until softened.
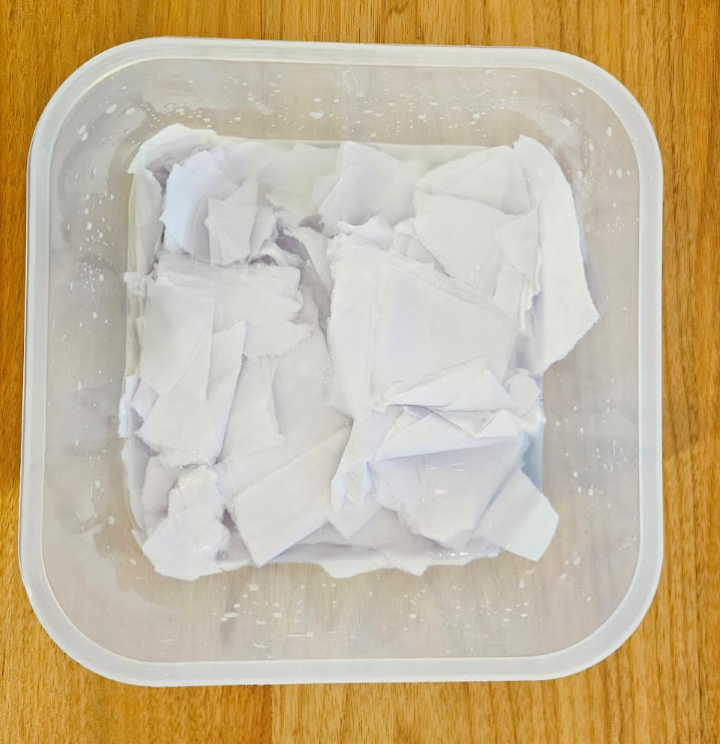
Blend the mixture until it reaches an oatmeal-like texture.

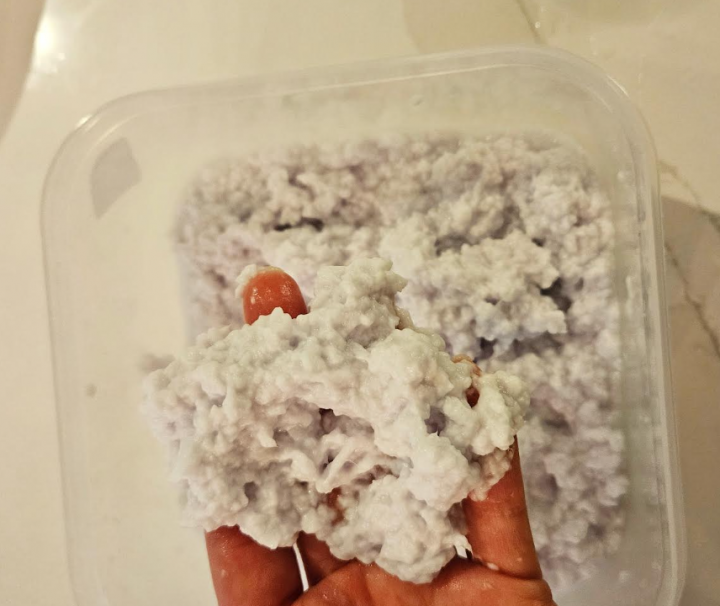
Pour the pulp through a strainer and squeeze out the excess water so it is damp, but not dripping.
Add ¼ cup of white glue and mix well. If the mixture feels too dry, add a little more glue or water. If it becomes too wet, mix in more paper pulp.
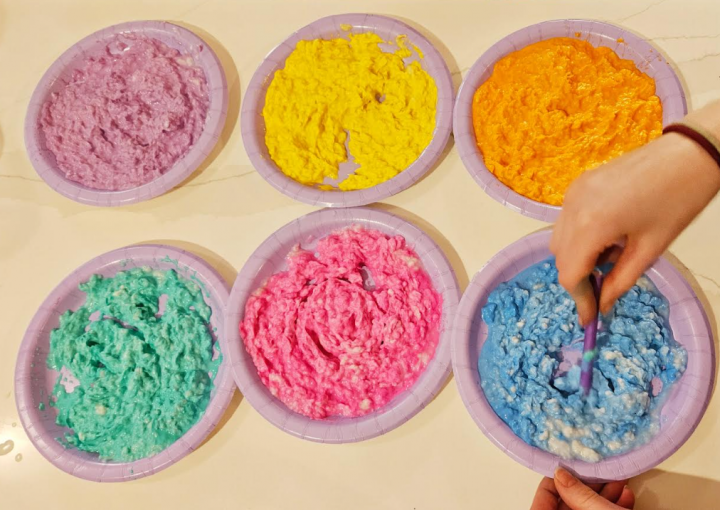
Add paint until you reach your desired color, then shape your art piece. Create as many colors of mixture as you want to feature on your Easter egg project.
Free Easter Paper Mache Project
Making Your Easter Egg
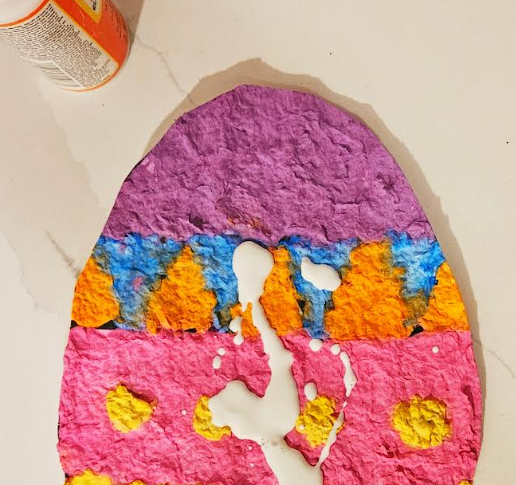
Once you have made all of your colored paper mache mixtures, you’re ready to start your Easter egg. The egg template will help younger artists keep the shape of the egg as they add the paper mache, but they can add any designs they want. For older artists, they can create the shape and design on the egg without any template.
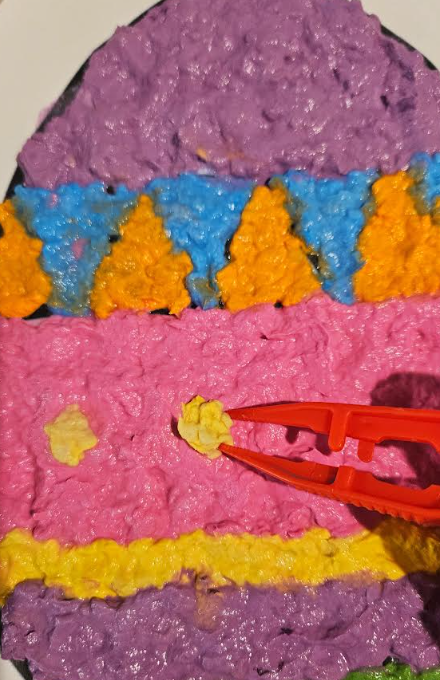
Start adding paper mache to form your Easter egg. The mache can be added with your hands, or tweezers. It can get a little bit messy, but it’s worth it!
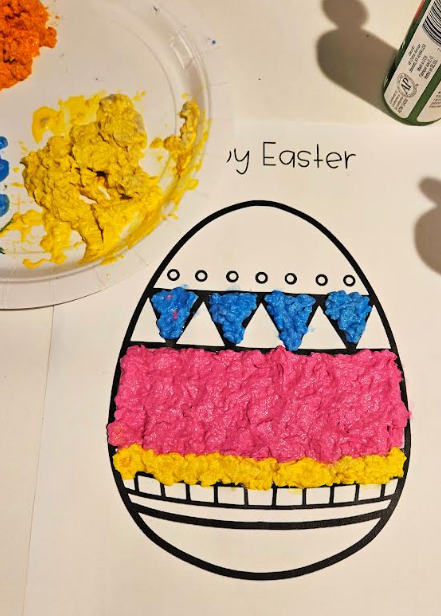
Fill each of the sections and don’t leave any paper showing underneath the paper mache. Use any combination of colors. Once the egg is filled in, you’re done, but leave time for it to dry. Depending how wet your paper mache pulp is it can take at least 24 hours to dry. Once it is hard to the touch, it’s done.
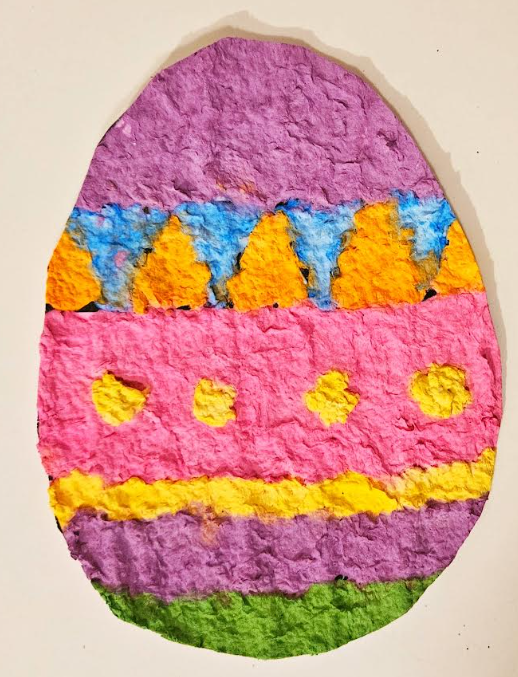
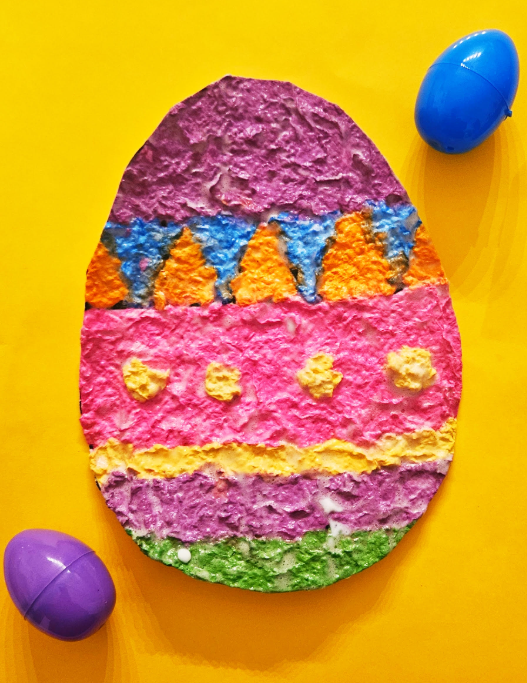
When it is hard and dry, you can choose to cut it out and glue to a background sheet of paper or simply leave it shaped as an egg. Once it’s dry you can also choose to add an outline with permanent marker if there is anything you want to highlight. Sometimes the color may appear to fade once it dries so you can paint over any section you want to brighten the color of. The result is a textured, colorful piece of Easter art!
Extension Ideas
When I created these with my class, a few of the children didn’t like the idea of touching the paper pulp. It is a wet, squishy feeling so I understand their apprehension. If you have a child like this, or simply want to keep the mess to a minimum, try providing tweezers for children to use. They make it easy to add details and small pieces of paper mache to small areas.
Another option is to add sparkles to your egg. Before it dries sprinkle any color onto the egg. You can use a sheet of paper to cover/block the sparkles from falling into any section of the egg that you don’t want it to. Don’t worry about adding glue or securing the sparkles because the glue in the paper mache will do this.
Finally, once your egg is dry, you can use a gloss, like Modge Podge, to paint on top of your egg. It’s a great way to keep it protected and it adds a great finish to the final product.
Free Easter Paper Mache Project
Download Here
Grab the free printable Easter egg template featured above. Click the box below and download it through Grow. Once you subscribe, for free, through Grow the file will download right away. It will also unlock all of the other freebies on this site.
Shortly after subscribing, you will receive an email with a link to the Free Resource Library. Here you can browse through over 150 free printables that you can download and print. From escape room games and math resources to STEM task cards and choice boards, there’s something for everyone all year long!