This post may contain affiliate links.
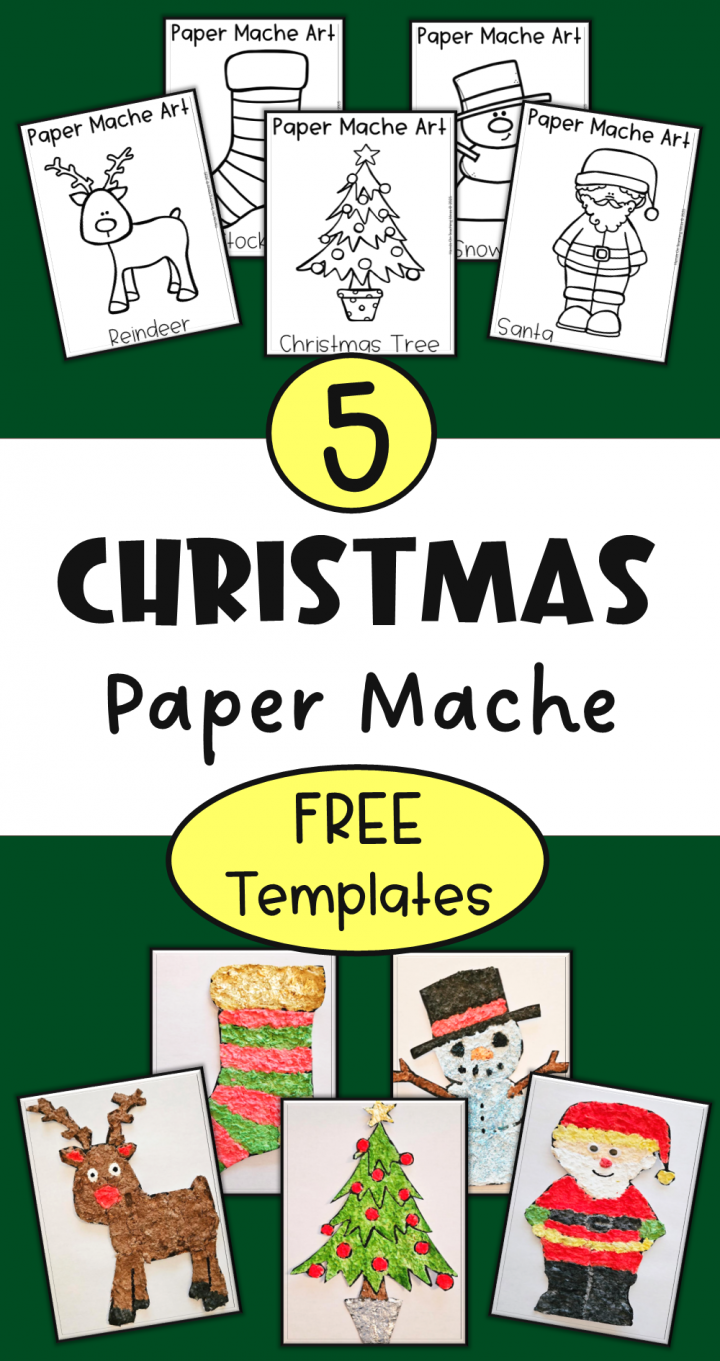
The holidays are right around the corner. Late November, I start looking for new projects and activities to try with my kids and my students in the classroom. I love ideas that are inexpensive, creative and easy! I’ve worked with paper mache many times and the projects you can create with it are endless. Kids always have a blast with it and it’s always worth the mess. As you gather some new ideas, make sure to grab this collection of 5 Easy Christmas Paper Mache Ideas for Kids.
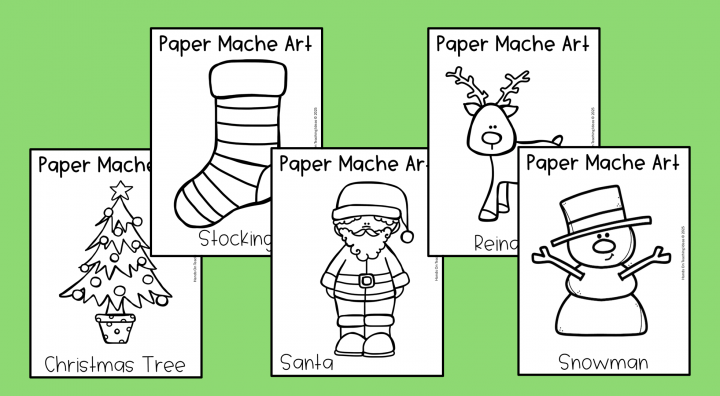
Below I am sharing five different holiday themed images to use for your paper mache project. The steps to make the paper mache are shared below along with a free printable template for each of the images. You can download a specific image, or all five at the bottom of this post, for free.
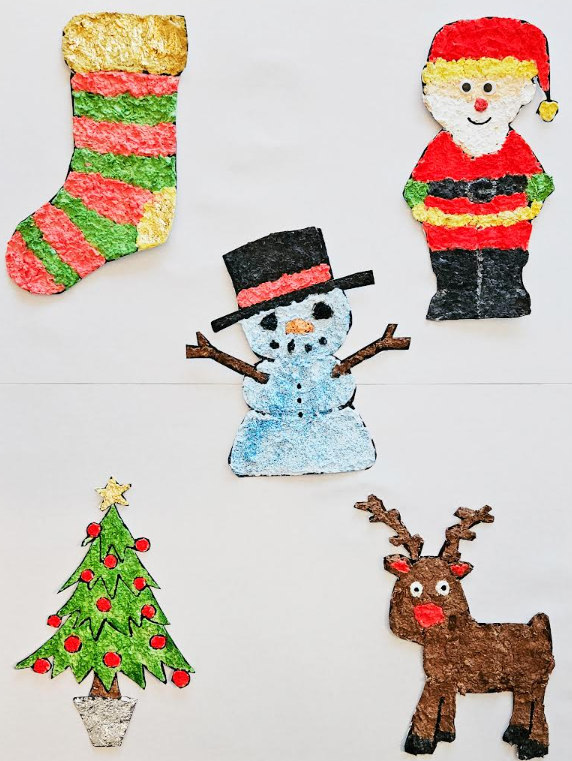
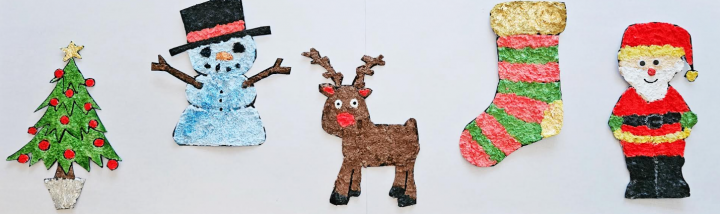
Included in the templates are a reindeer, stocking, Santa, Christmas tree and a snowman. A great option is to print a few copies of each page and let children decide which one they want to do. When kids get to choose, they tend to be more engaged.
Be prepared for a bit of mess, but also a beautiful end result.
For more paper mache projects, to try any time of year, check out How to Make Paper Mache for more projects and inspiration. For another free, fun and hands-on Christmas activity, check out the Best Christmas Escape Room game. With printable puzzles and clues you can set up around your house, it a wonderful holiday activity to play as a family.
5 Easy Christmas Paper Mache Ideas – Materials
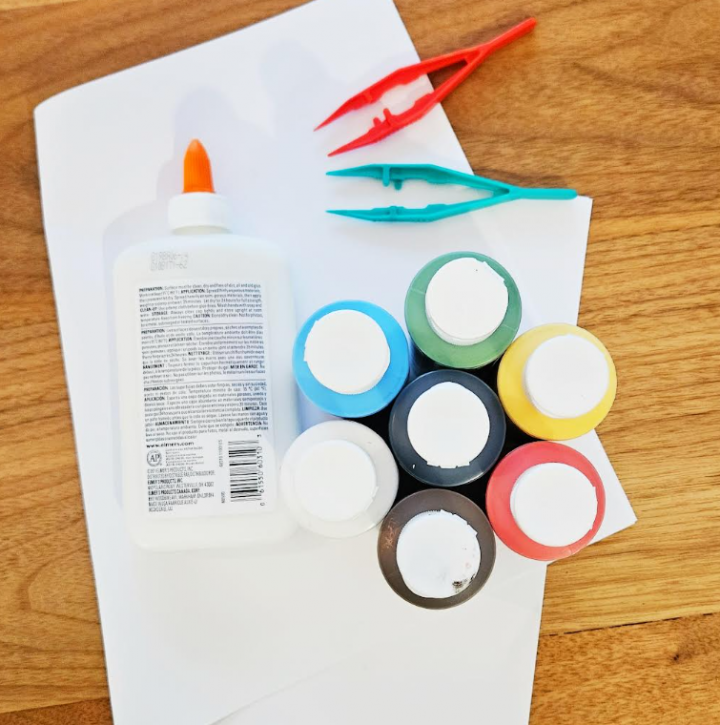
One of the great things about this paper mache is that the materials are really simple. There are different ways to make paper mache, and this one is unique, but easy. For this project you will need:
- Paper (Any kind, from paper towel to sheets of paper and white is ideal.)
- Paint (Acrylic paint works well, but any type can be used)
- Glue
- Water
- Blender
- Strainer
- Printable Template (Available at the bottom of the post)
- Tweezers (Optional)
- Decorations (Sparkles, gold foil) (Optional)
- Paint Brushes (Optional)
Once you have all of your materials, you’re ready to prepare your paper pulp. An example of each of the Christmas and winter themed templates are shown below.
How to Make Paper Mache
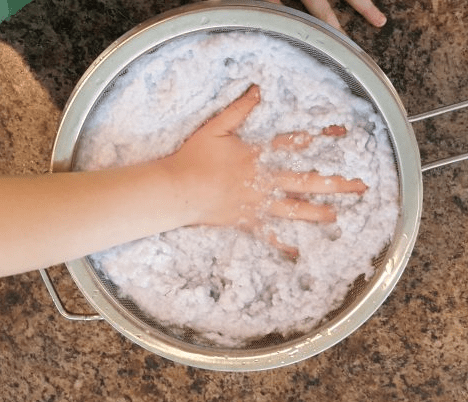
Start by ripping up your paper and soaking it in warm water. The water doesn’t have to be warm but it helps break down the paper faster. Once it has been soaking for awhile, use a blender to break the paper down more into pulp. Make sure to add lots of water to the mixture to help it break down faster. You will drain some of the water later.
Once all of the paper is turned into pulp, you’re ready to make your paper mache. If you are creating this with kids, giving them the opportunity to feel and run their hands through the paper pulp is a great sensory experience.
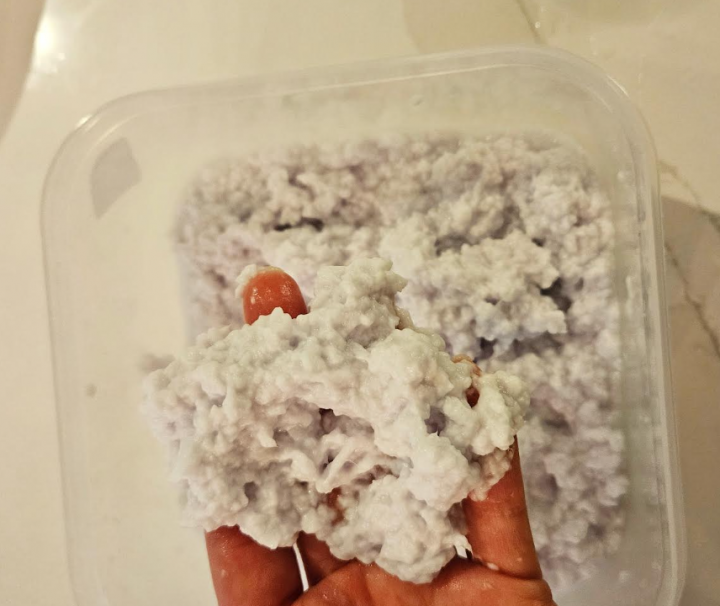
Next, use a strainer, or just by hand, press some of the liquid out of the paper pulp. Don’t drain all of the water because you will need to mix the paint and glue into it, but gently squeeze enough out so that the water is not dripping out of the paper pulp. If you have too much water it will take longer for your project to dry and can make your template page really wet. However, it is better for the paper pulp to be a bit too wet, than too dry.
Making Your Paper Mache Colorful
Once you have removed some of the water, next separate the paper pulp into piles. One pile for each color you want to include on your image. Next, add glue to each pile and mix. You don’t need a lot of glue. Roughly add at least 2 tablespoons for each cup of pulp or just enough so that the glue mixes in with the pulp. Finally, add paint to each pile of pulp and mix. The more paint you add, the more vibrant the color will become.
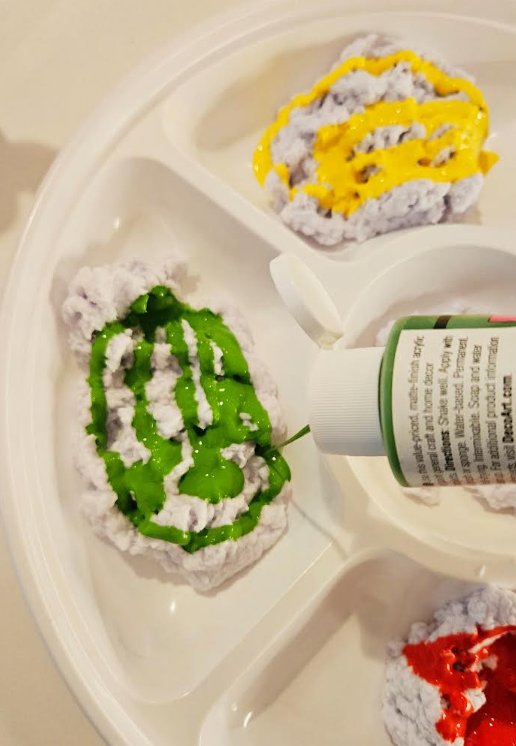

Mix everything together, and you’re ready to start creating.
Below you will find a short description for each of the five templates you can use to make different holiday images. In general, you will create each of the images in the same way, but each have something slightly different about them. Click the link below the image to explore the full activity in more detail.
Recycled Paper Mache Christmas Tree Craft
The first of the five ideas is the recycled paper mache Christmas tree craft. The project uses shredded paper that was heading to the recycling to make the paper pulp. There are lots of little details on this tree that make it one of my favorites. This image is great for slightly older children to carefully fill in each section.

You can also use tweezers to help place the paper mache. This helps keeps mess to a minimum, but it also helps be more exact and detailed. Some gold and silver foil add some extra shine. You can also touch up your final piece with a paint brush and paint.
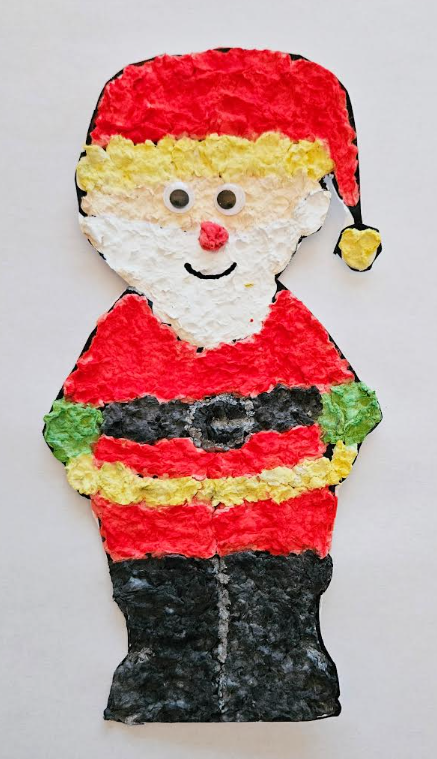
Santa Paper Mache Project for Kids
Try an adorable Santa paper mache project for kids with this free template. Use the same paper mache and add any colors you want to make your own Santa. You can also add some details such as googly eyes and silver pen marks to define parts of the Santa that can get covered by the paper mache.
Free Paper Mache Reindeer Template
I love the look of the reindeer, but I would suggest it for slightly older children or at least not for a young child’s first project. Getting the paper mache to form the ears can be challenging. However, with the tweezer it is easier.
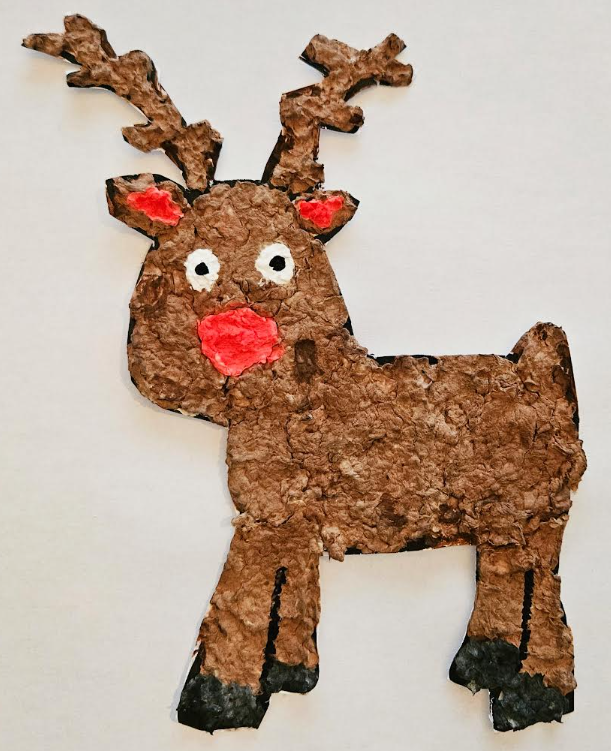
My favorite thing about the paper mache reindeer is that when the mache dries, the textured look looks like fur. Add small details with paint after it’s dry.
Christmas Stocking Paper Mache
If you are deciding which of the 5 easy Christmas paper mache ideas for kids to do with your own kids, consider the stocking if you have really young kids, such as preschool aged. The stocking is the most simplistic image and it doesn’t have any tiny sections that need to be filled. The stripes are large which make it easier for little hands.
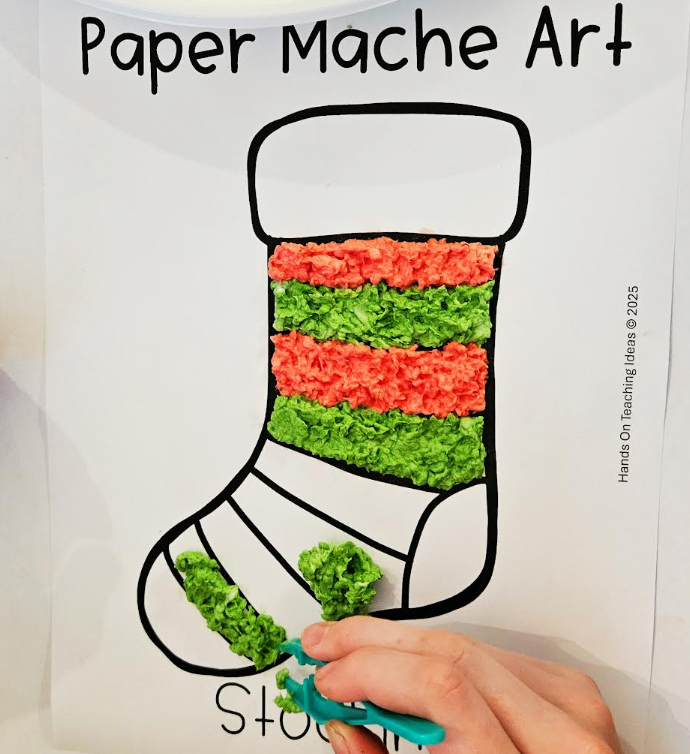
If older children or adults create the stocking, they have the option to add extra details or designs on their stocking. Since the template is covered with paper mache, and you won’t see it below, you can use it just as a guide.
Easy Winter Paper Mache Idea
The snowman is my favorite because it is adorable, but also because you can use it leading up to Christmas or after Christmas for winter celebrations. Parts of the snowman, such as the hat can be more challenging, but remind kids that going outside of the lines is okay.
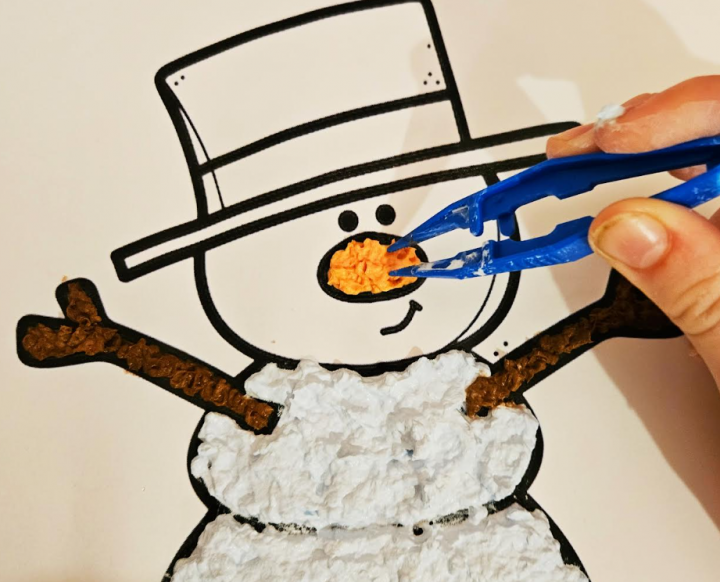
When we created the snowman, we added blue sparkles onto the paper mache. It gave it a fun and fancy look. If you use sparkles or any extra decorations, make sure to add them when the paper mache is still wet. Because of the glue in the mache, the mix will dry and secure the decoration as well.
5 Easy Christmas Paper Mache Ideas
I hope that you love this collection of 5 Easy Christmas Paper Mache Ideas as much as my kids and I did creating them. Expect to get a bit messy with this art project, but it’s worth it! The templates help young children create what can be tricky Christmas images, and they make it easy.
If you create any of these Christmas images, I’d love to see your work and how you made it your own. Happy holidays!
5 Easy Christmas Paper Mache Ideas for Kids
Download the Free Images Here
Make sure to grab the 5 Easy Paper Mache Ideas for Kids and all of the templates below. Click the box below and subscribe to Hands-On Teaching Ideas through Grow. Once you subscribe you will unlock all of the other freebies on this site.
There is no cost to subscribe. Once you have subscribed the freebie will download for you to then print. Shortly after subscribing, you will receive an email with a link to the Free Resource Library. The library is filled with over 100 printable resources. You are welcome to download and use any that are of interest to you.
You will also receive emails with the latest products, promotions, activity ideas and more freebies!