This post may contain affiliate links.
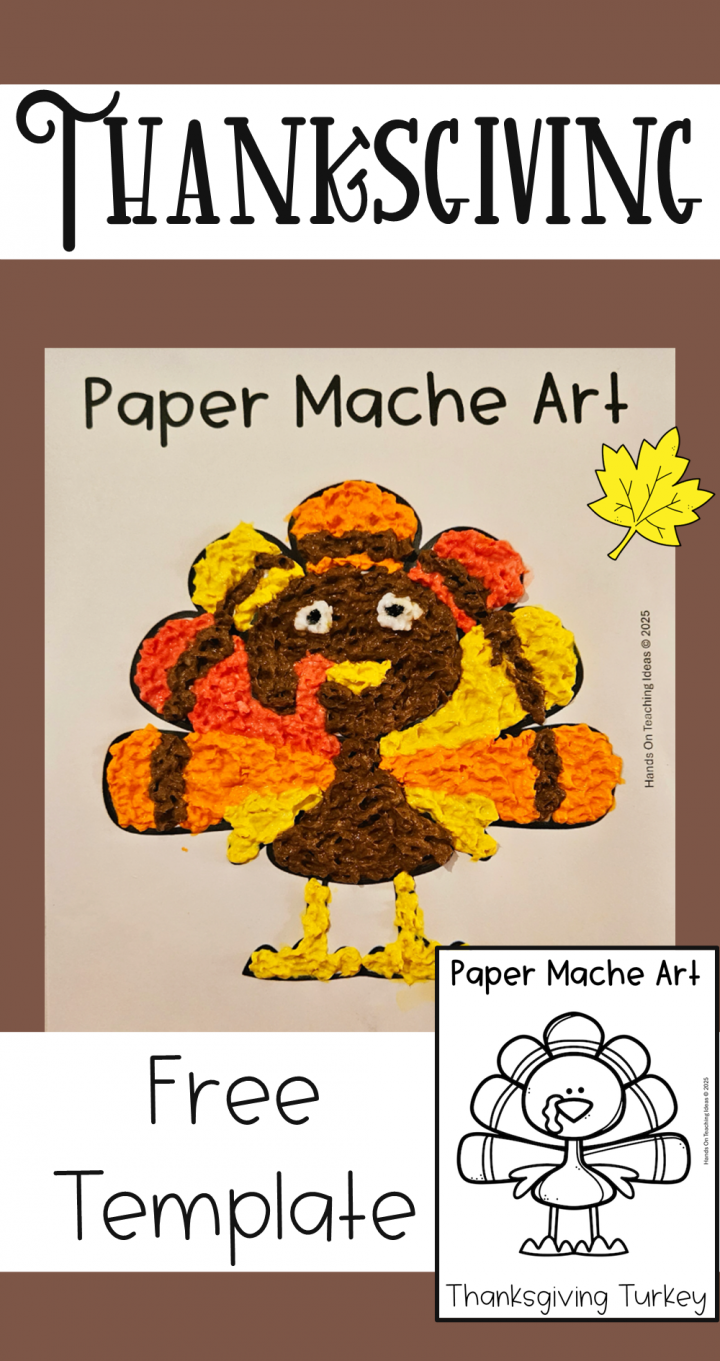
As Thanksgiving gets closer, I’m always looking for new art projects that my kids, and my students will enjoy. I created this Thanksgiving paper mache art as a fun, hands-on craft that I know my kids will enjoy making. Plus, they’ll create something they’ll be excited to take home and show their families.
If you haven’t worked with paper mache before, this is an easy project to start with. The materials are inexpensive and I’ve included a free turkey template to make creating easier for young kids. This Thanksgiving craft can however, get messy, but the end result is definitely worth it!
Children can use the template but still be creative by choosing their own colors and design to make it the way they want. The experience of creating the paper pulp is also part of the excitement. Give kids a chance to help make the pulp that will become the paper mache for the ultimate sensory experience.
If you’re looking for more Thanksgiving fun, try a Thanksgiving escape room game. All of the puzzles are free and easy to set up. You don’t need any additional materials to play and it’s all Thanksgiving themed!
Easy Paper Mache Art Materials
There are a few materials you need for this paper mache art, but many you probably already have at home if you have kids. You will need:
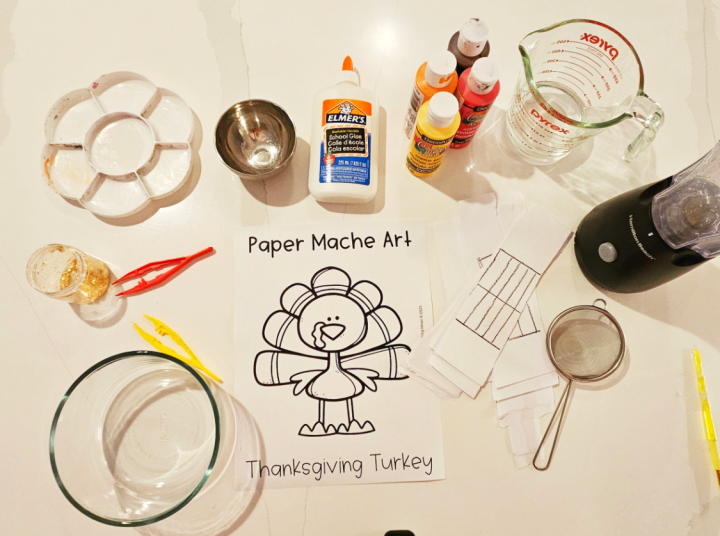
Once you have all of your materials, you are ready to begin making your paper pulp that will then be turned into your paper mache.
How to Make Paper Mache
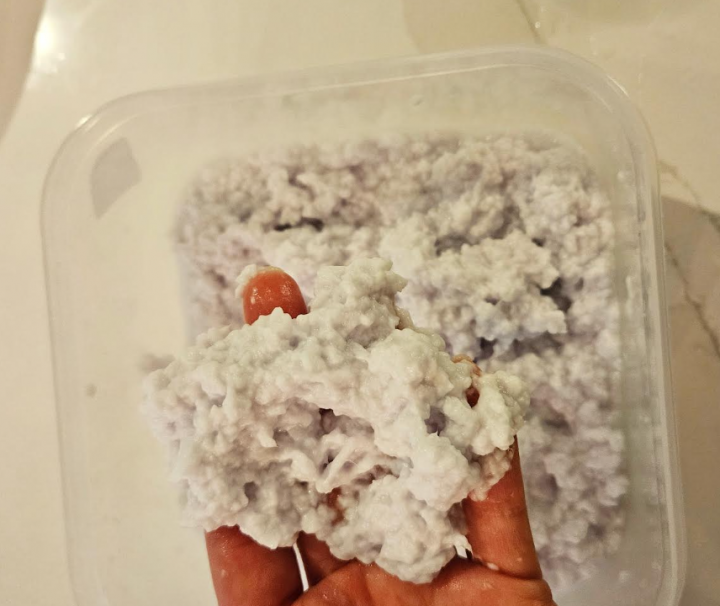
To start, rip up a bunch of paper. Ideally use white paper so that when you add paint the color shows. Place the ripped up paper into warm water and use a blender to break the paper down to a pulp.

If you have the option, let kids feel the paper pulp. It’s a great sensory activity for kids and the feeling of the pulp is really fascinating. You can also use this time to talk to kids a bit about how paper is made.
Next, use a strainer to remove some of the water. You want to leave enough water that you can easily mix in paint and glue, but not too much water that the pulp is dripping.
Next, mix in white glue. For every cup of pulp, add roughly 1/4 cup of glue. Adding less glue will still work, but it changes the texture of the pulp once it dries.
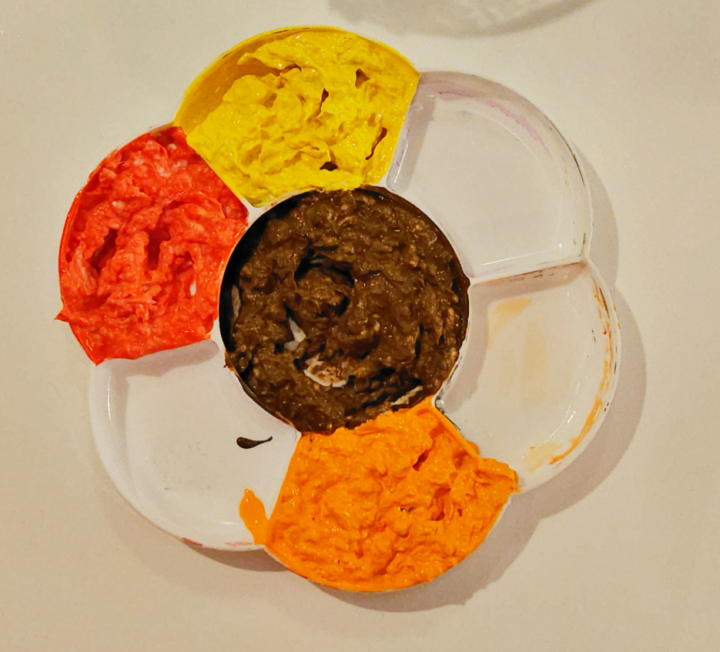
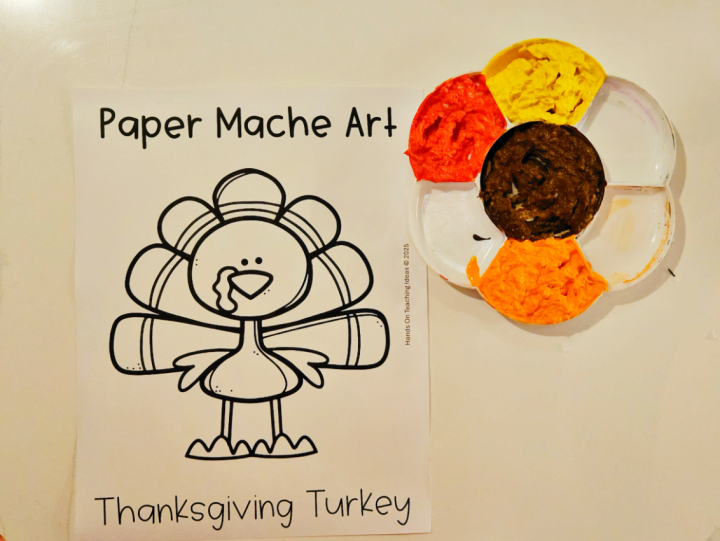
Once you have mixed in the glue, next separate the pulp into piles. Create one pile for each color you want to make. For the turkey, I made brown, yellow, red and orange. Add paint until you reach the desired color. Mix well.
Thanksgiving Paper Mache Art
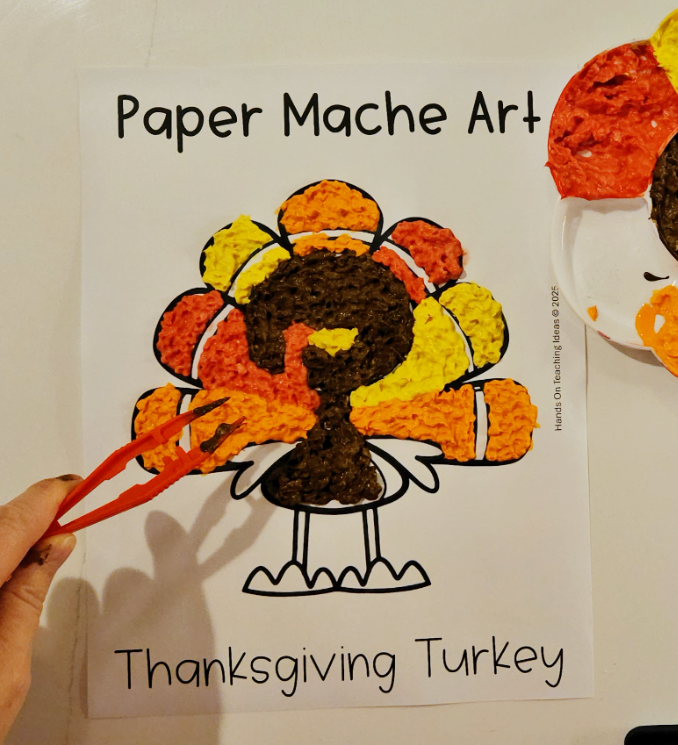
Next, use the free printed copy of the Thanksgiving turkey available at the bottom of this post. Begin adding bits of the pulp to the sections of the turkey. Children can design and fill their turkey in any way they want.
I gave my students tweezers to move and fill the sections of the turkey with paper mache. This was a great way to help reduce the mess of this project. You can simply use your fingers to fill the sections, but the tweezers are great for filling in smaller sections and adding details.
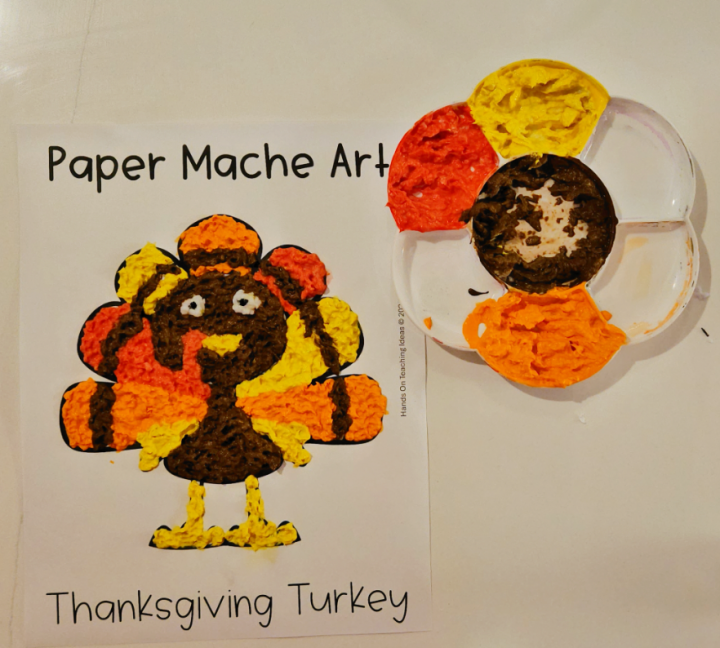
Kids can fill in the turkey to create a pattern or add lots of different colors to create something truly unique. Once you have filled in the turkey, let it dry overnight or for 24 hours. You can also add small details to your turkey when it is still wet such as googly eyes, gold foil for a special shine or paint to add more vibrant colors in places you want to touch up.
Thanksgiving Art Project for Kids
If your paper mache is more wet, it will need longer to dry. Once dry, you can cut out your turkey and place on a hard, colored background. You can also add a layer of polish, such as modge podge gloss to complete the Thanksgiving paper mache art. Happy holidays!

Thanksgiving Paper Mache Art
Download the Template Here
When you’re ready to get started on your Thanksgiving turkey, you can download it for free below. Click the box below and subscribe to Hands-On Teaching Ideas through Grow. Once you subscribe the file will download right away. By subscribing this way, through Grow, you will also unlock all of the other printables available on this site.
Make sure to sign up today! Shortly after signing up you will receive an email with a link to the Free Resource Library. The library is filled with over 100 free resources for you to access. You will also receive an email with the latest products, promotions and activity ideas from Teaching Ideas.