
I love science! There are so many hands-on science experiments you can do with kids! Right now we are learning all about sound in our classroom. I have personally found that having a sound experiment for kids to demonstrate what they are learning is the best way for children to really understand the material.
So, I came up with a few sound experiments for kids, including my favourite tuning fork sound experiment and vibrating rice.
Keep reading for a few simple, hands-on ways to making learning about sound fun and meaningful.
The experiments work well in the classroom or at home.
Introducing big, but important concepts, such as sound and hearing, to young children may seem early; however, I am always amazed by how much children of all ages learn from hands-on science experiments.
When children are interested in a topic, they absorb and understand a lot of the material.
Slinky Sound Experiments
Kids are naturally drawn to do experiments and play and explore with their hands. I like to do this sound experiment with kids as a way to introduce big science concepts to young minds.
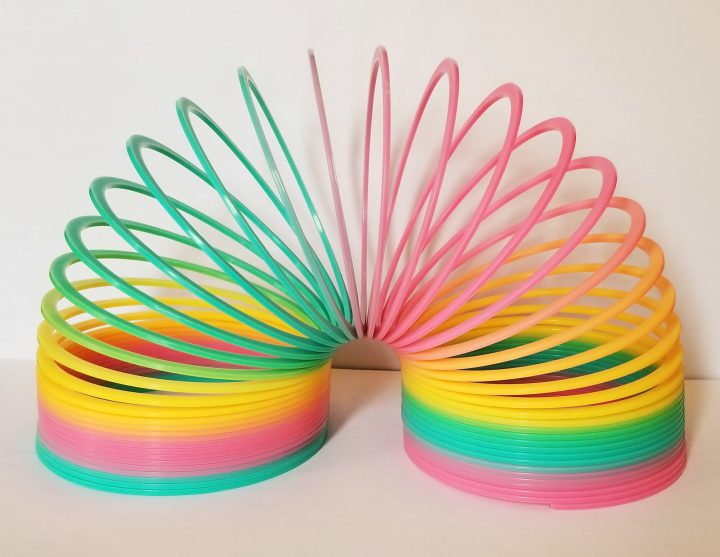
I have done this experiment with kids aged 3-10 and it is a hit with all of them. All you need is a slinky. A large one works best, but any size will work.
Sound Experiments Steps
I started by using a large slinky and having one child and I hold the ends on opposite sides of the carpet. I banged the slinky to send a wave to the other side. We talked about how sound travels in waves.
A big, fast wave equals a loud sound – like someone yelling. A small, slow sound wave may be someone humming. I either hummed or yelled as I banged the slinky to replicate how the volume and sound travels.
Sound Waves
Sound Experiment
The main idea you want to make clear is that sound travels in waves. Also, it is important that children know that sound waves are invisible.
The slinky is just a fun way to show what we can’t otherwise see.
Some students even noticed the slinky bounce back after reaching the student holding the other end of the slinky. This was a great chance to discuss echoes and how sound bounces.
Fork a Sound Experiments
This is perhaps my favorite sound experiment for kids! I love the excitement that it causes and the ‘explosive’ result. Also, kids of all ages are able to get hands-on and do the experiment. You only need a few materials:
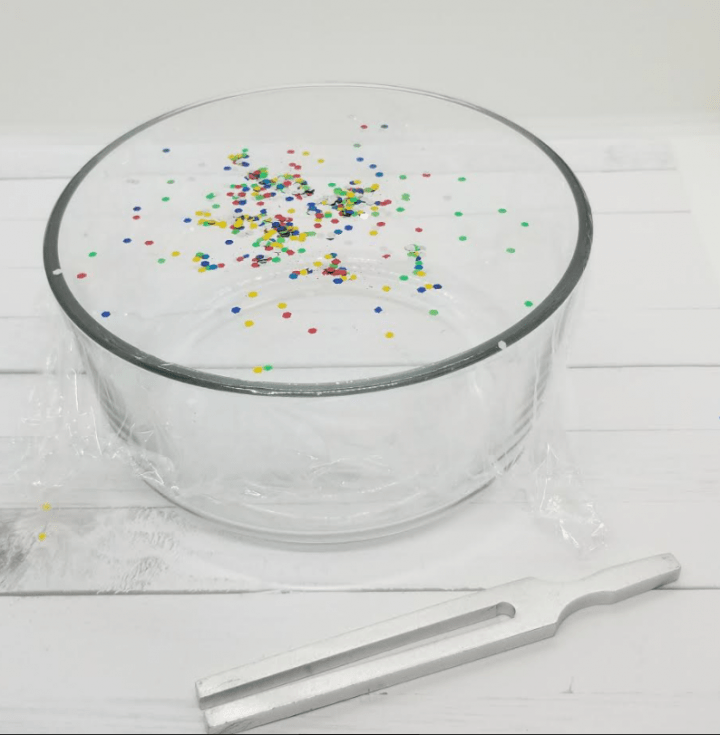
- Containers
- Plastic Wrap
- Uncooked rice or Large Sparkles (I added some food coloring to mine, but the color is just for fun.)
- Tuning Forks
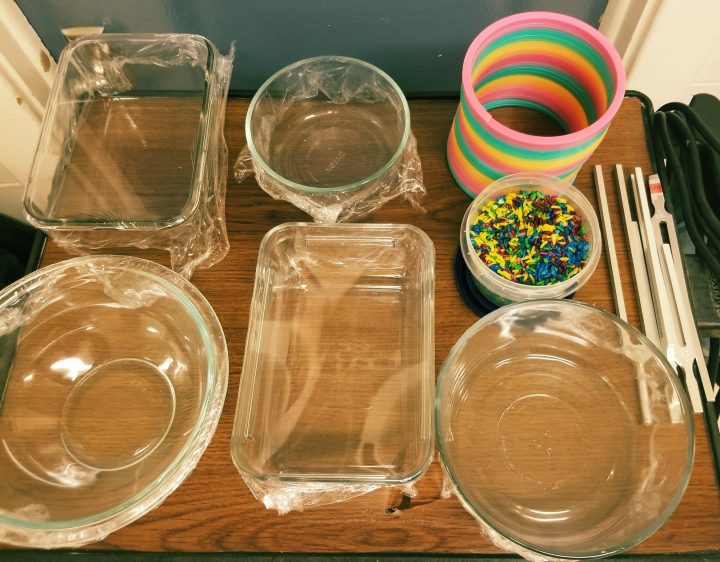
Since I did this experiment with several groups, I had several containers ready to go. I grouped Children into groups. The smaller the groups the better.
Cover each container tightly with plastic wrap. The wrap has to be tight or the experiment will not work.
The Steps
To start, I introduced the children to tuning forks. Many had not used or seen one before. Some recognized the fork being used in their music class before.
I gently banged one of the forks onto the carpet and held it up. We could hear a bit of a sound coming from the fork.

I had a child beside me gently touch the fork. They were able to feel that it was vibrating, but as soon as they touched the tuning fork the vibrations stopped.
We talked about the fact that when it was vibrating, it was making a sound. When it stopped vibrating, the sound also stopped.
Children then each had a chance to gently try out the tuning forks. They loved the hands-on experience. (I would suggest making sure to tell children not to hit the tuning forks too hard. Just a bit of a bump will work. Also make sure they are not banging it on anything that could break.)
Next, children went to the tables with a small group. Each group got a container with the plastic wrap stretched across it. I then gave each group a small container of rice. You only need a small amount for each group.
Also, the more rice you give each group the more clean up there will be. The rice will go flying!!! (But that’s also the fun of the experiment.)
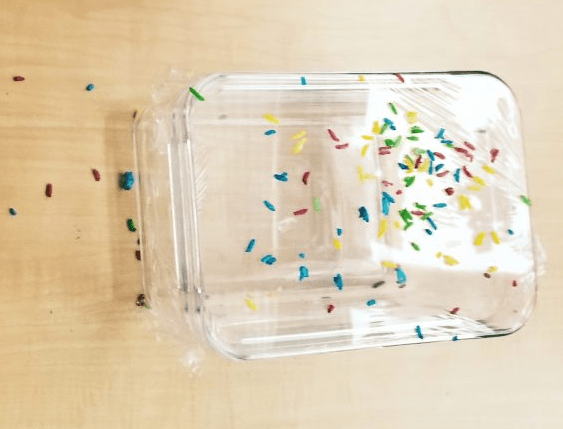
Children then pour the rice onto the plastic wrap. They make a guess what will happen once they touch the tuning fork to the plastic wrap.
Once they have guessed, they are ready to do the experiment.
When banged, the tuning fork vibrates, which creates a sound. Tap the fork so that it is making a sound, and vibrating.
Next, touch the vibrating fork to the plastic wrap, but be sure not to touch the side of the bowl. You only need to touch it gently to get the result.
As soon as the vibrating fork touches the plastic wrap, it sends vibrations across the wrap and to where the rice is sitting. These vibrations cause the rice to “jump” until the vibrations/sound stops.
The tuning forks are ideal to have on hand when teaching or learning about sound.
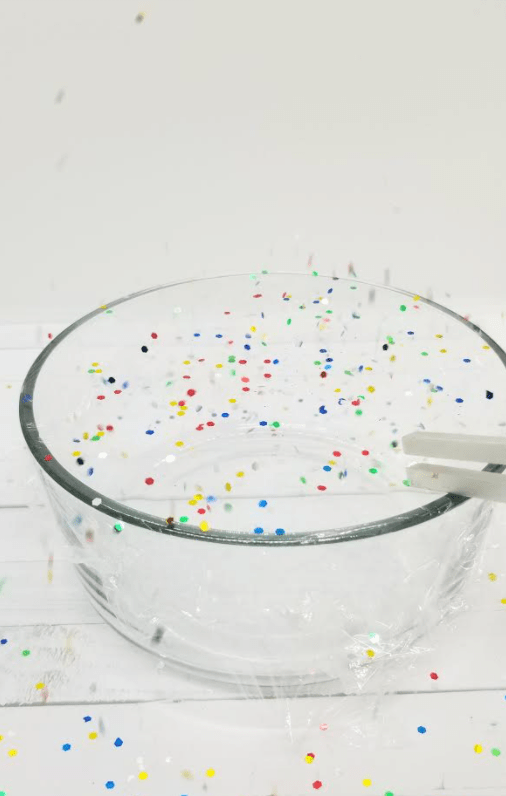
There was so much excitement in the room when the rice started bouncing everywhere! The mess is definitely worth the learning that occurred! Since the materials you need are so simple, you can repeat this tuning fork experiment several times.
I really wanted each child to be able to do the hands-on experiment. After each child got the rice to jump, the group worked together to gather the rice and put it back on the plastic wrap for the next child’s turn.
Repeat as many time as you wish!
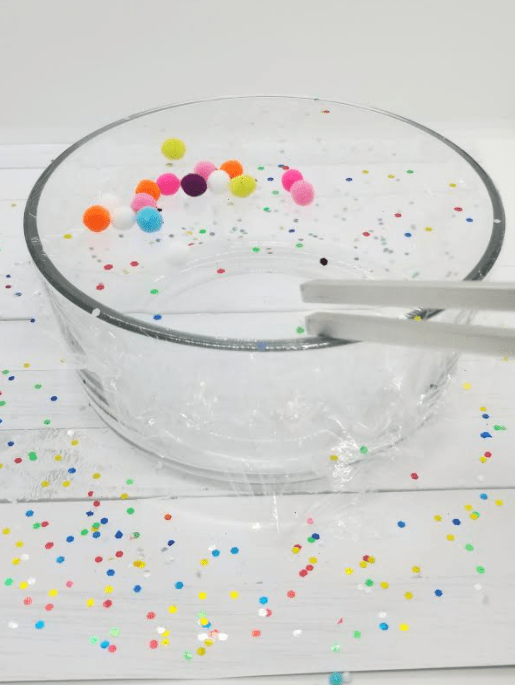
Sound Experiments Extension Activity
The tuning fork experiment sparked so much interest in my classroom that I wanted to extend our activity for another science lesson. If you have all of the materials for the fork a sound experiment, all you need extra to do another experiment is water!
As an extension, you can remove the plastic wrap and fill the glass bowls with water. I also added a few drops of food coloring just for fun.
Repeat the experiment above by banging the tuning fork and then touch it to the container with water. Make sure to only touch the water, and not the container.
When the fork is touched to the water it makes the water splash out of the bowl. This sound experiment is an easy way to show kids that sound causes vibrations/movement. Happy experimenting!
For your convenience, this post contains affiliate links. As an Amazon Associate I earn from qualifying purchases and I may earn a small commission at no cost to you.


Join Hands-On Teaching Ideas
Join Hands-On Teaching Ideas to gain access to my Free Resource Library filled with lots of printable learning resources, from a choice board full of STEM activities for kids to escape room games, you can download anything that interests you for your classroom or home. Subscribe here.

More Hands-On Teaching Ideas
If you enjoyed the sound experiments above, you may like the activities below. From science to art and even escape rooms, I’ve got lots of learning activities to keep children busy.
Leave a Reply