
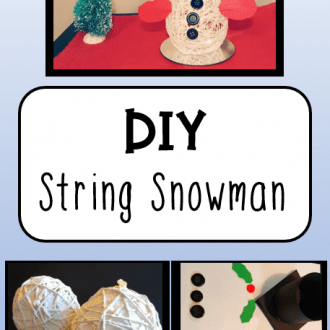
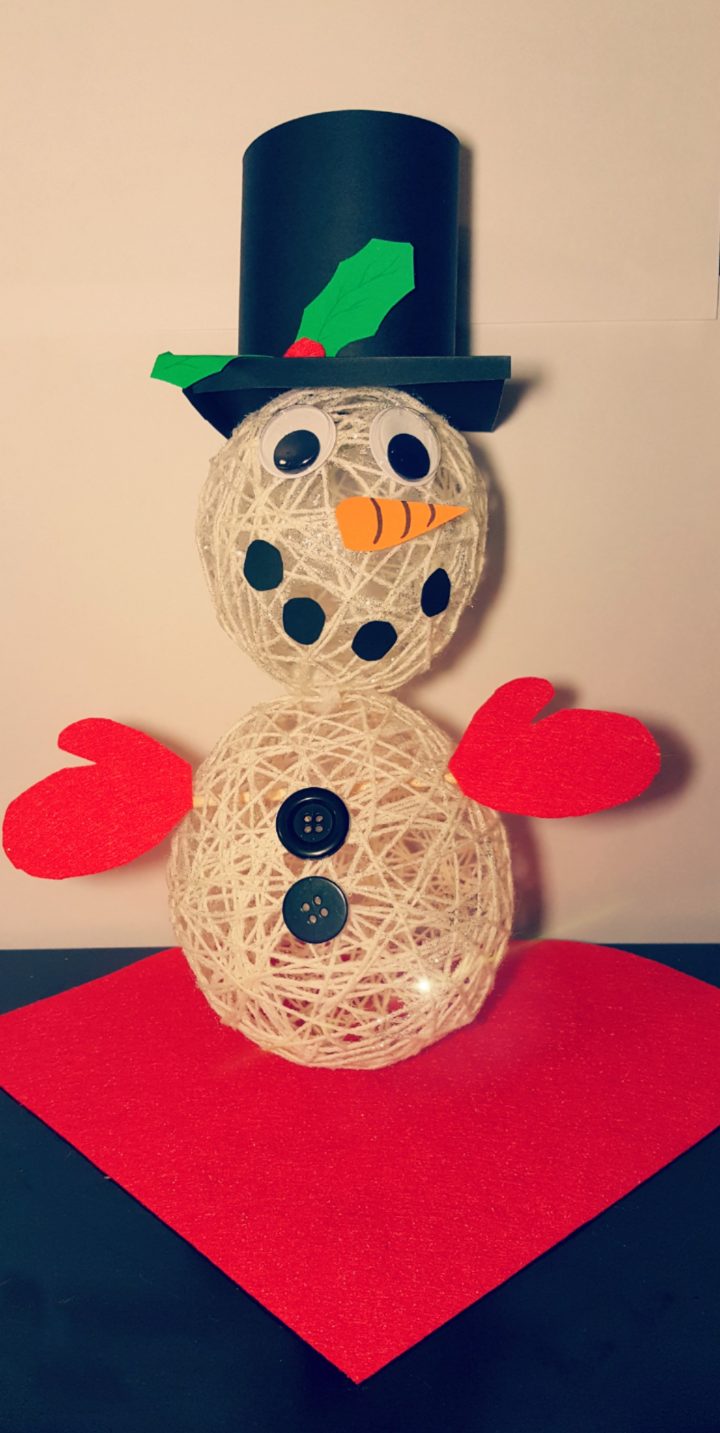
Isn’t this snowman adorable? Sometimes craft ideas just work out exactly how you had hoped. I made this snowman with my kids for a winter decoration for our house. We had so much fun creating it, that we ended up making a few extra.
Sometimes I am really organized and buy specific materials for winter craft ideas that I want to tryout with my kids. Other times, we use what we have on hand.
Often, our spontaneous craft ideas turn out to be some of our favorites. This string snowman is definitely one of those ideas.
With Christmas around the corner, and a bit of snow on the ground, making a snowmen was on my kids minds. This snowman craft idea is simple and turns out so beautifully.
I love the fact that it is 3 dimensional because it makes a beautiful decoration.
Once you’ve created this adorable snowman, hang onto the string to make even more string art that kids will love. Grab a collection of colorful yarn for this unique Yarn Art activity.
Crafts and other hands-on activities are a great way to spend time with kids during the winter. For more ideas to try during the winter, check out this the 7 Fun Ways to Homeschool in the Snow.
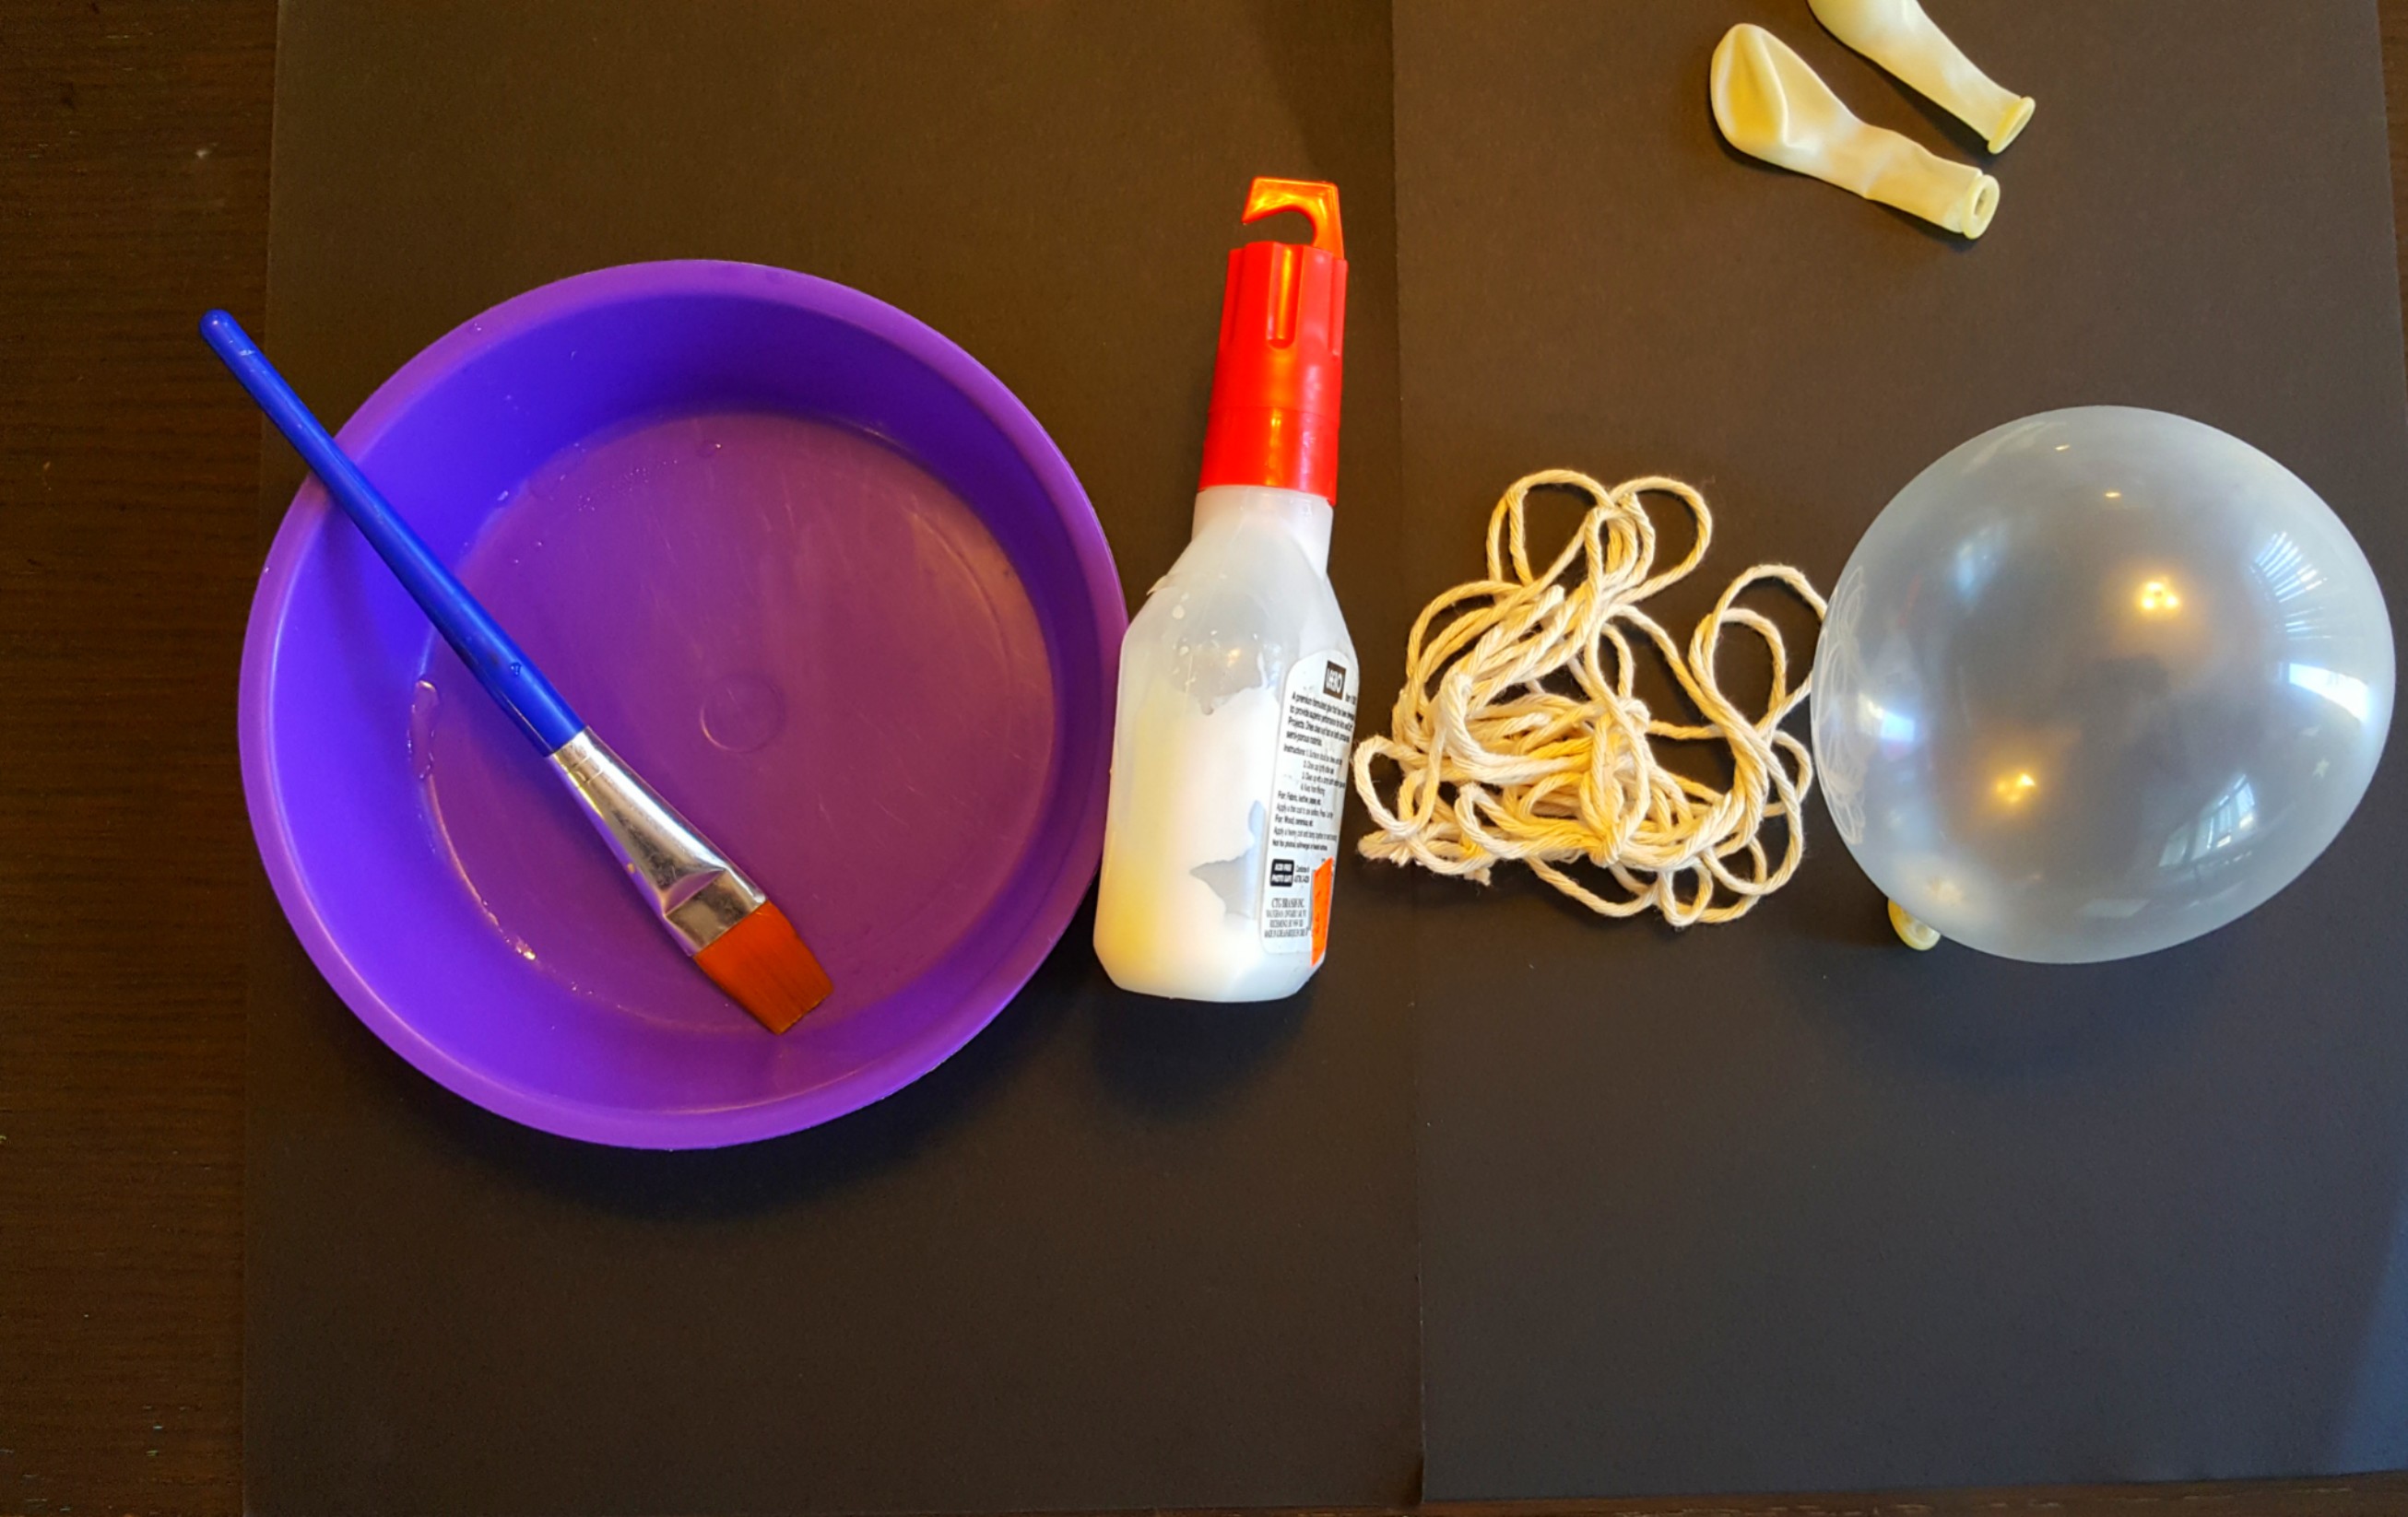
Materials
You don’t need a lot of materials for this snowman craft, and it is very inexpensive to make. You will need:
- 2 Balloons
- Glue
- String
- Paint Brush
- Construction Paper
- Googly Eyes
- Buttons
- Wooden Stick or Twigs
Steps to Creating Your Snowman
Start with 2 small balloons. You can make your snowman any size you like, but we kept it small because it’s easier for young kids. Blow both balloons up to your desired size. Fill one balloon slightly less than the other (for the head).
Covered your balloon in white glue. It works best if you use a paint brush to brush the glue all over the balloon. Next, dip your string into the glue to make sure that it is fully covered.
Now, wrap your string all around your balloon and wrap in many directions to help make it more secure. I.e. Make lots of Xs as you cross the string and layer it.
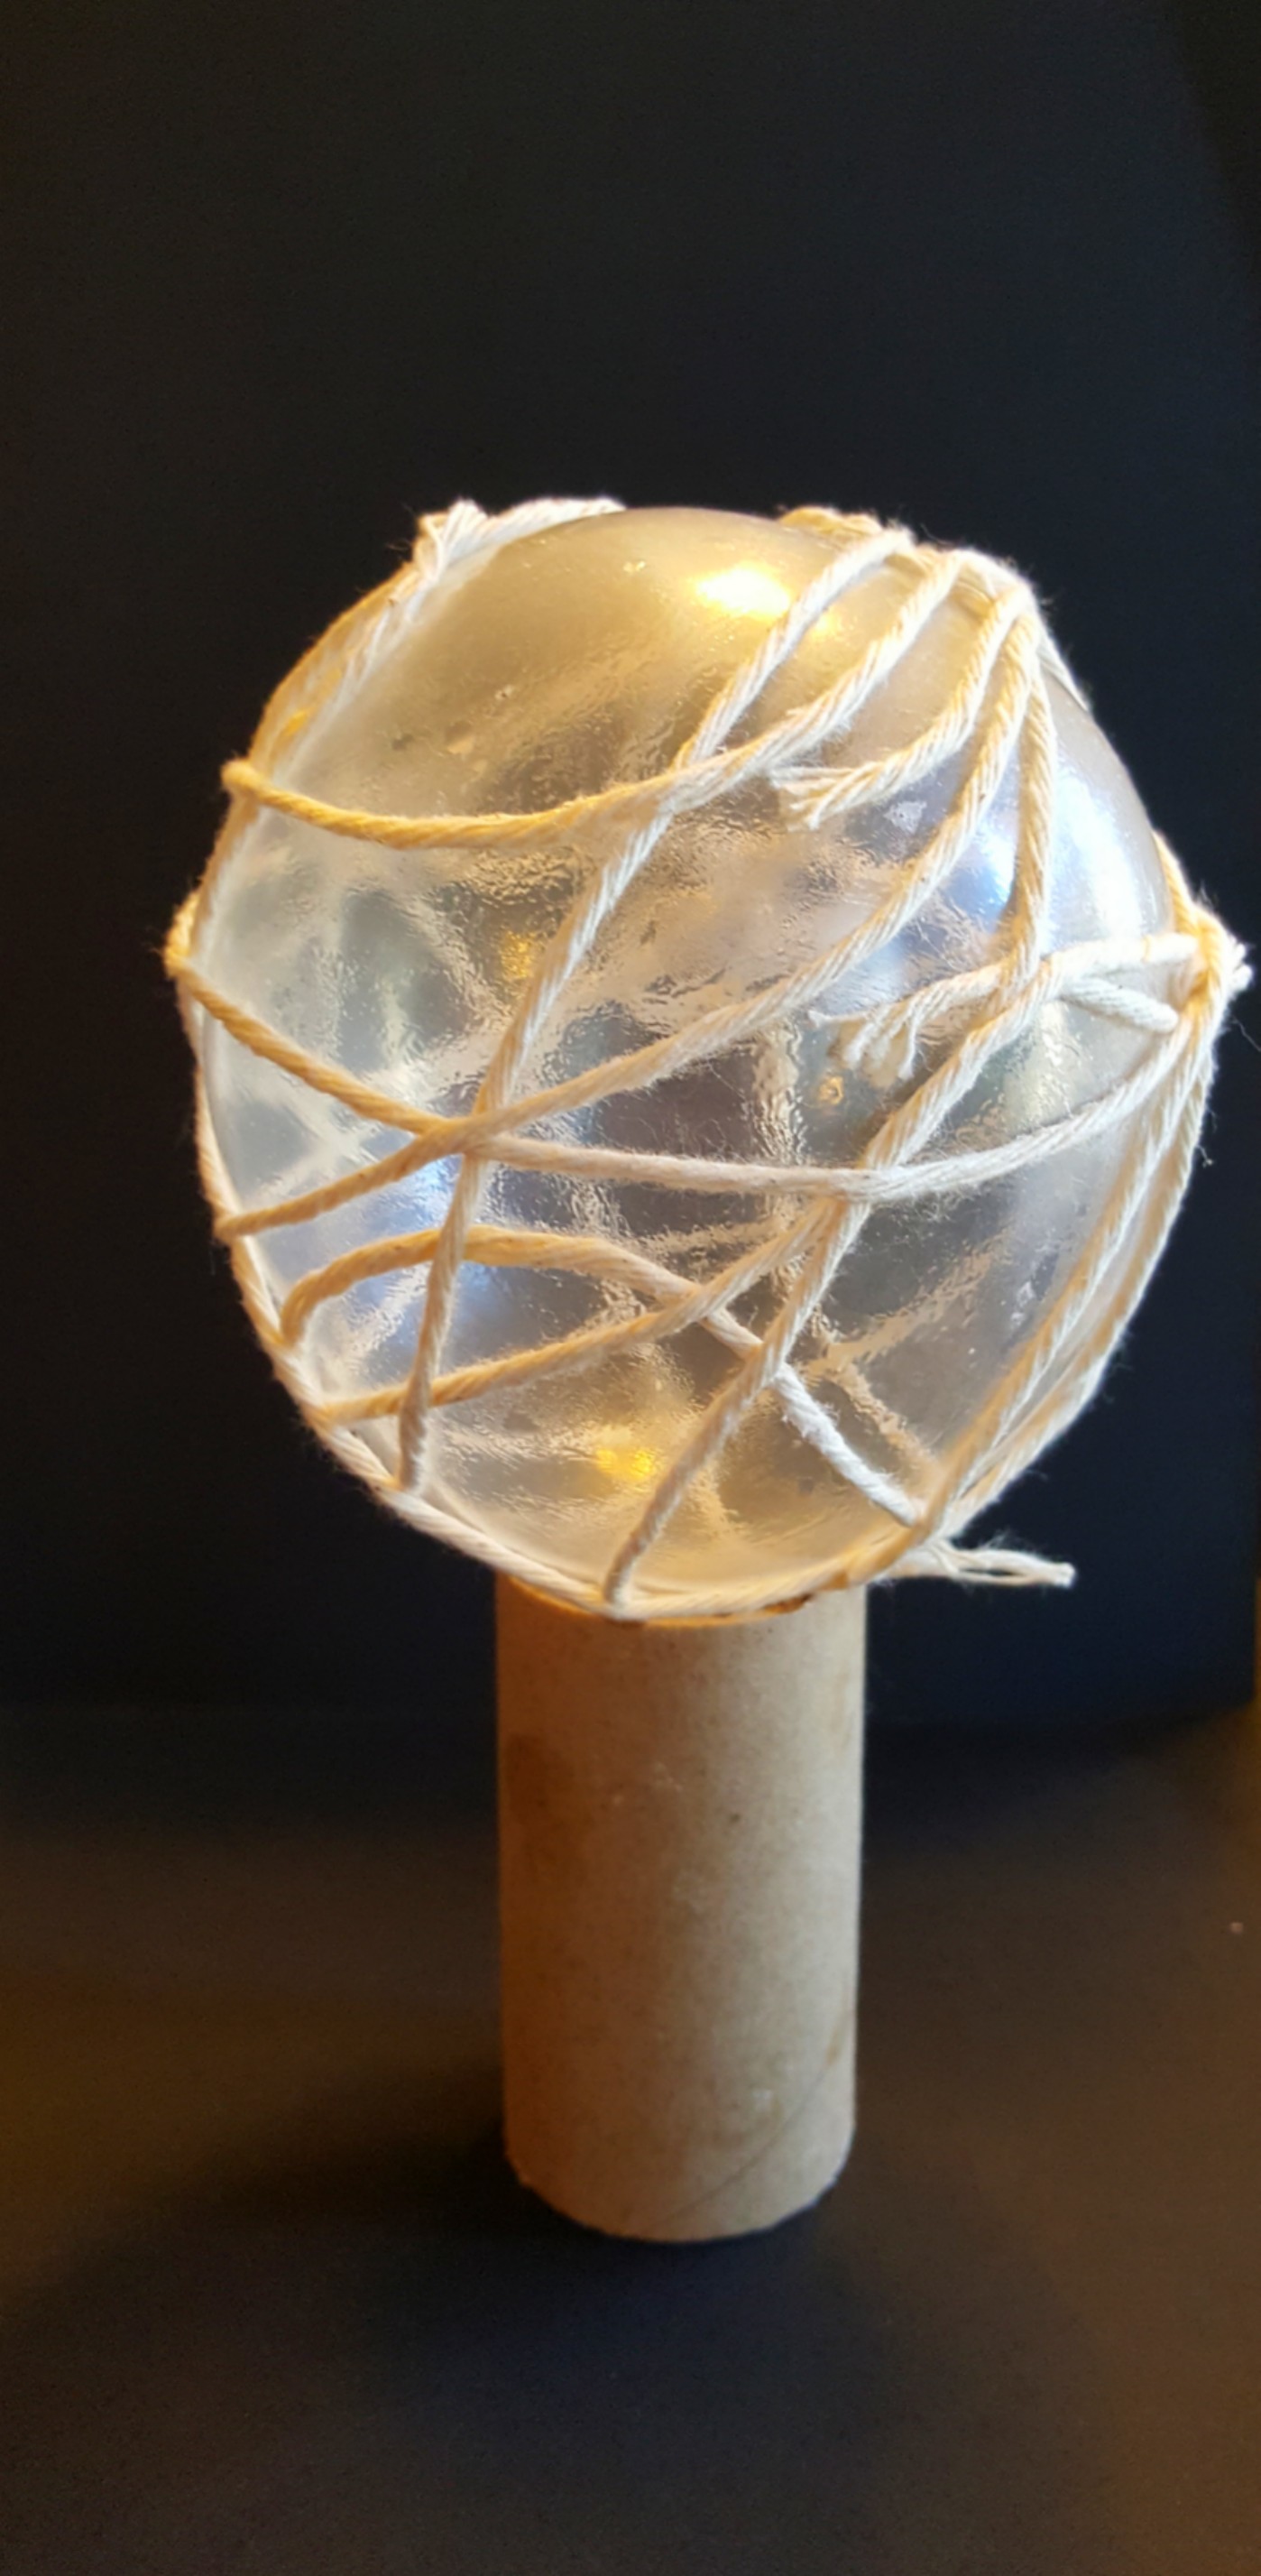
You want to cover the balloon enough that it will hold its shape, but you still want some gaps that you can see the balloon through the string.
It is best to leave your balloon with the string on it to dry overnight. Once dry, the string should be hard.
Once it is fully dry, I suggest painting the string white. Our string was white to begin with, but the paint gives it a much cleaner look.
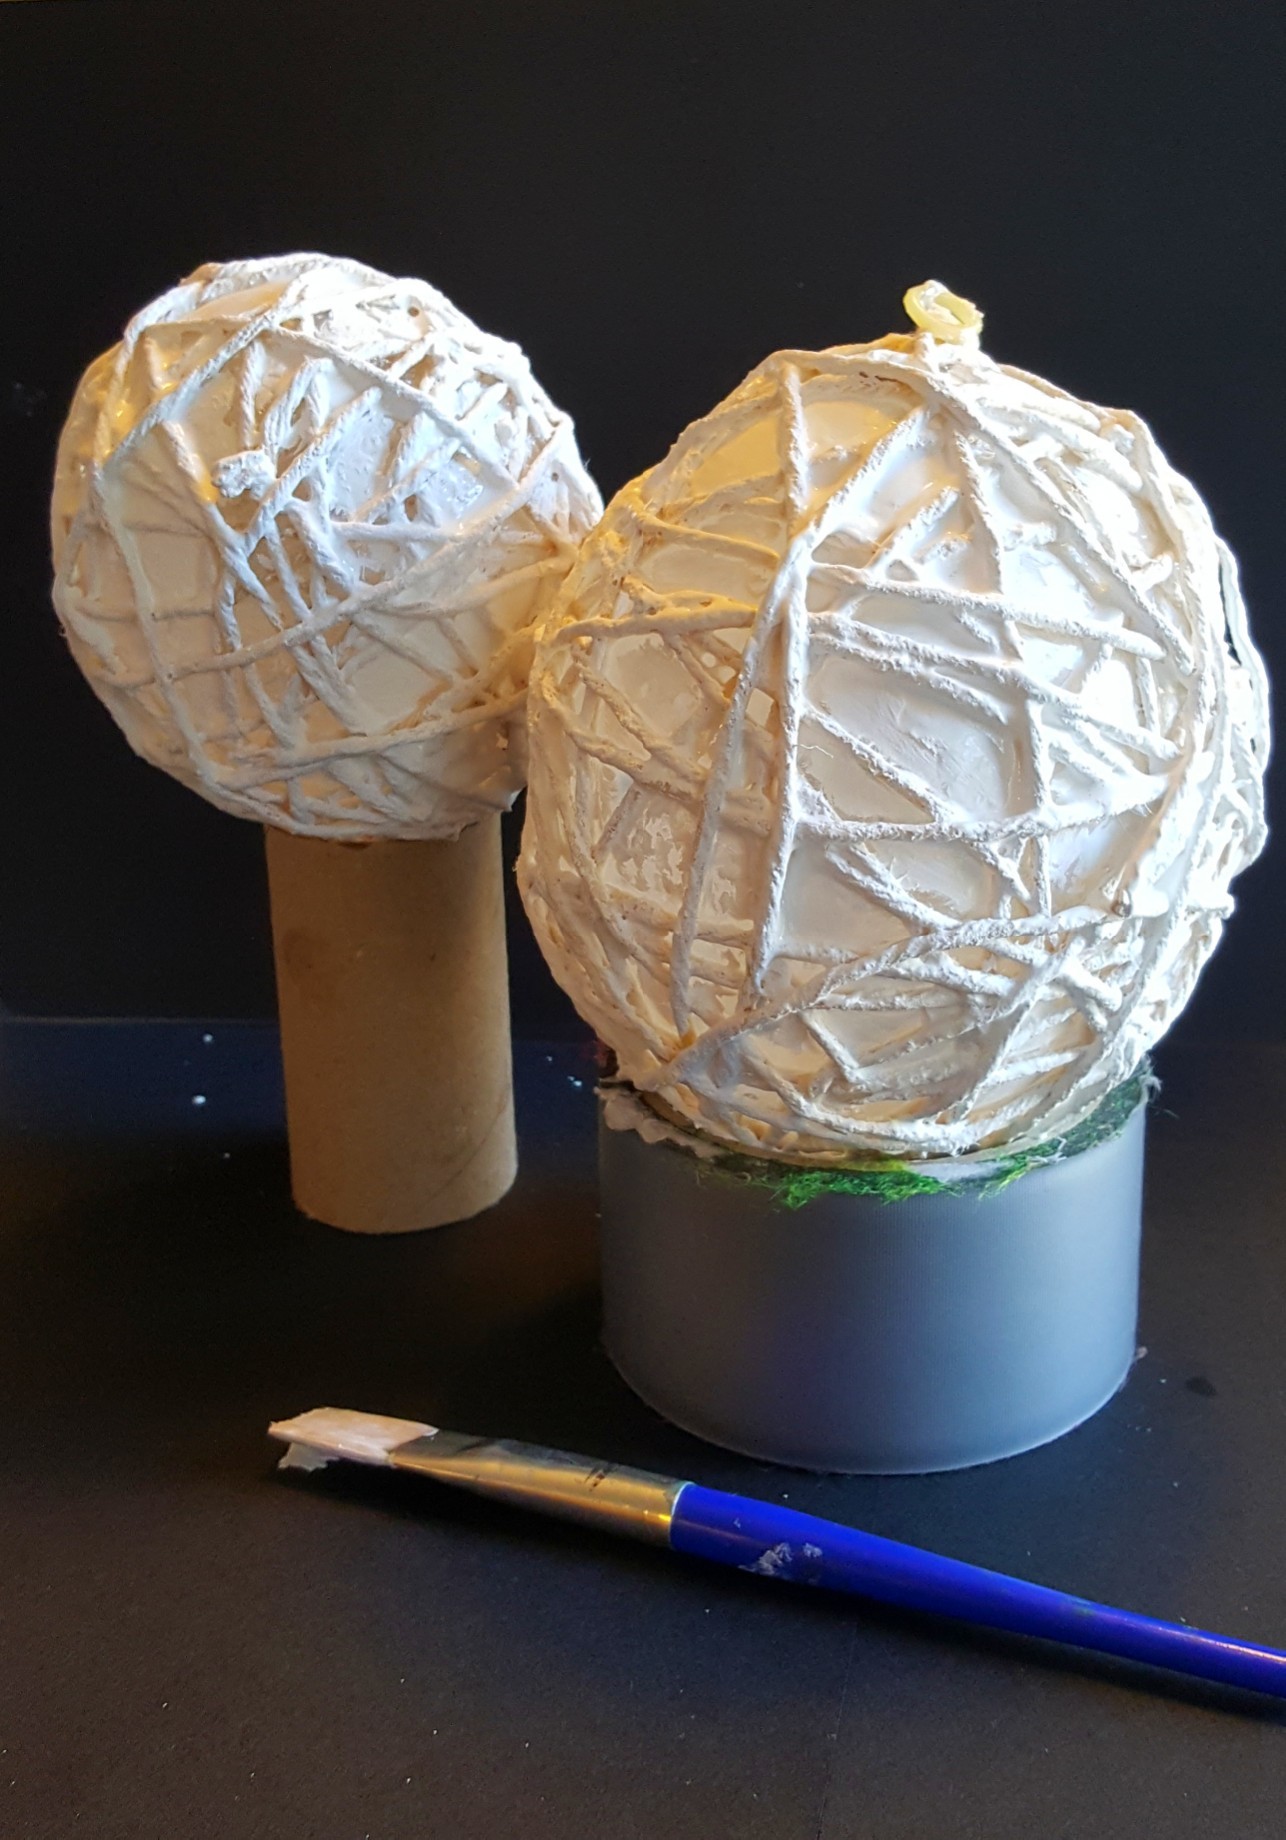
Just for fun, on top of the wet paint, we sprinkled some silver sparkles.
The Details – Winter Craft Ideas
Next, as we waiting for the string to dry, we created our details for our snowman. This is where you can get really creative and add the features that you like the look of.
Also, if you are creating the snowman with children, they will likely enjoy creating the details and pieces of the snowman.
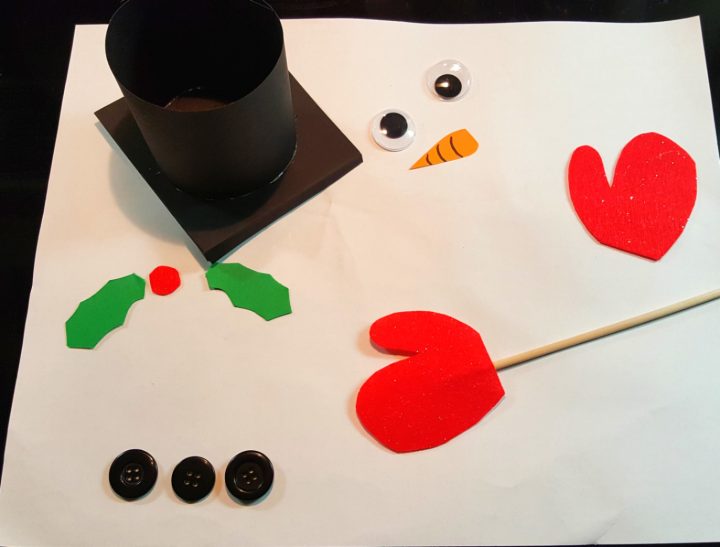
We kept it pretty simple with the cut outs that we used. I simply used construction paper for the holly, nose and mittens. We used buttons, for the snowman’s coal on his belly and googly eyes.
For the top hat I simply rolled a rectangular piece of black construction to form a tube and glued the ends together. I then glued the the tube onto a square sheet of black paper.
To make the mittens, I cut out 4 identical mitten shapes. I then glued two mittens together with the long stick, or twig, between the two mitten pieces.
You don’t have to do this, but it makes your snowman look great from all sides.
Only glue one set of mittens onto the stick before your snowman is ready to assembly. (You need to be able to stick the stick through the snowman and then attach the other set of mitts).

Once our snowman was fully dry, we popped the balloon inside. Once popped, we had two, hard, white string balls. You can use glue, or some string to tie the two balls together. One on top of the other.
Hot glue works best for putting your snowman together. It is also strongest if you use hot glue. Glue the buttons onto your snowman’s belly.
Put the stick with the one set of mittens through the belly and then glue the other set of mittens onto the other end of the stick.
Add some black circles for the mouth and attach your carrot nose. All you have left to attach are the googly eyes and your snowman’s top hat!
Our snowman tilts a little bit to the side. I could easily fix this with a bit more glue. However, I kind of like the tilt – it gives him character.

I ended up setting our snowman on a small, circular mirror. It looked a little bit like our snowman was standing on ice. The other thing you will enjoy about your snowman when you are done, is that it looks beautiful at night with a light on the back of it.
I love how our snowman turned out. My kids were pretty proud of their snowmen too. I love when our winter craft ideas turn out this well! Since we ended up creating three snowmen, we have started a bit of a little snowmen town.
I love the fact that none of our snowmen are the same. They are all a little bit different, but they all look great!
For your convenience, this post contains affiliate links. As an Amazon Associate I earn from qualifying purchases and I may earn a small commission at no cost to you.
For More Holiday and Winter Craft Ideas, Check Out the Ideas Below…
Looking for more adorable winter craft ideas? These cube decorations are simple to create (trust me – I made them with over a hundred children in kindergarten!) and they are inexpensive too. Four to choose from and they also make wonderful ornaments.
For More Activities To Do with Kids Any Time of the Year…
This collection of 40 DIY escape room puzzles are ideal to use to create an escape room at home. Kids will love problem solving to “escape” the room.
Keep some learning happening over the holidays, with this collection of Winter Activity books. Kids will enjoy the fun, themed activities in one organized booklet. Visit “Shop” at the top of the screen to learn more.
Leave a Reply