
I remember in elementary school doing mask making during an art period. We made face masks from plaster cloth. I remember the experience very clearly and even the feel of the plaster on my face. I loved the mask that I made!
Today my kids were interested in making a mask. I thought they would love making one the way I remembered making mine so many years ago.
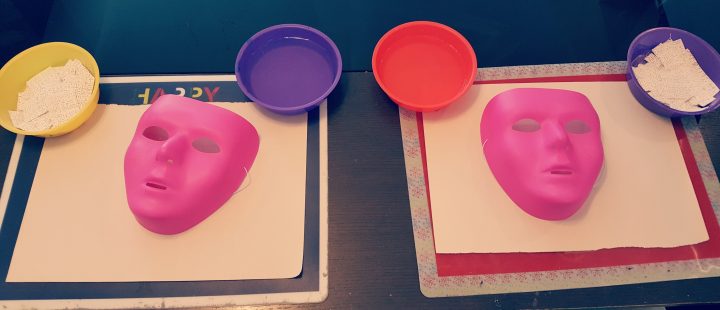
However, they didn’t like the idea of their face being covered, which I understand. I wouldn’t suggest it for young children. But for this activity, all you need is a plastic mask mold.
Instead of putting the plaster directly on their skin, we used plastic face masks. This worked really well for my young children!
(If you do put the plaster cloth directly on the skin, make sure that it is the proper cloth intended for this, read labels carefully and make sure that nostrils and mouths are never covered!)
Materials
There are a few special materials that you need for this activity. One of the great things about the materials is that you can reuse the plastic masks and you will have plaster cloth left over to creating something else.
- Plaster Cloth (Link at Bottom)
- Plastic Mask
- Paint and Paint Brushes
- Other Decorative Items for Mask (i.e. pompoms etc.)
If you have never worked with plaster cloth before, it is unlike anything else! It is a really neat sensory activity for kids and a great art material to work with.
The other great thing about plaster cloth is that it dries very hard. If you are looking to create something that is going to last, I strongly suggest trying out plaster cloth.
Mask Making Steps
Start by cutting the plaster cloth into strips of different sizes. You will also need a bowl of water for the plaster.
If reusing the mask is really important, you can apply a thin layer of petroleum jelly onto the mask. This way when the mask dries, it will easily come off of the plastic mask.
With the masks that I used, the plaster cloth came right off without the petroleum jelly, but depending on the material your mask mold is made of, you can always try the petroleum jelly.
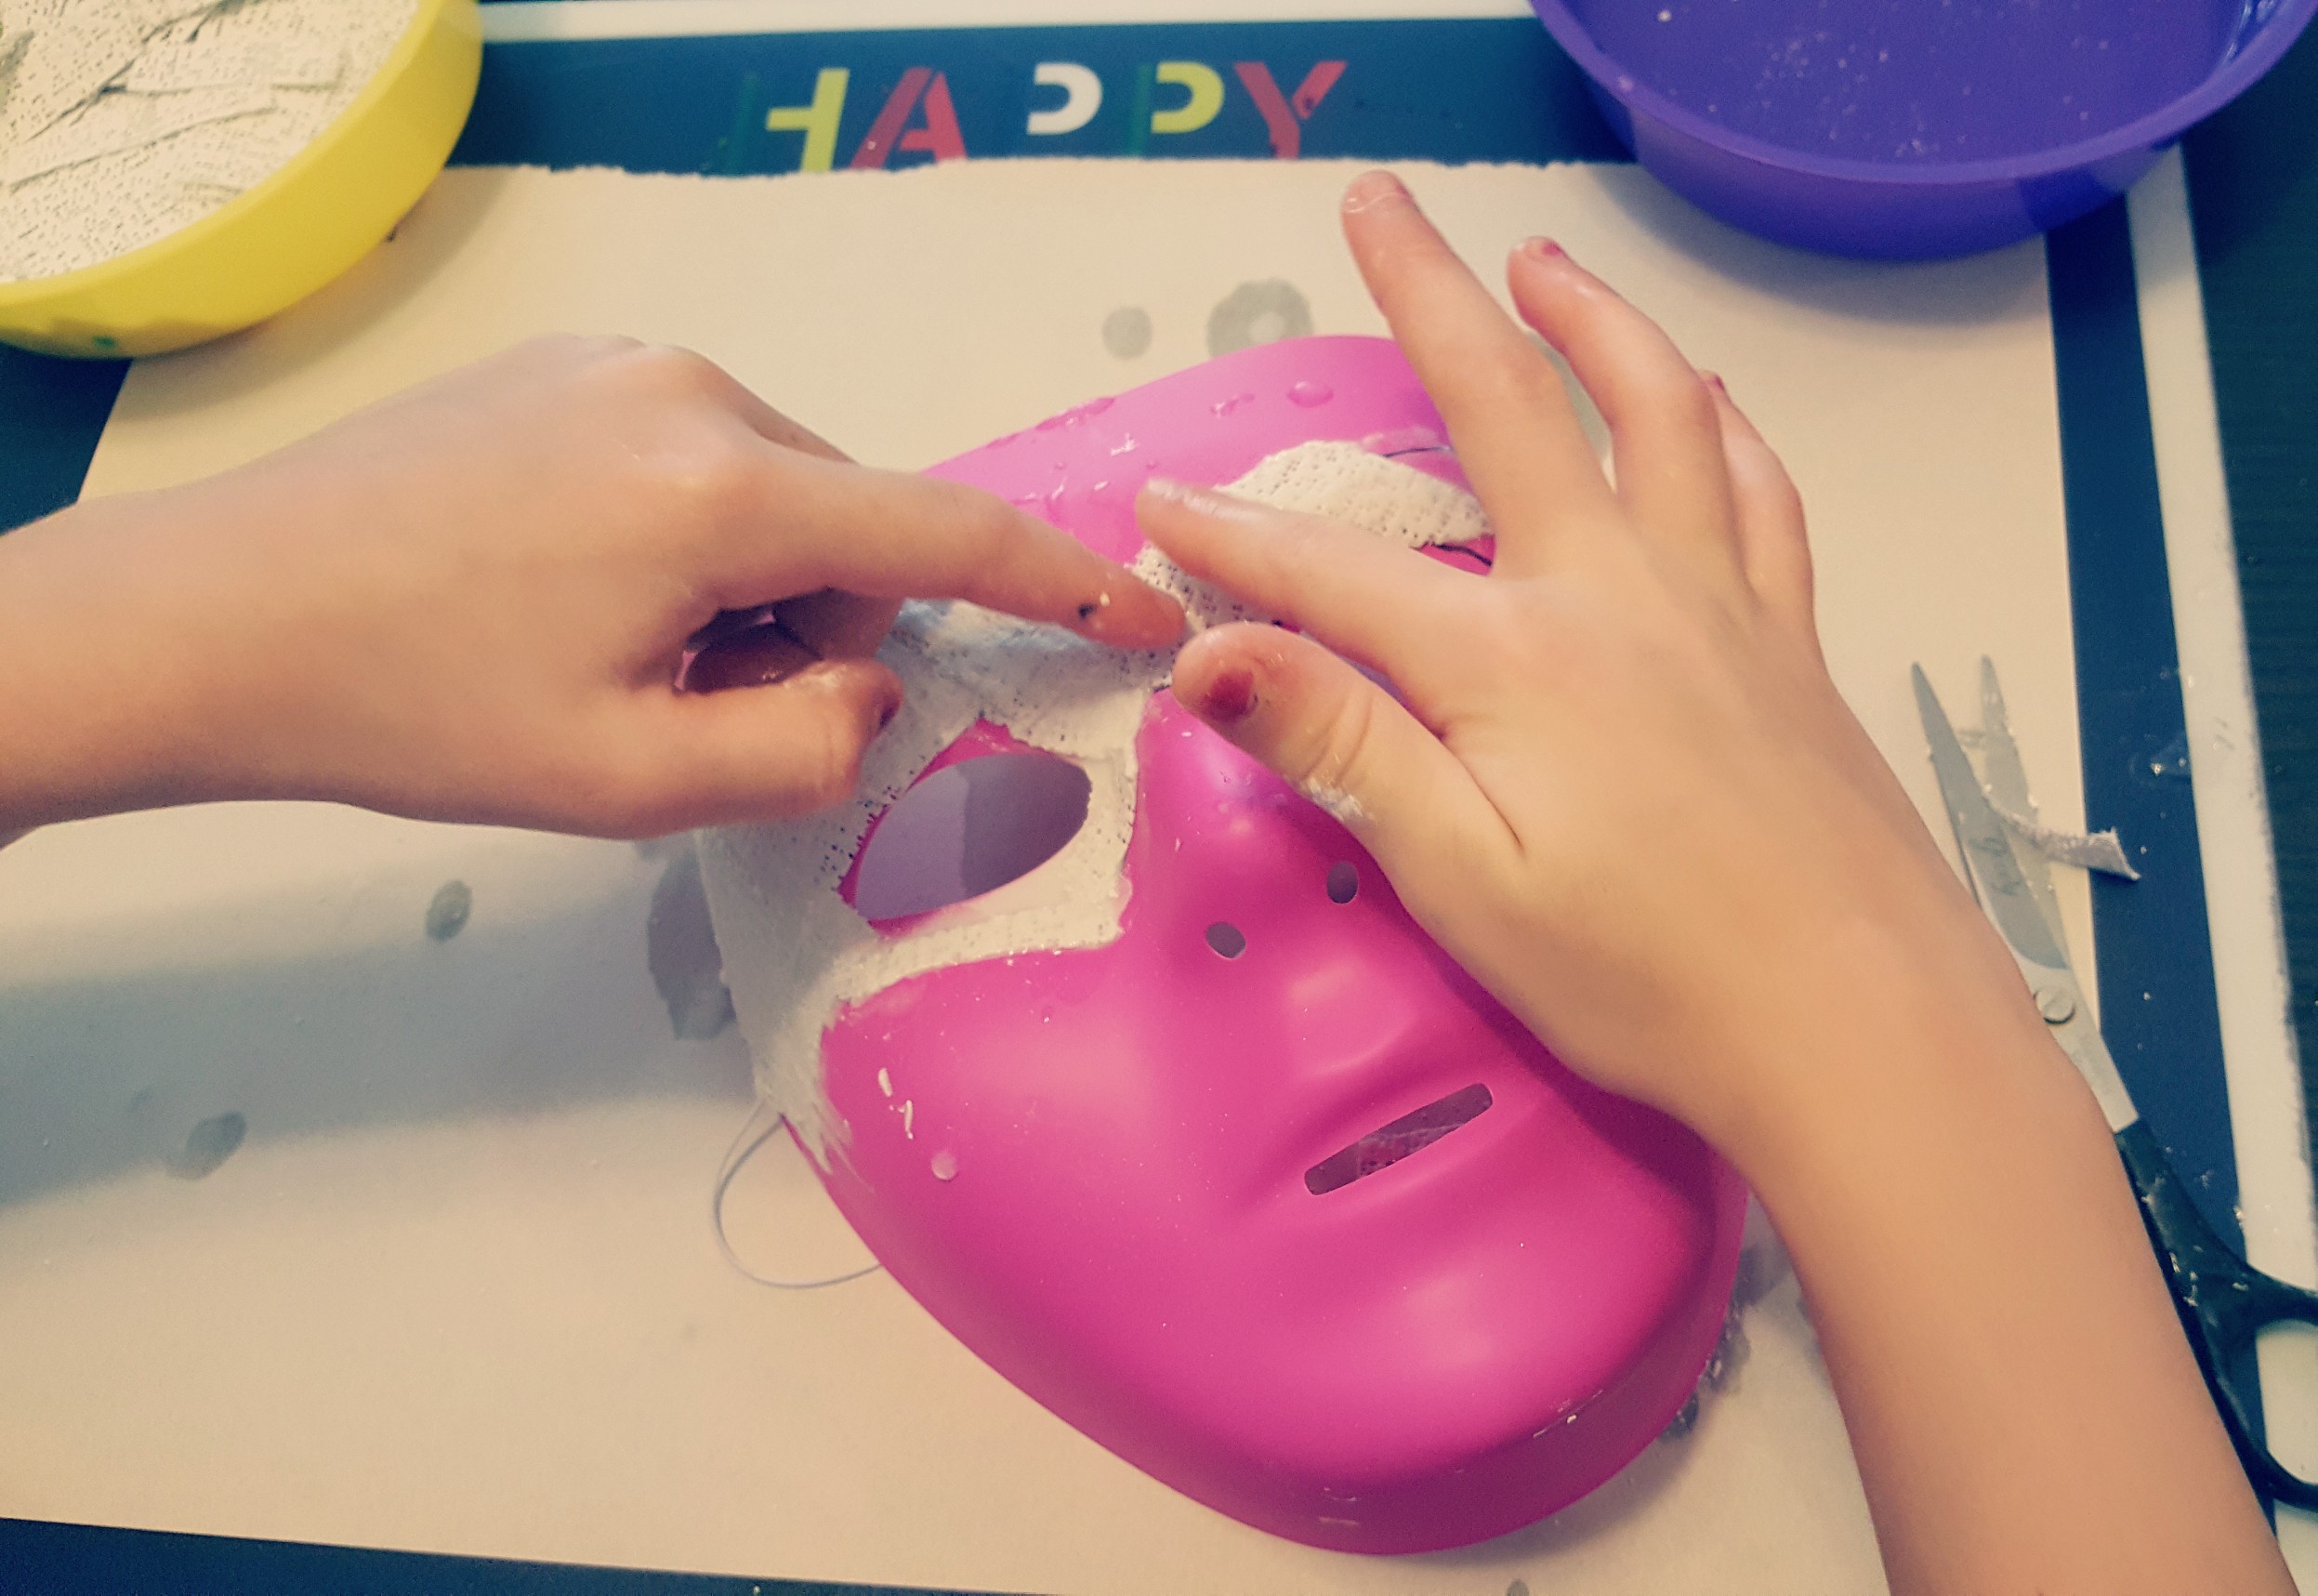
To start, choose a small piece of plaster cloth and dip it into the water. (I find warm water works best.) Do not leave it in the water.
Set the wet cloth onto the plastic mask and use your finger to smooth out the bumps in the cloth. Continue to cover your mask. Try to go in different directions and overlap the cloth all over.
I usually try to apply at least 2 layers on the mask. The more layers, the harder and stronger your mask will be, but even 2 layers is quite strong.
Go around the eyes and nose so that if you choose to wear the mask once it is done, you can breathe and see through it. These masks are best for decorations though because they are heavy.
I always like to add a smooth piece of cloth around the edges and eyes when I am done my mask. This way the edges are not rough or jagged.
The plaster cloth dries quite quickly. You may find that some areas are dry before you have even finished your mask. That’s okay. You can even go back and add details to a hardened mask.
When my children and I did this activity, one of my kids decided that they only wanted to create a mask that would cover their eyes. My other child wanted to create a full mask.
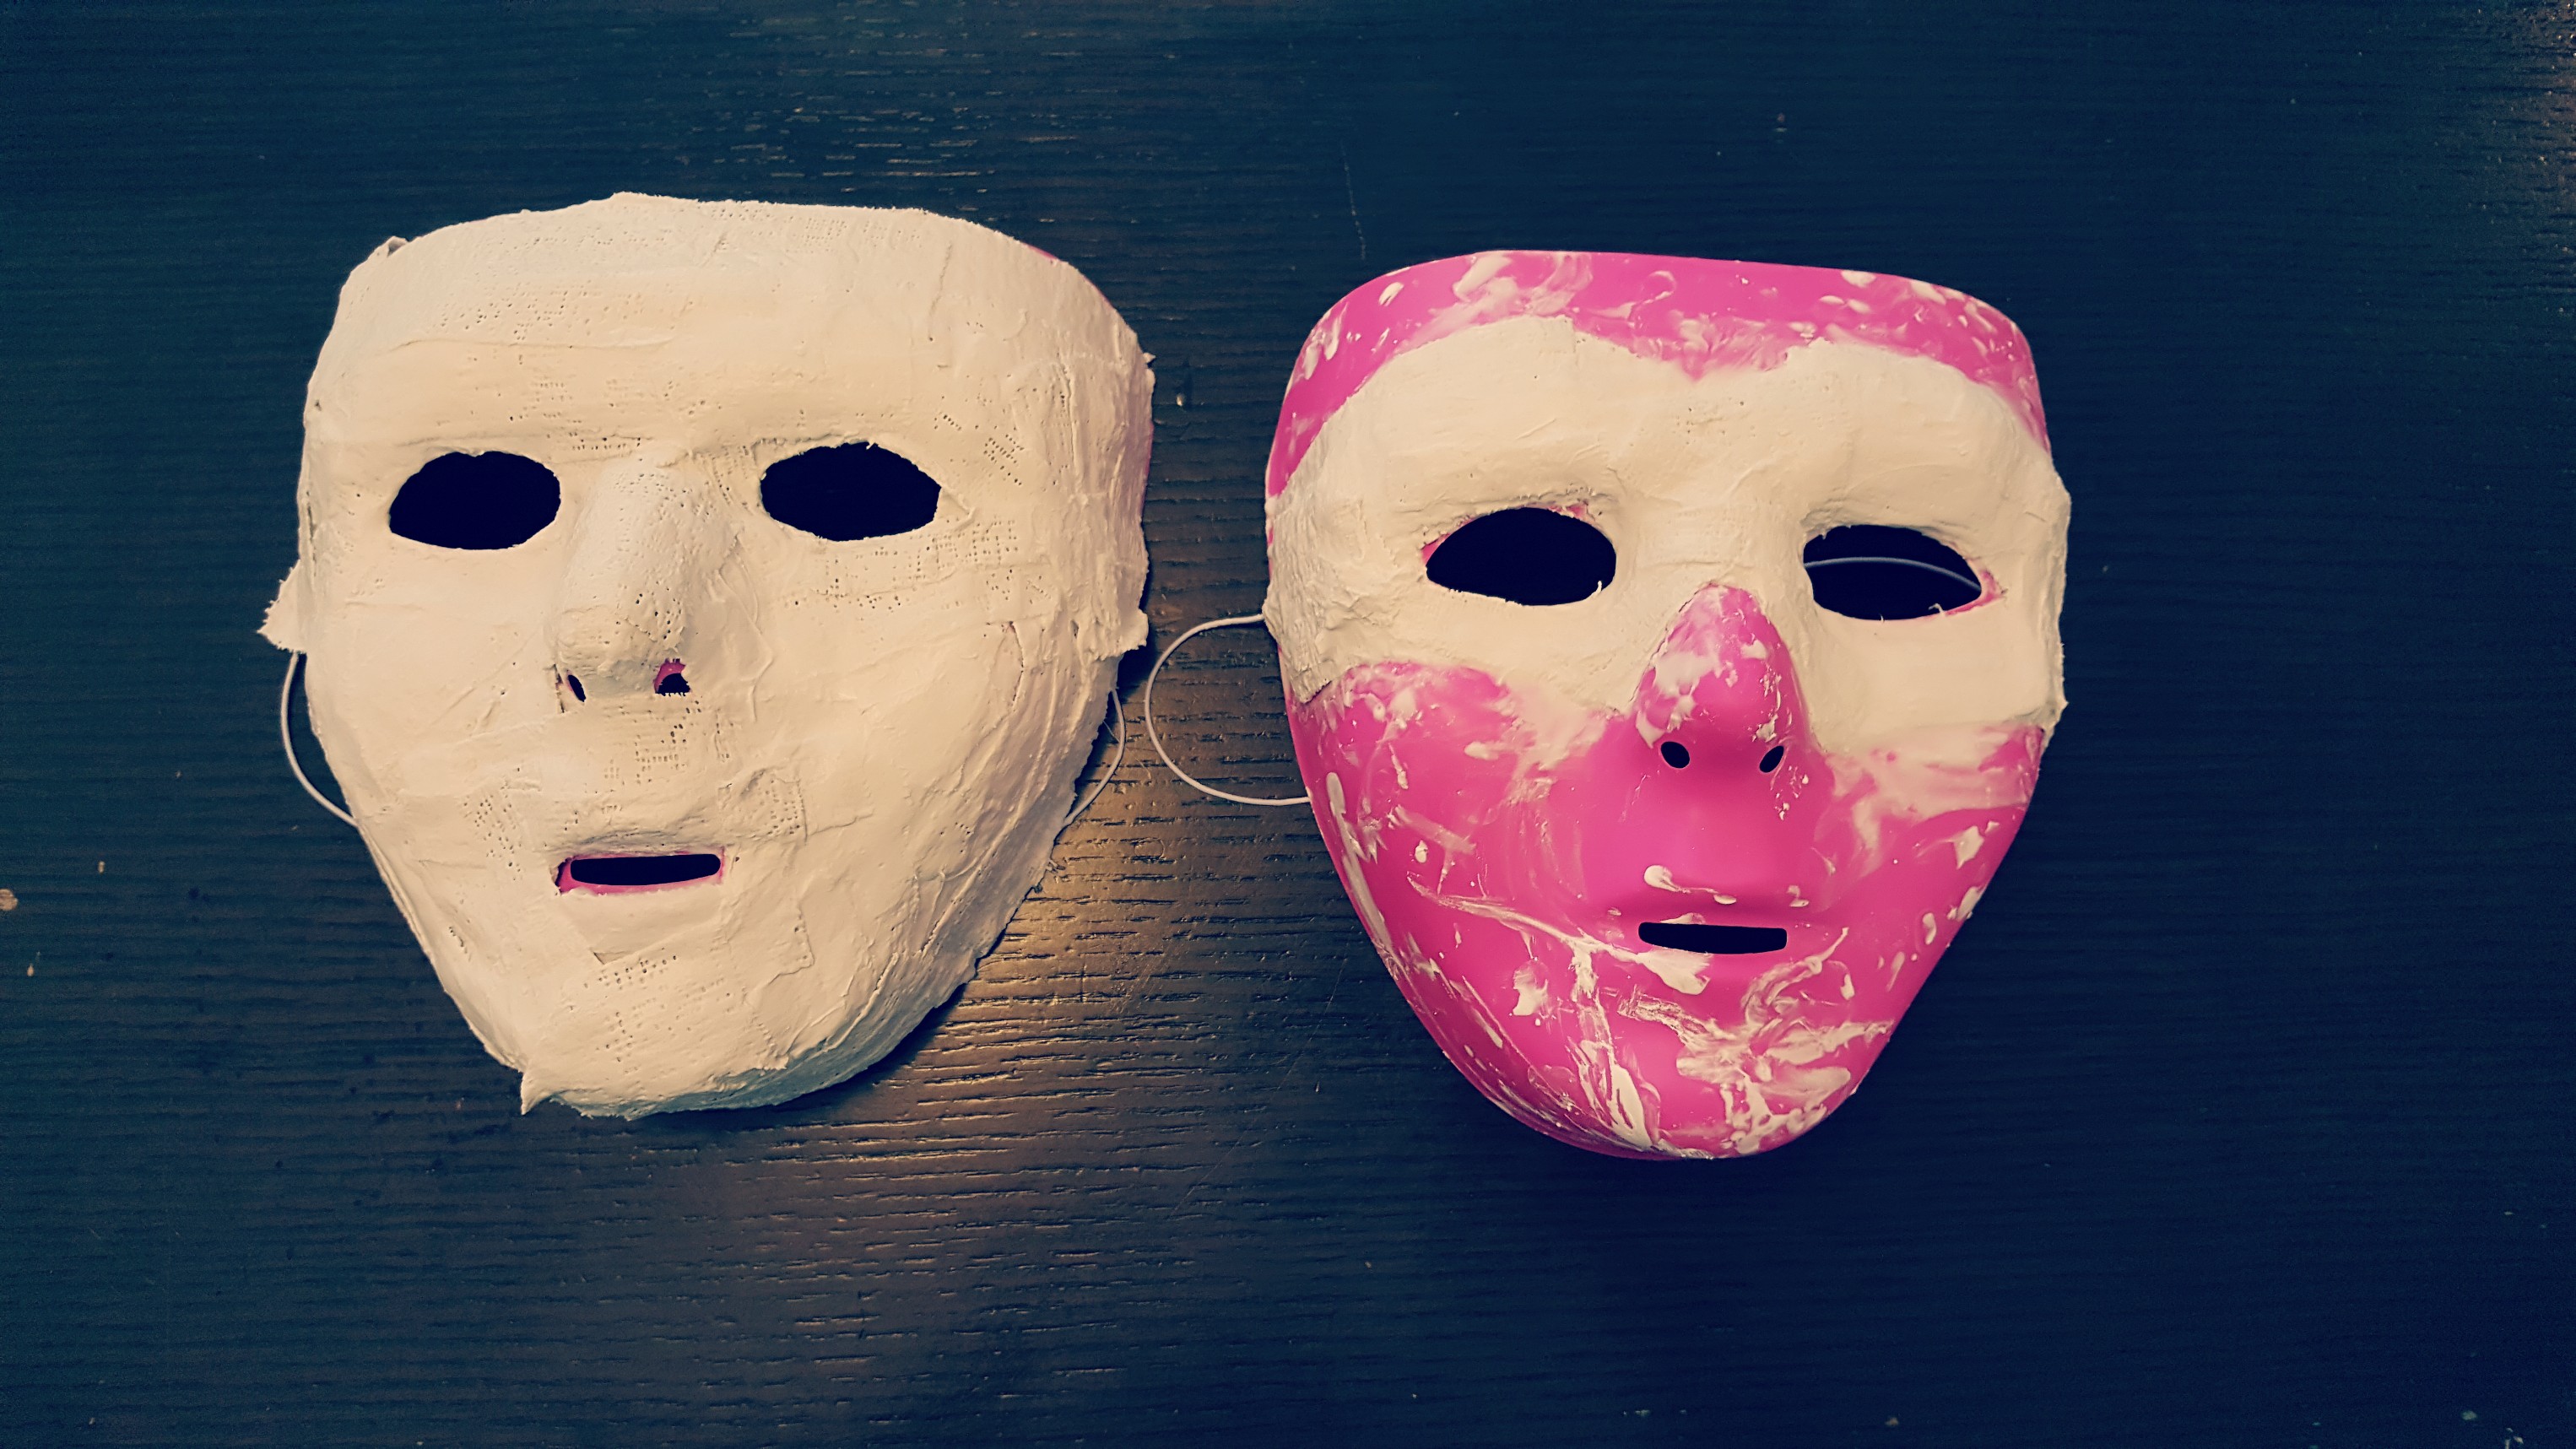
Once the masks were done we left them overnight to dry. They easily came off of the pink face mask in the morning, but we then left them for another day to dry underneath.
It was a great sensory activity to work with the plaster cloth. It is an interesting feeling once it is wet. My kids really liked working with the plaster cloth and it is easy to use.
Decorating Your Mask
Once they were fully dry and hard, my kids could hardly wait to start painting and decorating. The possibilities are endless!
My kids started with paint and painted their masks. We then got out the hot glue gun and I glued on pompoms and feathers where they wanted them on their masks.
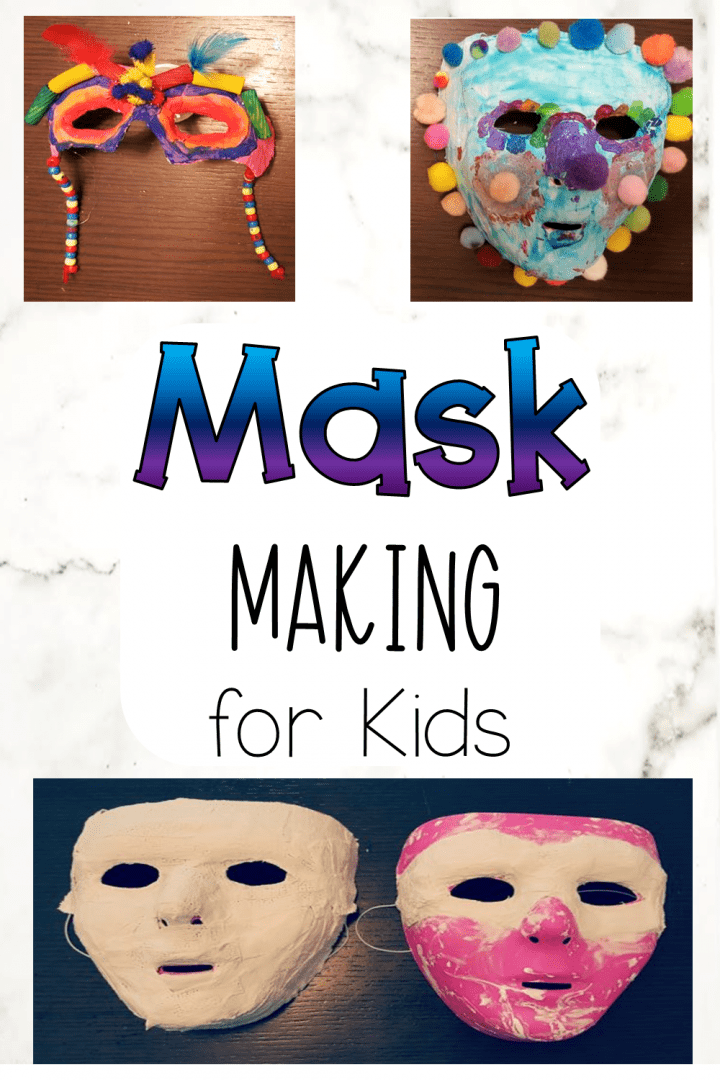
The masks turned out beautifully and my kids had so much fun. We had a lot of the plaster cloth left over, so we ended up each creating another mask and experimenting with the plaster.
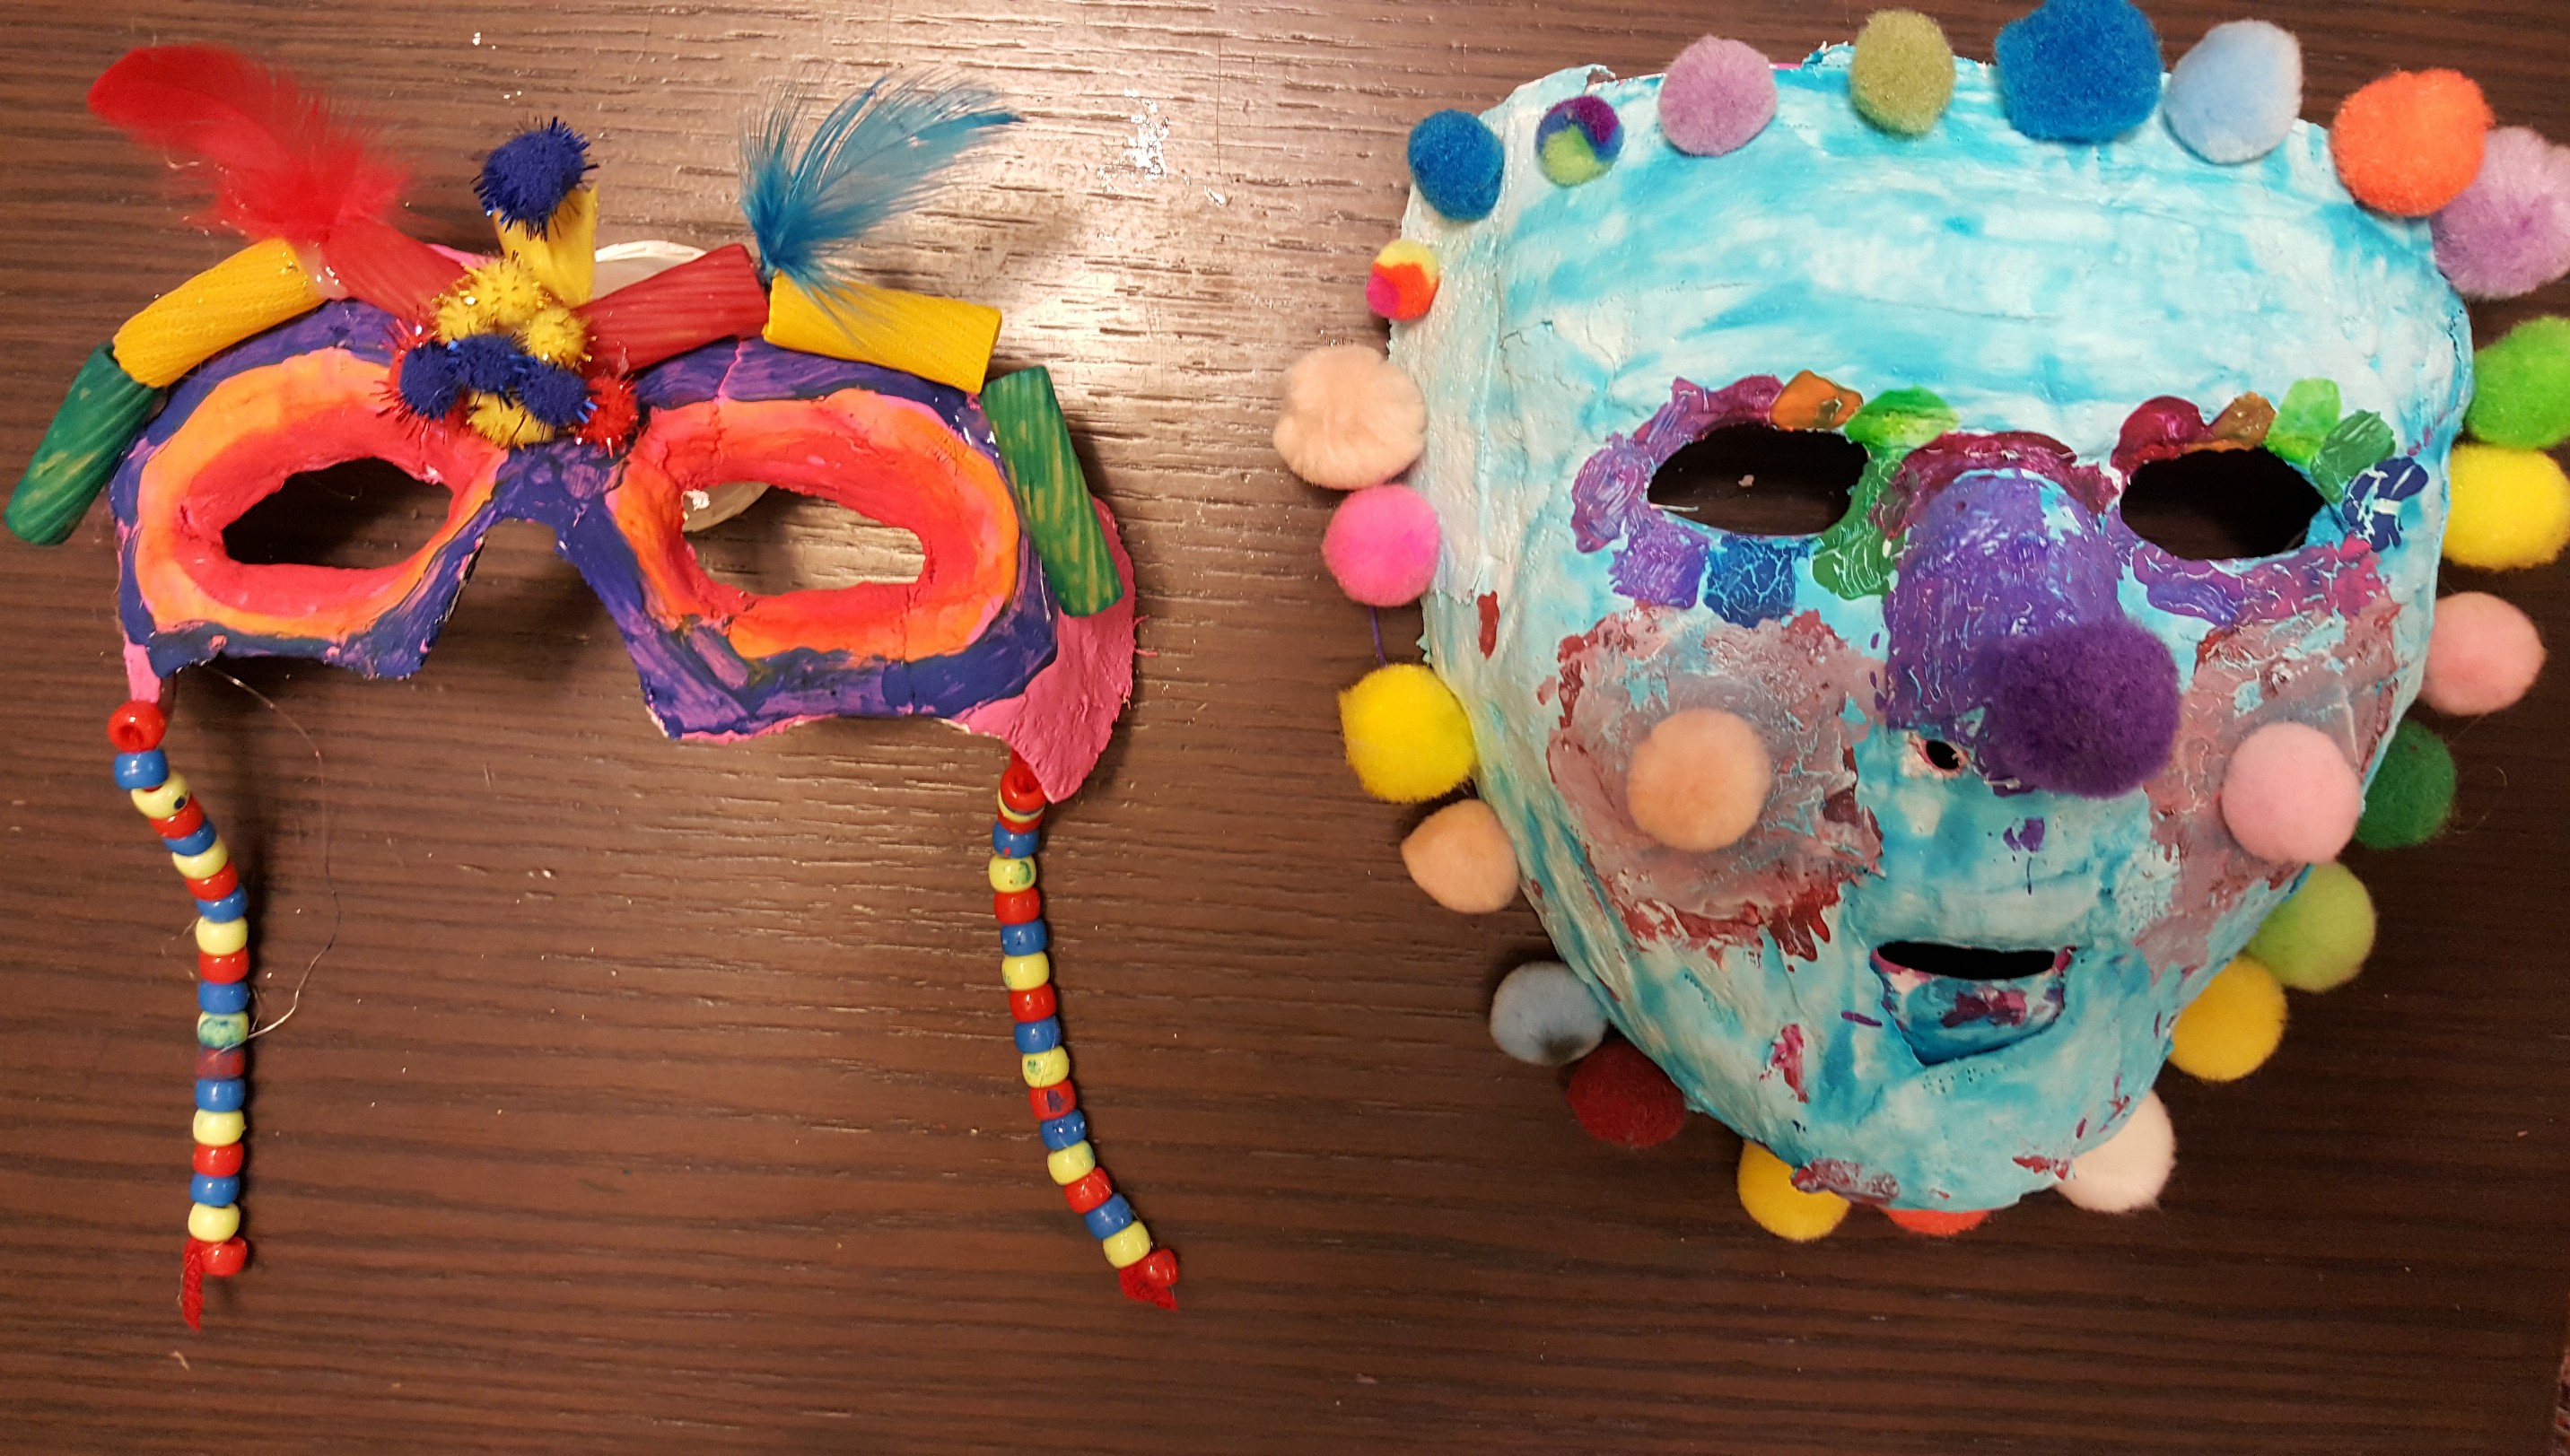
This masks are not ideal for actually wearing. They are heavy and not an exact match to the face because we use the plastic mask as a mold.
However, if you really want to at least try it as a mask, you certainly can. Make sure to leave holes for your eyes, mouth and nose.
Also, before the plaster is dry, or as it is drying, create a hole at the side of the mask. I have hole punched a hole in the side before adding the plaster cloth, and then inserting a straw through it.
You can work around the straw with the plaster cloth and then simply remove the straw once the cloth is dry. Tie a thick elastic through the holes and you have a mask!
For your convenience, this post contains affiliate links. As an Amazon Associate I earn from qualifying purchases and I may earn a small commission at no cost to you.
More Hands-On Teaching Ideas
Do you have some of the plaster cloth left over? If you are looking for another activity to do with the cloth, try out a DIY plaster volcano! Click the link below.
Below are some of my favourite, and my top blog posts of activities for kids at home, or school. From building challenges and art activities to escape room ideas and printables, I’ve got lots to keep your kids busy.

Leave a Reply